Blog
How to Get a Tabletop Jukebox Working Again
Project: Tabletop Jukebox V2
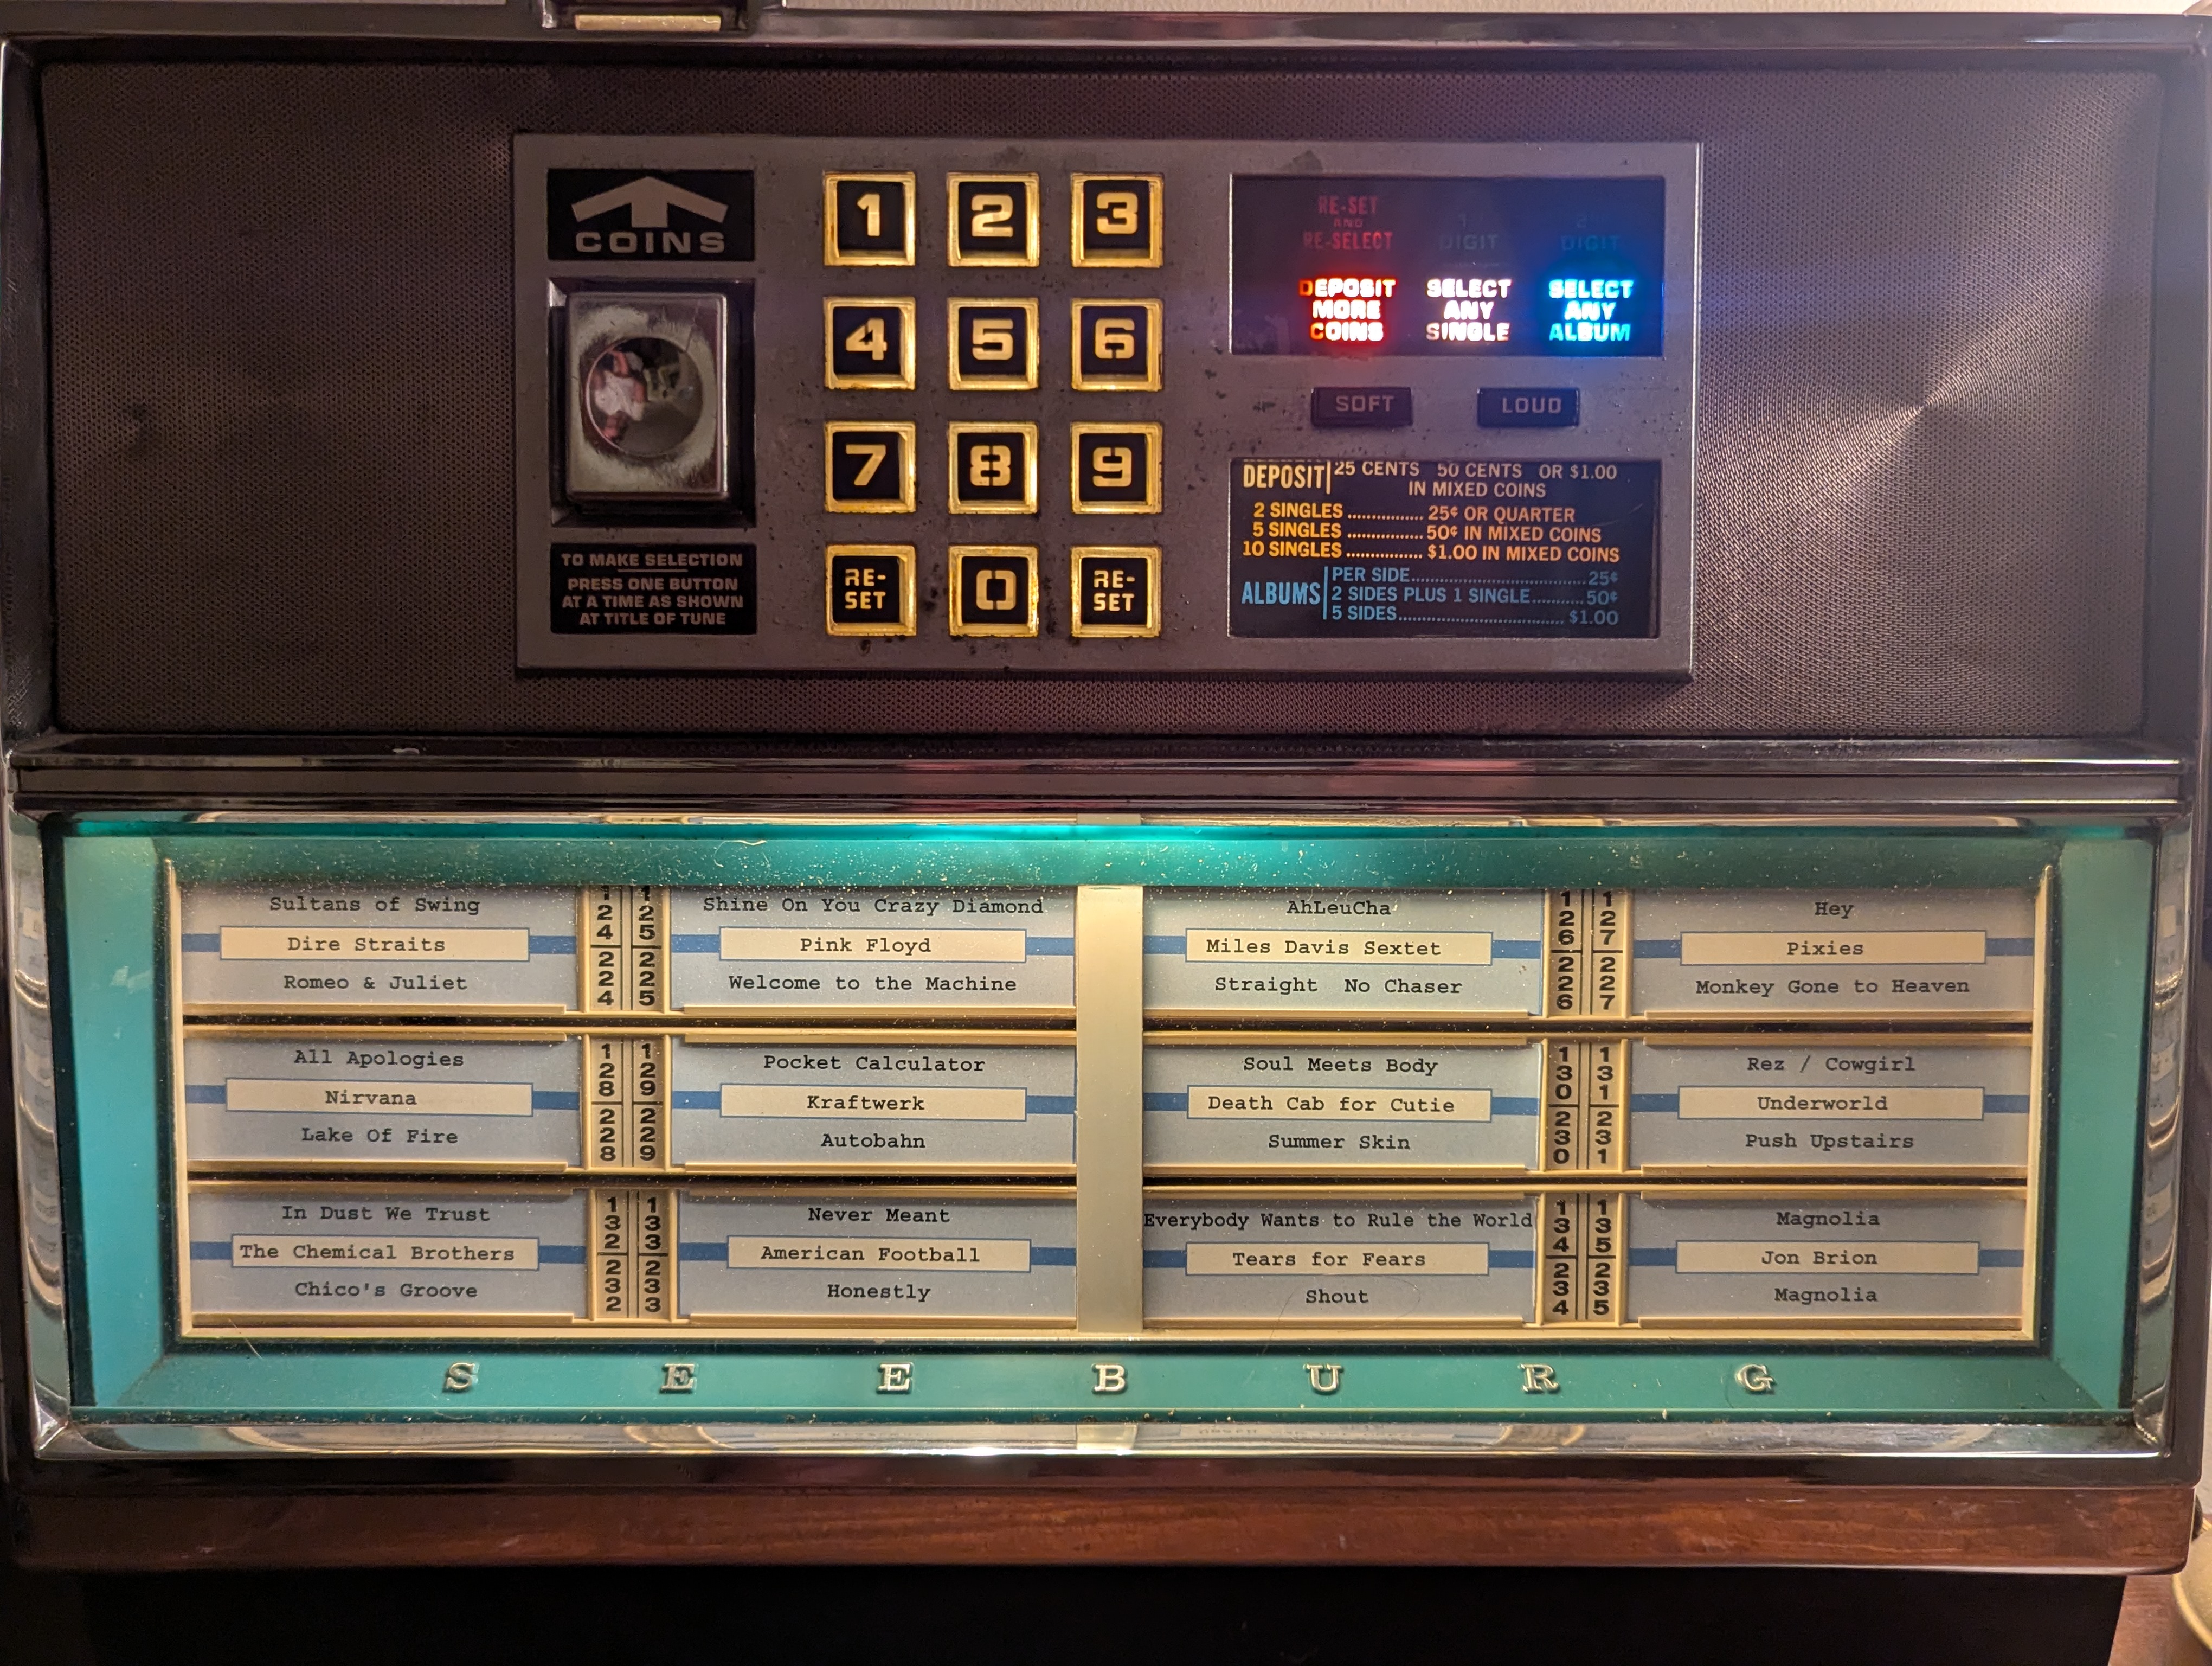
I picked up an old tabletop jukebox a while ago and was able to make it play music again. Unfortunately, the wiring and software were fragile in in version 1 and I eventually canceled my Spotify subscription, which it relied on. I kept the jukebox around, though, knowing that I would get it fixed again one day. This time, for version 2, I had a decided to use my local Navidrome audio server instead of Spotify. With some help from Claude and Ollama I was able to dramatically improve the code and the hardware. Now, I can say that its fun to have around and I’ve enjoyed the process a lot more.
List of supplies
- Molex connector
- Raspberry Pi 4 Model B Rev 1.5
- GPIO screw connector hat for Pi.
- Raspberry Pi case from S2Pi
- Adafruits Max9744 20W audio amp.
- G4 plug with 10W - equivalent
- 10mm 12v Pre-wired Ultra bright lights
- Three 3 pin NPN transistor
3d print files
Artist Statement / Rant
Our world is cluttered with the remnants of technological progress and consumerism. Everything gets upgraded and left behind. As a result, things are not getting repaired or fixed. Its a continuum of new hotness vs old and busted. It doesn’t help that new stuff isn’t made to be fixed, or is that the actual cause? Technology is always being updated and improved upon. The effort and cost of repairing old things doesn’t compute against the “time is money” mantra of capitalism. Its common knowledge to get rid of an old car once the repairs start to outweigh the monthly payments on a new car.
Ironically, as we lose our ability (desire?) to repair equipment, the knowledge needed is more abundant than ever. Learning new skills from the YouTube and the ability to decipher previously obfuscated technologies with AI, remain at an all time high. And yet we continue to devise new things, use more new materials and leave the old-and-busted behind. It’s even built into our understanding of economics, where consumers need to spend money to buy new, so the economy can keep growing, which it must.
What we leave behind, however, isn’t just the shell of the technology, we also leave behind the experience of using that equipment or device. We lose the understanding of how using the device shaped our thoughts and actions. We lose how that experience shaped an entire generations’ sensibilities. For example, the experience of having to search through songs that were available hoping to find one that you loved, clicking buttons that will magically play a song after a remote record player loads the exact disk under its needle; being subjected to listen to music choices that other patrons chose as well as subjecting others to your own preferences; or not always hearing the song that you thought you paid for; and remembering a song by it’s 3 digit corresponding number.
By restoring pieces like this tabletop jukebox, I hope to inspire others by showing that repairs and re-purposing old objects are something that many of us are capable of. By bringing these pieces back to life, I hope to help us rethink “reuse” in a way that doesn’t have to benefit consumerism, or turn a profit to become the “next big thing”. Finally, by using and interacting with these reanimated-antiquated objects, I hope to enable people to experience, (or re-experience) what it was like to have these machines and objects be a part of their everyday lives.
In Version 2 of this project, I am also disconnecting my Spotify account and instead suggesting the use of Navidrome, an open source media server that can be run in your home. I’m also choosing to use a media server instead of placing files on an SD card. I liked the ability to modify the playlist that I can listen to with other devices without having to change anything on the Pi. Having a media server in the first place is something I highly recommend having in general, especially if you’re trying to “cut the subscription stream”.
Tabletop Jukebox Architecture
A Raspberry Pi daemon that reads three-digit codes from a physical jukebox keypad (GPIO) and plays the corresponding song from a playlist on a Navidrome server through the Pi’s audio output.
┌──────────────┐         ┌───────────────────┐         ┌───────────────┐
│  Jukebox     │  GPIO   │  jukebox_daemon   │  HTTP   │   Navidrome   │
│  Keypad      │────────▶│                   │────────▶│   Server      │
│              │         │                   │         │               │
│  [1][2][3]   │         │  3-digit code     │  stream │  navidrome.local│
│  [4][5][6]   │         │  → lookup song    │◀────────│  :4533        │
│  [7][8][9]   │         │  → play via mpv   │         │               │
│  [R][0][R]   │         │                   │──▶ 🔊   │               │
└──────────────┘         └───────────────────┘         └───────────────┘
Approach
To build this out, I removed some of the hardware from the tabletop jukebox to make room for other electronics. I took out the coin mech and “communication board” that talked to the main jukebox. In hindsight, I could’ve kept the coin mech inside, connecting it’s sensors to the Raspberry Pi’s GPIOs, but I was being fearless when I first removed the wiring and ready to jump in. I eventually removed the internal lighting as well, since everything was expecting 24v and the wires were stinky (and sticky). This left me with the keypad, speakers, label “rolodex”, volume buttons and display gels as original, which were the main things that people would interact with.
I chose to use a 12v power supply, whose voltage I split between the audio amplifier, the lighting and a voltage regulator (buck converter). The voltage regulator was set to output 5.1v which I then used to power the raspberry pi through it’s USB-C plug. The only tricky thing I did there was using the audio amplifier as the ‘plug’ for the DC connector, since it already had a a barrel jack soldered onto it. I plugged the 12v into that first, ran the 12v lights from the alternate power source screw terminals, and ran another line to the buck converter.
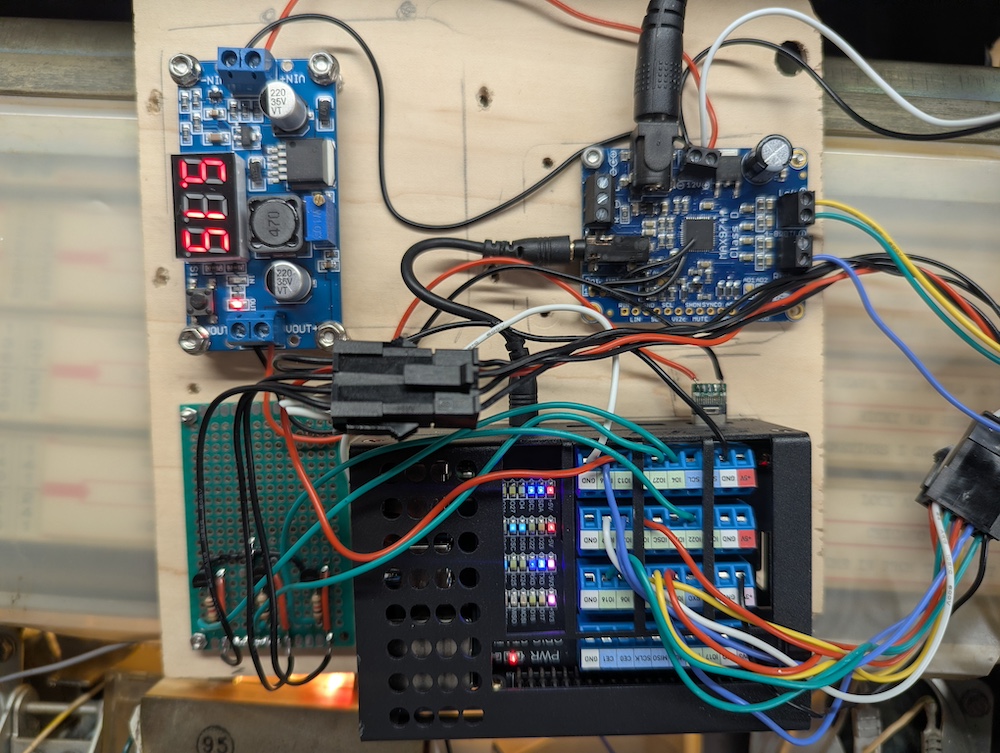
To run the brains, I chose a Raspberry Pi 4 Model B Rev 1.5. It has built in wifi, so there’s one less cable to worry about. I also added a breakout board with screw connectors to help stability of the connections ([https://amzn.to/4vcymCy](You can get a similar one on Amazon.)), and used Molex connectors to help with the constant assembly/disassembly that invariably happens in this process.
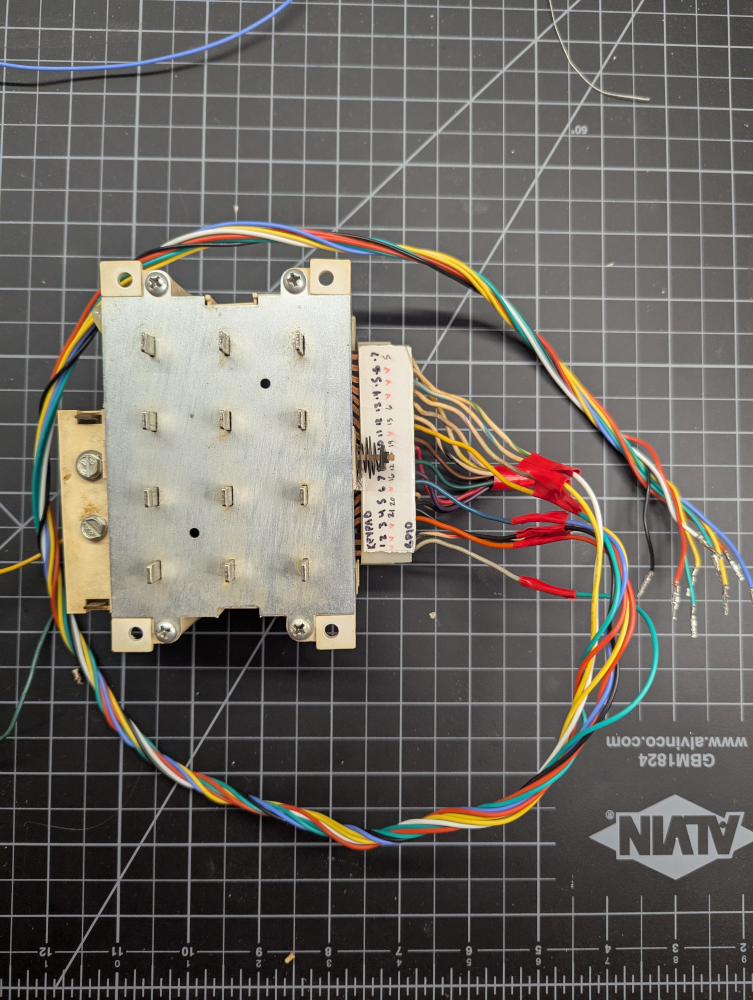
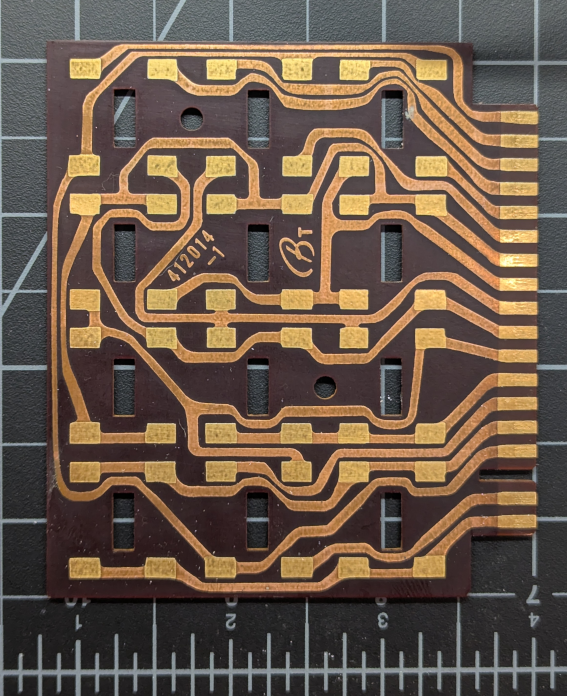
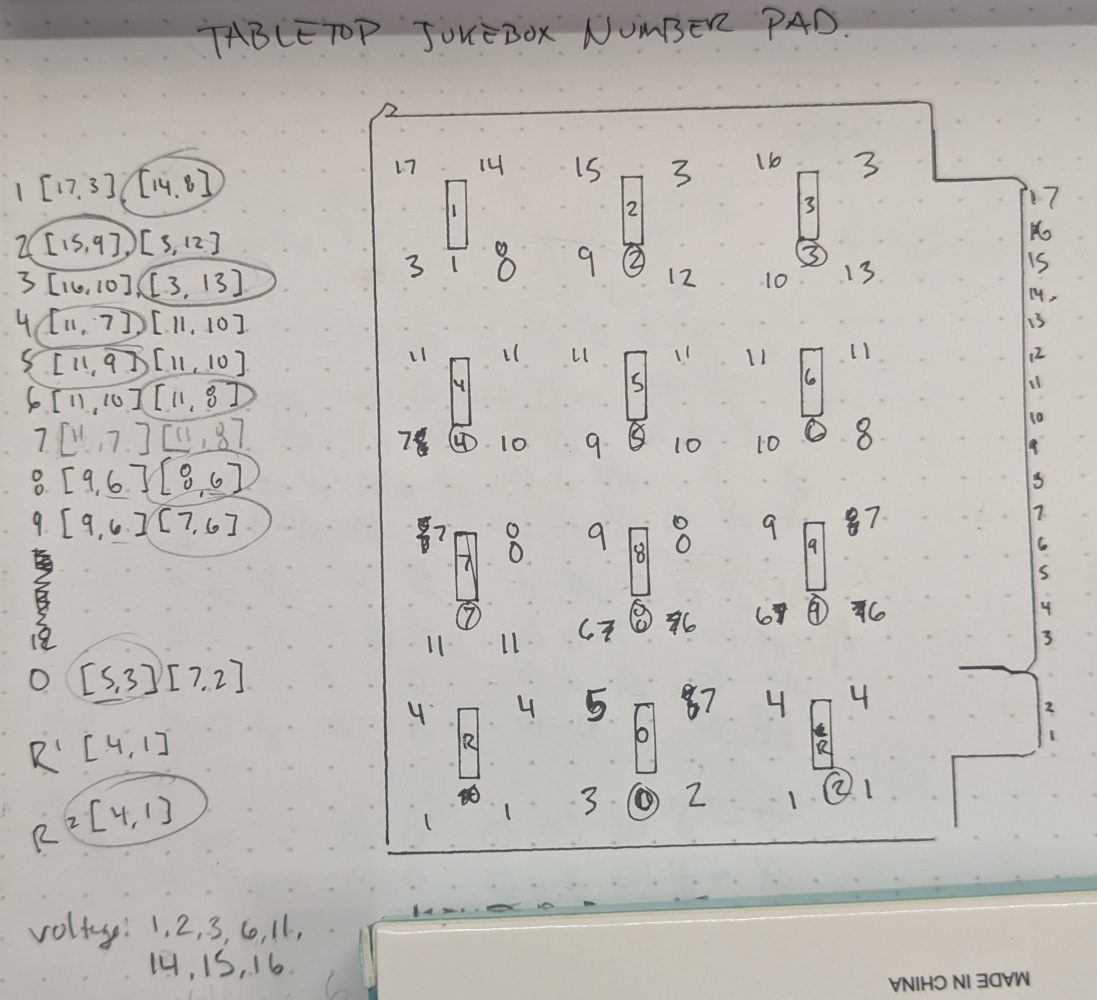
To use the keypad, I had to determine what were the critical circuits for identifying which keypad was pressed. Once identified, I combined roughly half of the endpoints that could be combined as a ground, and the other half went directly to a GPIO … in most cases. Interestingly, each press of a keypad completed TWO circuits, not just one. So, each number is actually a combination of two circuits (with two exceptions, “reset” & number 5). This allowed for using 9 GPIOs to determine which of the 11 unique keys were pressed. Ignoring my incorrect labels in pencil in the diagram, I combined output pads 1,2,3,6,11,14,15 & 16 into a single connection to Ground. This left me with output pads 4,5,7,8,9,10,12,13, & 17 as individual GPIOs.
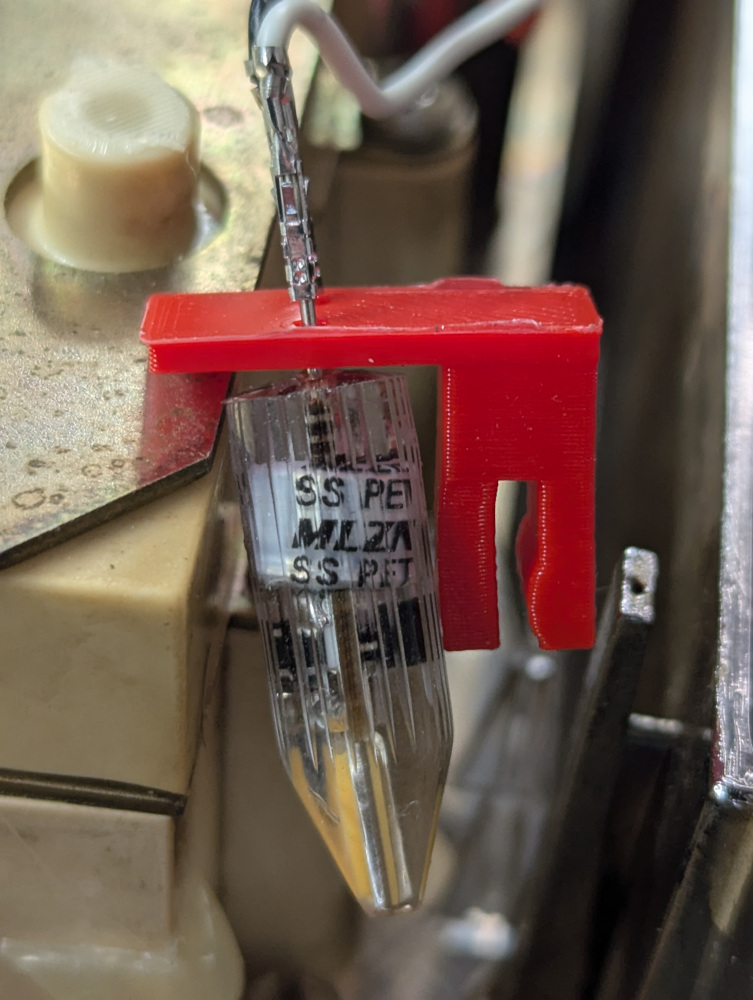
For the lights, I have a combination of LEDs. First, I used two standard 12v 10W lights that had a G4 base for lighting the keypad and display. The G4 base actually connected perfectly to the “square” molex crimped connector (without the plastic), and I devised a simple 3D printed clip that could hold the bulb and position it to shine into the sides of the plastic for spreading the light around.
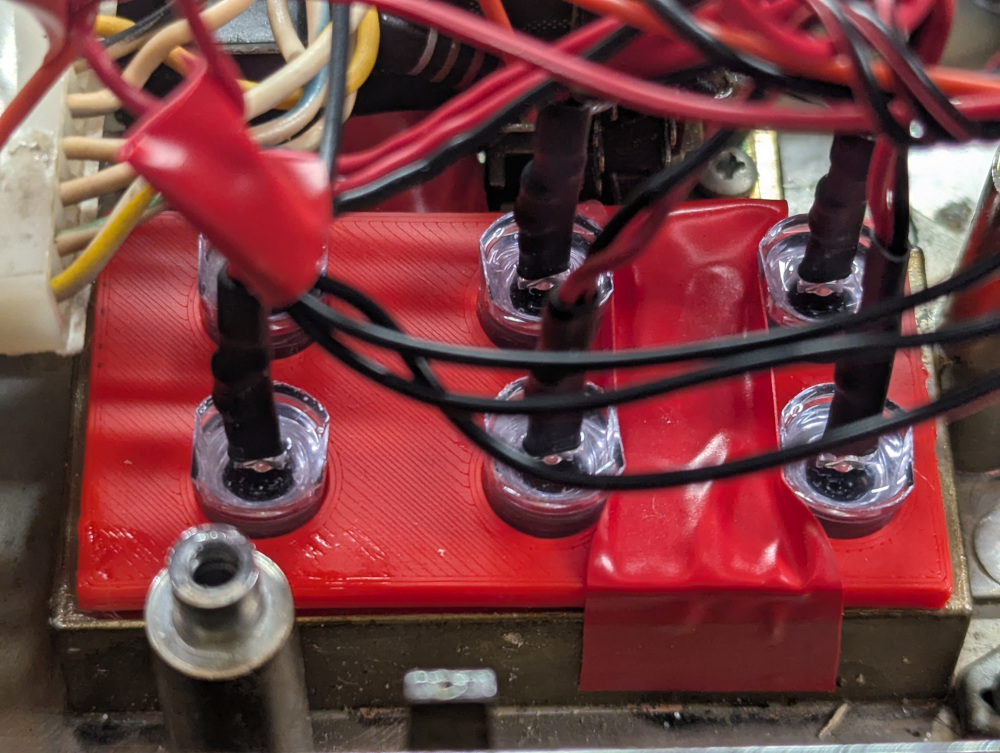
For the other lights, I used smaller pre-wired LEDs. I printed a small template to hold them snugly in place, and inserted each into their corresponding 6 holes that light up words on the front display. For three lights, however, I wanted to have them turn on and off based on “1st digit” selected, “2nd digit” selected, and when you pressed the “reset”. These would require a small custom circuit that included a transistor that was connected to the GPIO and the LED, so that I could still get the 12v power from the main source, but let the Raspberry Pi control the “on/off” switch that was the transistor.
Software:
The software went through a few iterations. I first set up navidrome-player.html just to verify that I could get connections to Navidrome. This worked nicely, and I had a simple player html as an artifact.
The main key functionality to recreate was 1) enter three digits that match up to the song on the jukebox label to play a song and 2)add any consecutive entries to a queue. In a real jukebox, you pay your money and then you enter a list of songs that you wish to play. It plays the first immediately (or as soon as it can load the record) and then any consecutive entries are put into a queue to play next. When entering a digit, the “1st Digit” display lights up to let you know that it has received the entry and then the “2nd Digit” label lights up when you enter a second. When the third digit is entered, both lights will turn off. If on your way to enter the first and second digits, you change your mind, or didn’t enter correctly, you can press one of the reset buttons, and your entry will be removed.
The main improvement to the code, other than letting Claude do the heavy lifting, was to have a ‘setup phase’ where all of the GPIOs are configured in the app based on an interactive discovery phase. By doing this, I removed the headache of keeping track of which keypad circuit output corresponded to which GPIO. This way, I just plug it into any valid GPIO, run the config, press the corresponding key, and it figures out which one changed. The program then writes the final GPIOs to a mapping.json, saving me the headache and eye strain keeping track of each input.
Since only 160 songs are able to be listed on the labels in the front of the jukebox, I’m also able to 1) add as many songs as I’d like up to 999 and 2) reserve some of those numbers for “special functions”. Since the 999 would be the last to fill up, I just worked backwards from there and assigned a few special functions. Entering 999 on the keypad will stop all songs playing immediately and 998 will continue the play on the playlist based on the last song in the queue.
There are also two buttons on the device which handle the volume: a “soft” and “loud” toggle. This was treated like another button, but only one button’s state had to be detected. If “loud” was on, I set the volume to 80% and if “soft” was selected this mean that “loud” was off, and I set the volume to 30%. These are also configurable.
Roles
- Keypad will interface with raspberry pi to take input.
- Python code will interpret the pin inputs to read the keypad.
- Python code will select the song to play and play through network media server (Navidrome) on Raspberry pi.
- Raspberry pi audio output to the audio amplifier component (20W)
- Audio amplifier will provide sound for the speakers.
- 12v Power supply provides power to audio amplifier, lights and voltage regulator to give 5.1v to Pi.
- Jukebox will be lit by LEDs controlled by the raspberry pi.
- Breakout board with basic transistors provides ability for Rapsberry Pi GPIOs to turn on/off 12v lights without relying on Pi for power.
- Voltage regulator, enables a regulated DC voltage (5.1v) to the sensitive electronics of the Pi.
Conclusion
In hindsight, version 1 of this was a prototype. I honestly didn’t know if ANY of it was going to work before I started. When I started version 2, I literally re-gutted everything that I had installed the first time, and started the wiring process all over again. Version 1 didn’t solve any of the power supply problems, as I had separate plugs for the Pi and the audio amplifier. Version 2 had one plug. Version 1 had LED fairy lights for the display and the second version had very bright lights that lit the project up perfectly. This process taught me that revisiting can be fun and that initial versions of something don’t have to be great. Also, as a side effect, I basically now have an always on raspberry pi with speakers sitting quietly in my house waiting for new projects. For instance, I could combine person-detection and potentially have songs played when people arrive at my house. I can have it be the “speakers” for any type of notification that is important enough to broadcast. I can (probably) turn this into a bluetooth speaker as well. So many options. Hope you enjoy and find this useful.
Recycling, reusing, and repairing is a means to learn things, improve things and possibly even spark creativity for new uses.