Blog
How to Make Tabletop Jukebox Work Again with Spotify
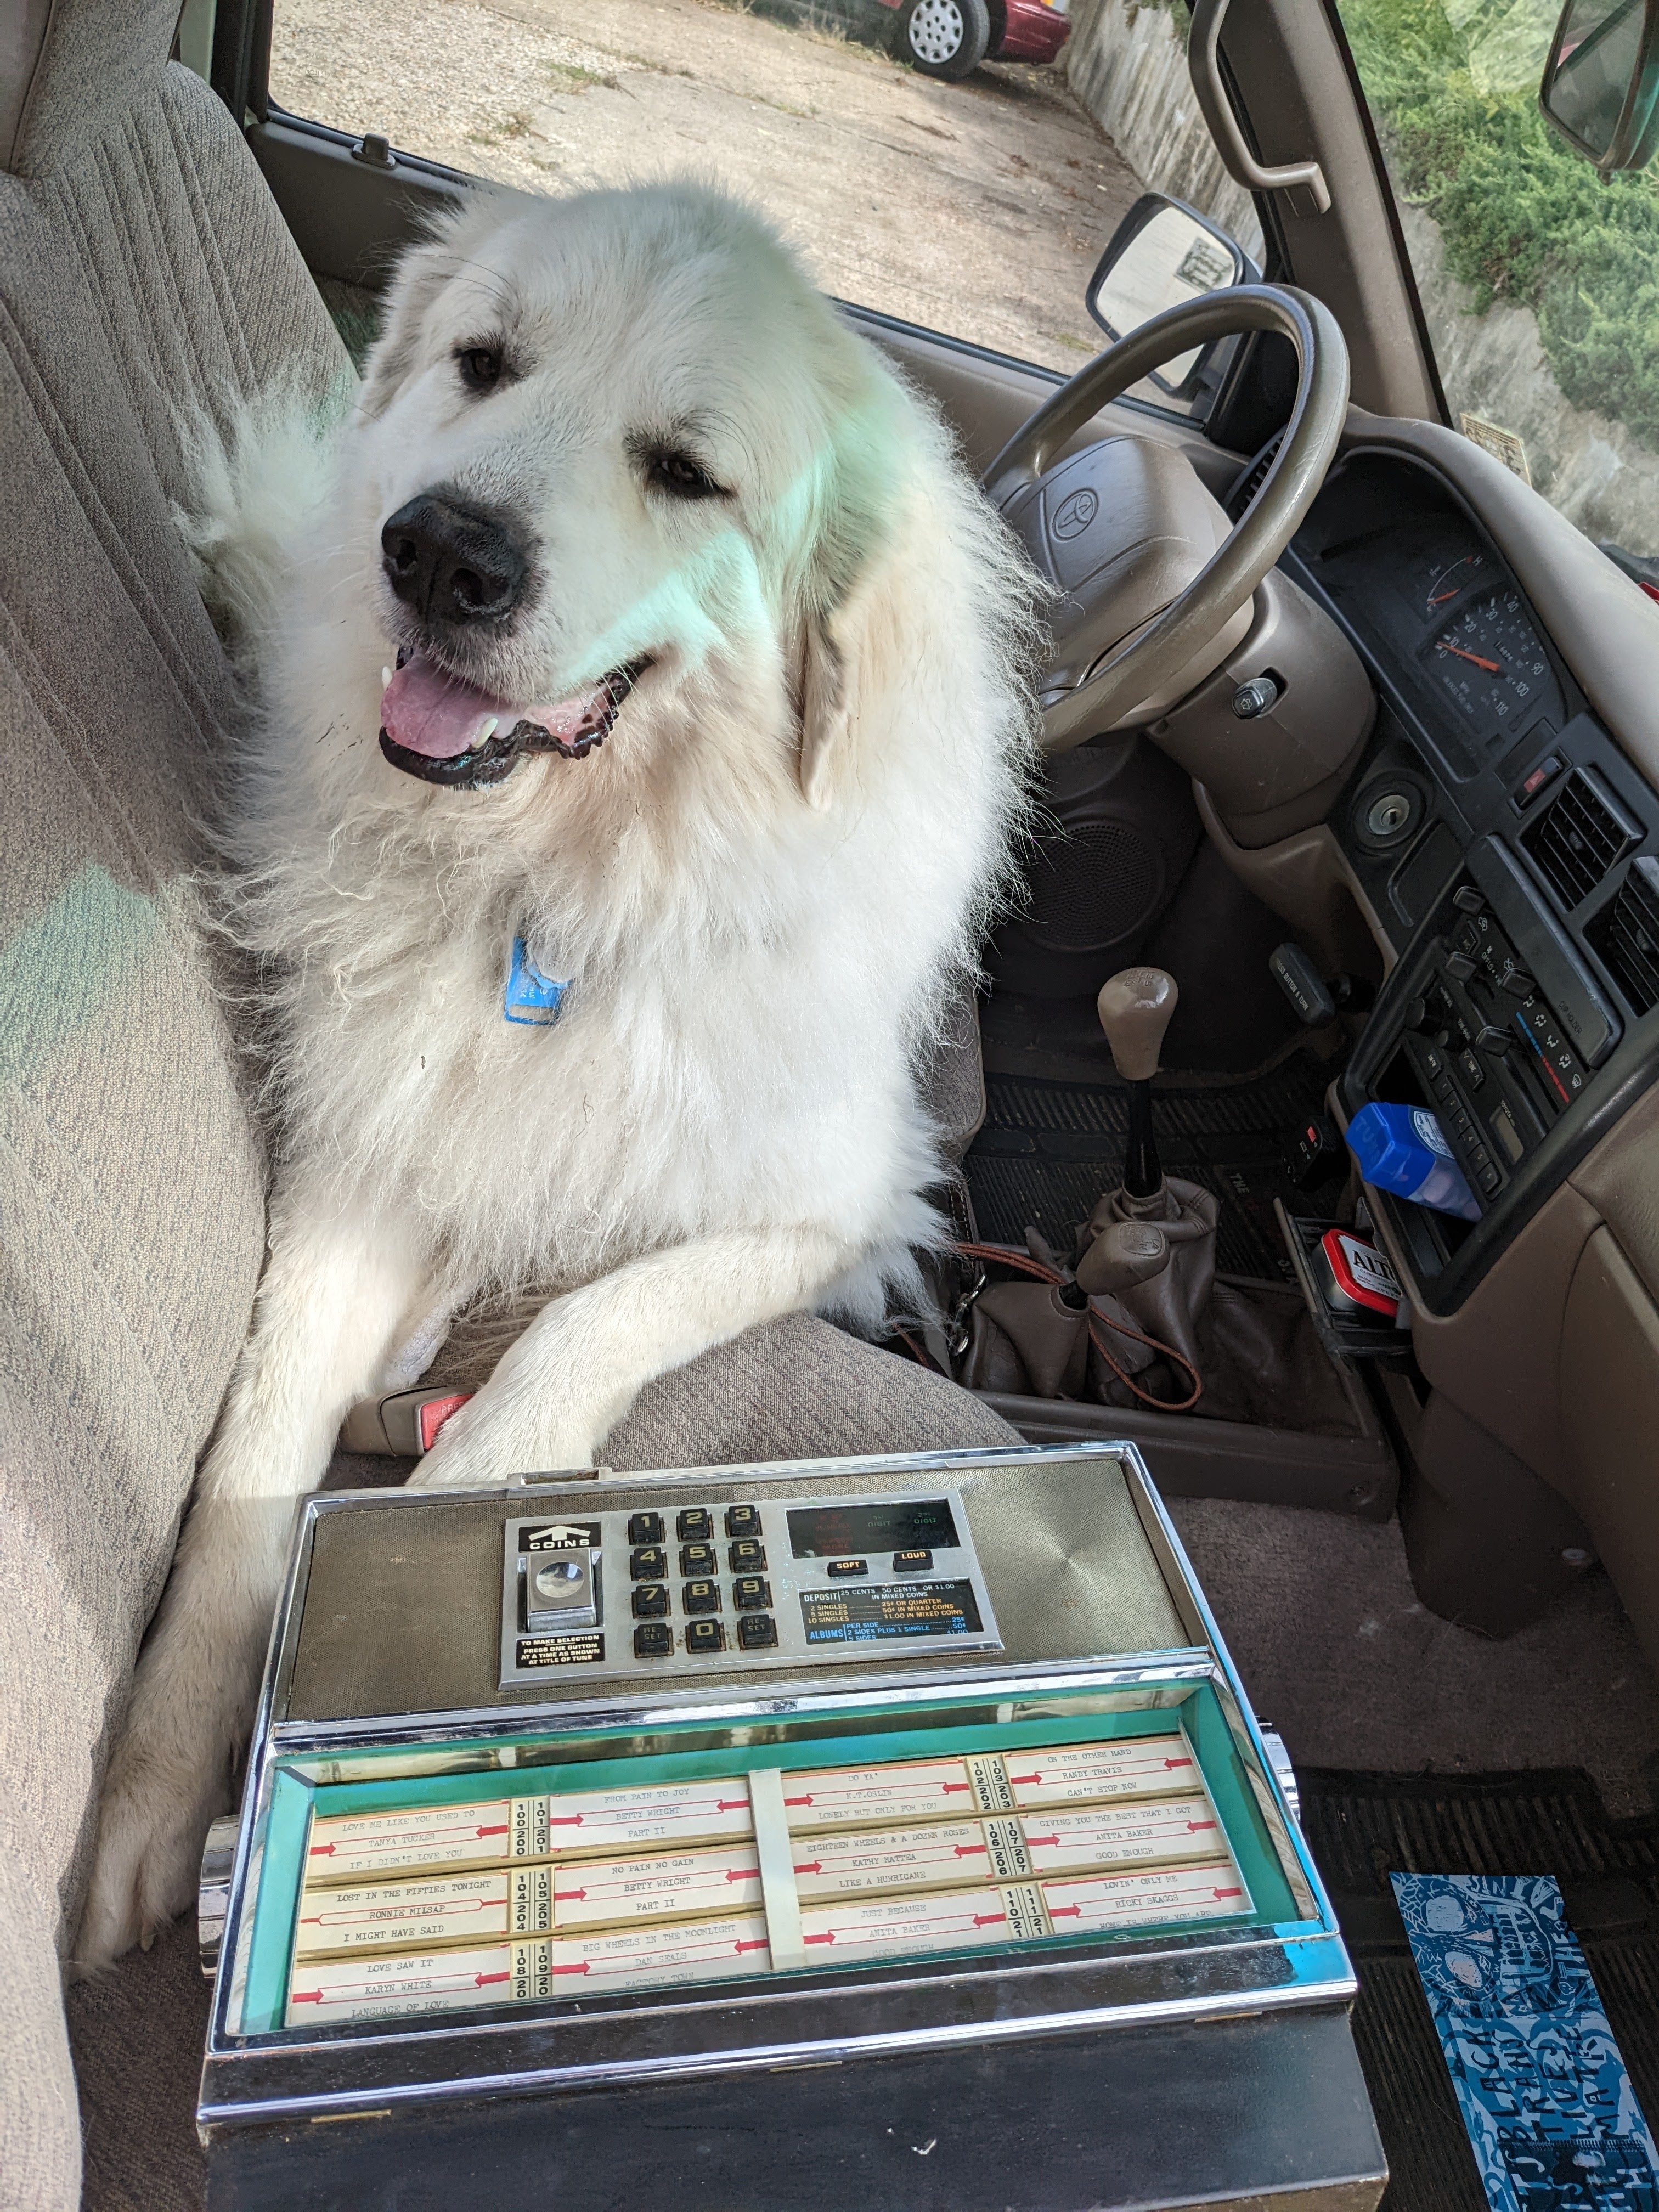 One morning, I got a message from a friend with a post from instagram advertising tabletop jukeboxes for sale at a local antique store. The price was $75, and they looked to be in good condition. I sent her a response saying “DAGGONIT, I have too many projects right now… but I love it!”. Within 15 minutes I was in my truck, and in the 10 minutes it took to get there, I had the idea to make it play Spotify. Why not?
I had some confidence that I could figure it out since two previous projects had involved python connecting to restful API and another to a hardware keypad. I could do similar with this. I decided to use a Raspberry Pi this time though, instead of an Arduino. They have more voltage input/output ports and can be accessed by python. Python would also help me connect to Spotify. The raspberry pi has audio output, but I’ll still probably need a special Spotify app to play anything. It seemed like a good enough plan.
I spent a month re-learning some python basics by making my way throughmost of this online python course. I downloaded and set up all of the tools they recommend (Visual Studio Code!) got the Desktop app for Github, and set up a repo. The code is in this repo: https://github.com/paulvivier/jukebox
Use Case steps
Let’s walk through the use case steps and then see how each area of the project is interacted with throughout the flow.
- User flips through list and finds a song with three digit number.
- User enters three digit code on tabletop jukebox keypad (#100-279)
- Keypad controller sends number selected to Spotify via a “Main.app”
- “Main.app” translates GPIO numbers that are triggered for each keypad.
- “Main.app” responds to user, acknowledging First Digit and Second Digit by triggering corresponding lights on jukebox.
- “Main.app” takes 3 digit input and requests Spotify to play song on specified device.
- “Main.app” authenticates through PKCE with Spotify and saves renewable sessions.
- Raspberry Pi allows itself to be a device on Spotify by Raspotify.
- Raspberry Pi headphone jack broadcasts audio to an audio amp
- Audio Amp plays the music of the song selected out of the jukebox speakers.
Step 1. User flips through list and finds a song with three digit number.
I want to start by making a playlist that matches what is already here. I first made a spreadsheet, which helped because the songs by the same artist don’t have a consecutive number so I’ll be able to re-sort the spreadsheet.
Set up a Spotify playlist with each of the songs listed, keeping the order. The first one will be song #100. If a song can’t be found, or needs to be skipped, a replacement song will need to fill it’s spot. The order of the items in the spotify playlist must match the order on the jukebox labels 100 - 279 (or 0 - 179).
Get the ID of the playlist by ‘Share->Copy Link to Playlist’. You’ll have something like this: open.spotify.com/playlist/7D7FASC0bXRMdvfjggS0ug?si=99978cc924bd4581 . The first portion in red will be your spotify playlist ID. So mine is(was) 7D7FASC0bXRMdvfjggS0ug
The app will use playlist ID to determine the context of a song played.
Step 2. User enters three digit code on tabletop jukebox keypad (#100-279)
This part was a little tricky. They keypad is just a set of buttons. Buttons are just switches, and a switch is just opening and closing a circuit. The trick is to hacking a keypad is to understand that there are always going to be wires going in (to send low voltage) and wires going away from the button that will send voltage out once the circuit is completed (button is pressed). You just have to figure out which pins (or wires out) will close a circuit when they’re pressed. It’s a basic logic puzzle. Sometimes, you can do a continuity check with various pins, pressing the button and see which buttons complete circuits for which pins. Sometimes, however, they can be fairly complex (or too tiny to see). In the case of this keypad, I decided to take it apart and just look at the circuit since I was not getting consistent or full results. Some of the pins showed as not having a signal, which couldn’t be right.
In the blow image, the circuit board on the left will complete specific circuits when a button on the right is pressed down.
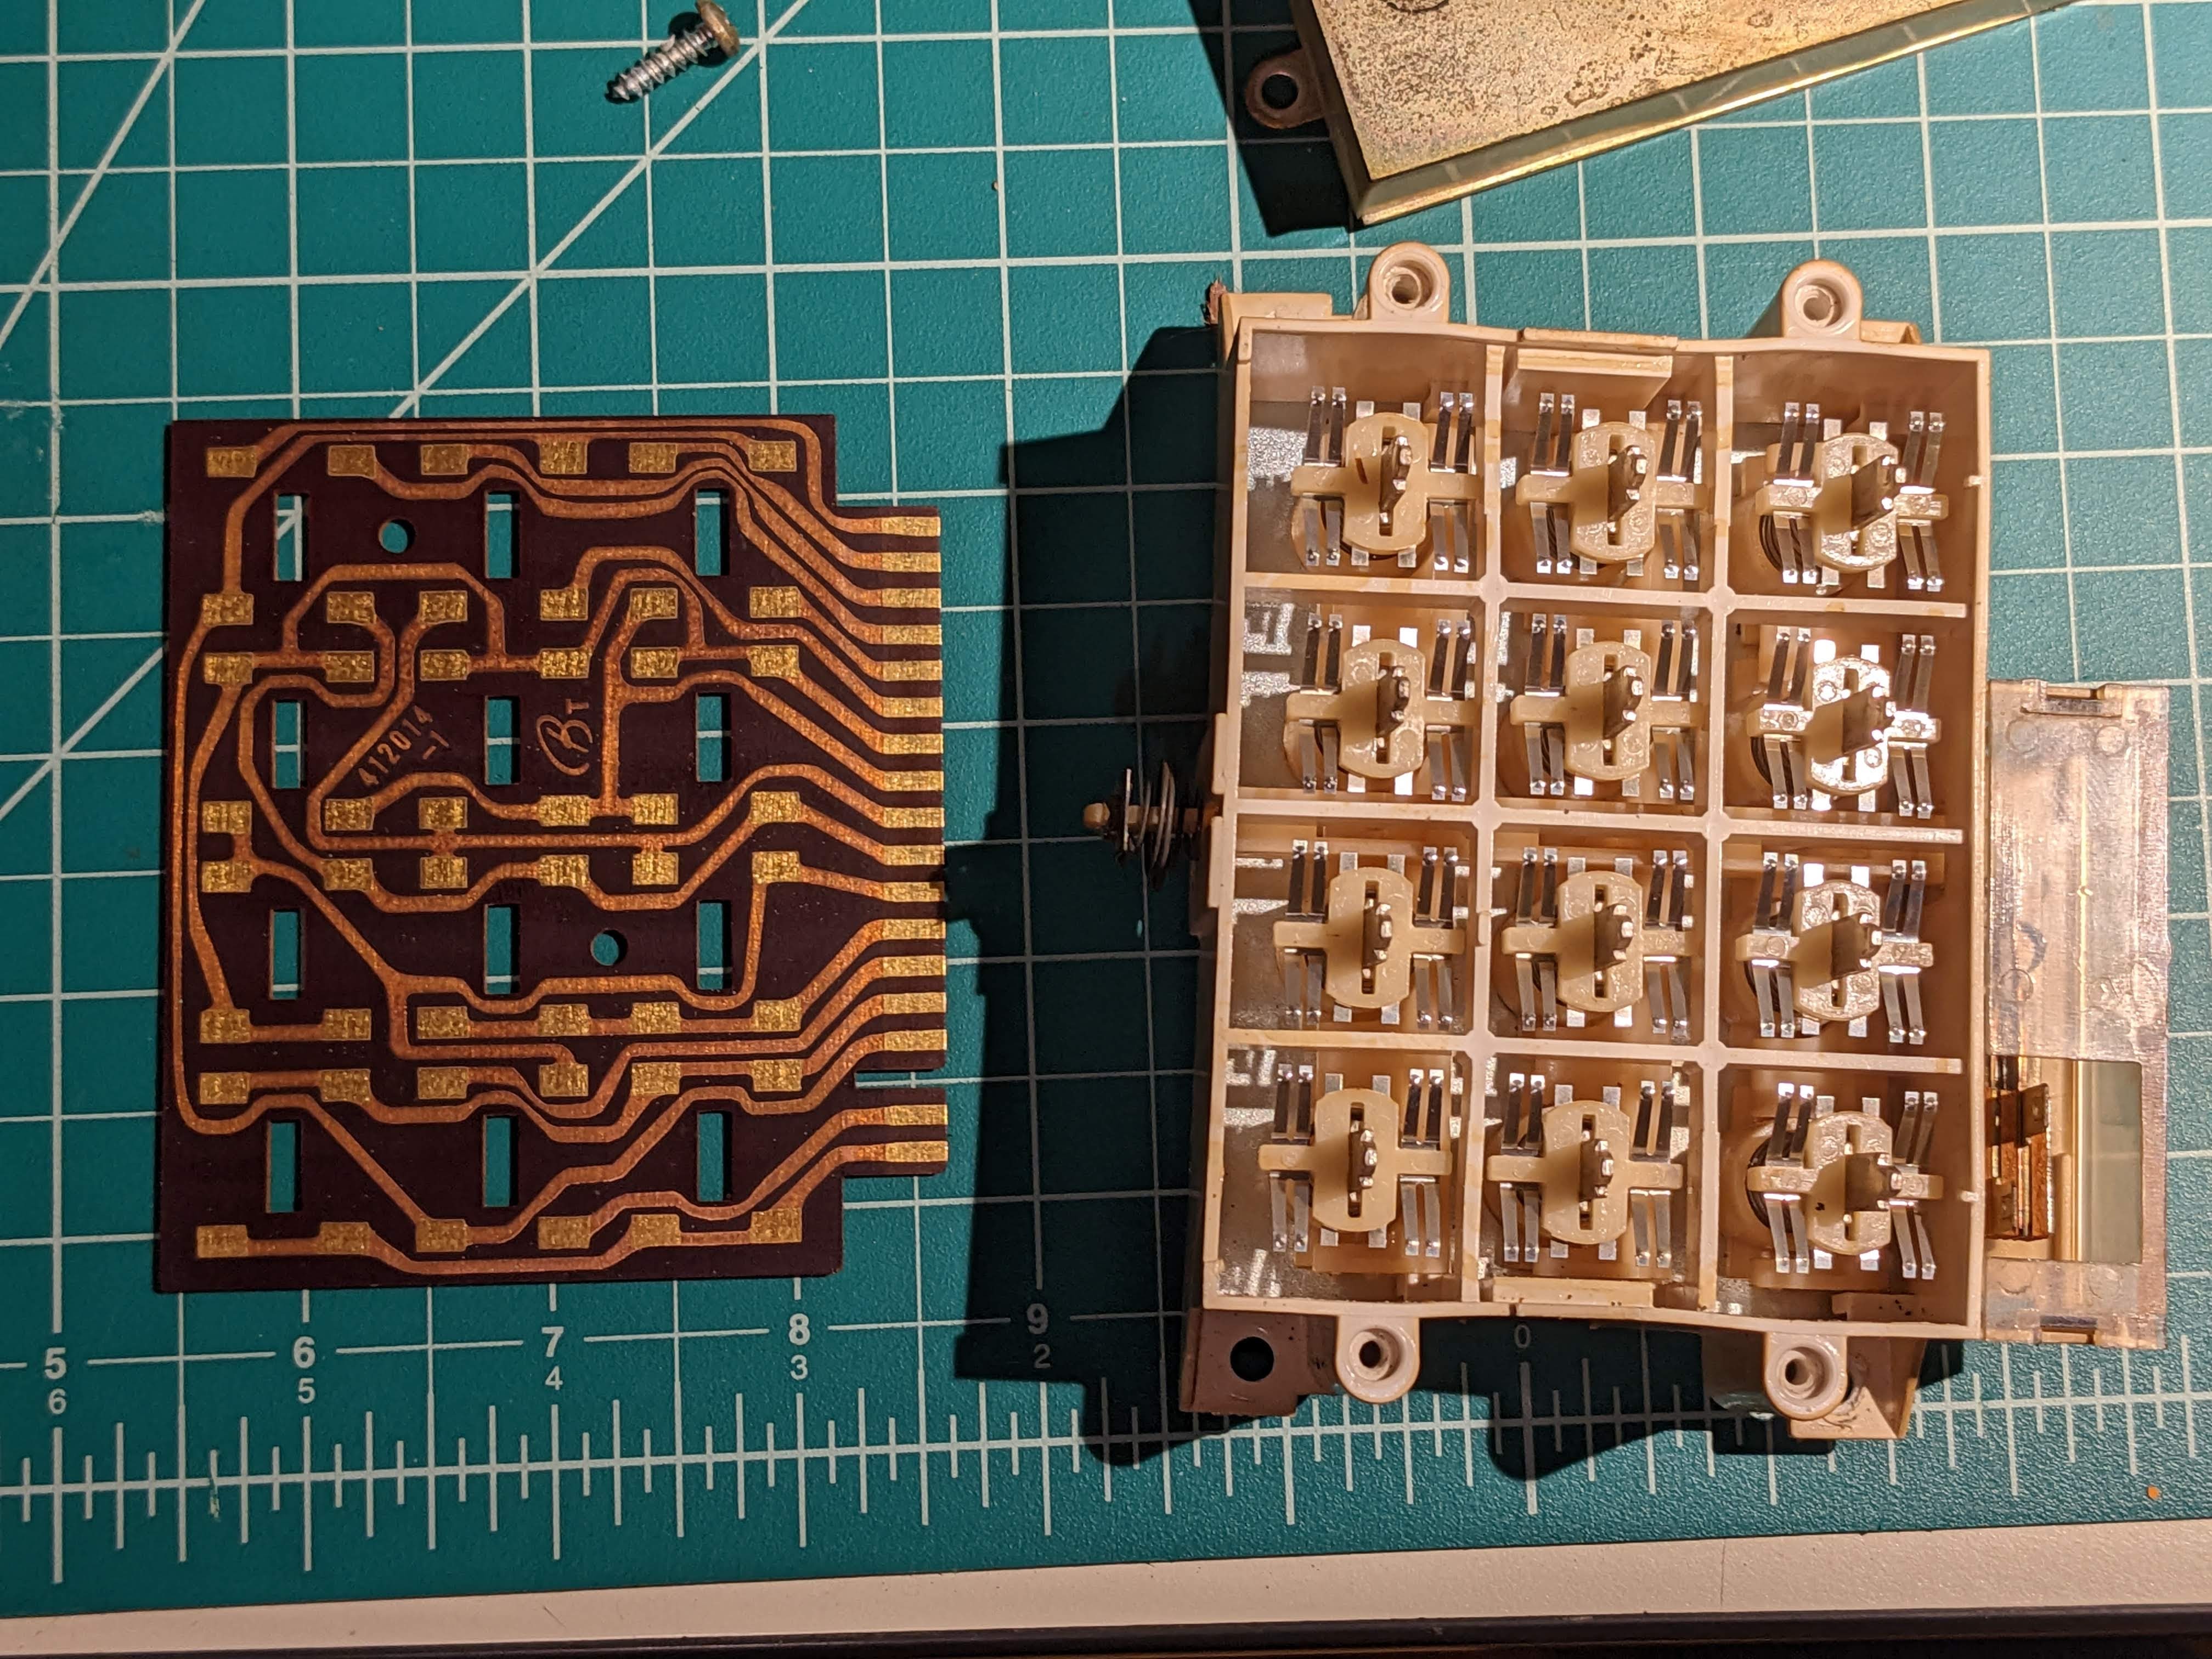
From the looks of it, when a button was pressed down it was completing TWO circuits. Neat! Also … won’t really use that (ps: I was wrong!). If I need to control multiple things with the push of a single button, I’m going to have the raspberry pi do that work. Still, pretty neat.
Looking at the circuit, I made a basic diagram that mapped out the numbers and had a space at each corner to represent the copper endpoint pad. I then visually traced each pin and put it’s number on the in one of the corners of each button.
Then (on the left of the diagram), I grouped the two sets of pins that made a connection for each number pushed. Then, looking at the common pins, determine which pins are going to send voltage to the keypad (output from the Pi), and which pins are going to send voltage to the pi, once a button is selected. A signal on the pin I select will represent that number.
Pins numbering on the keypad circuitry and which position on the keypad they map to. Summary of all numbers on the left. I had left out keypad #7, out of disbelief at first.
Step 3: Keypad controller sends number selected to Spotify main.app
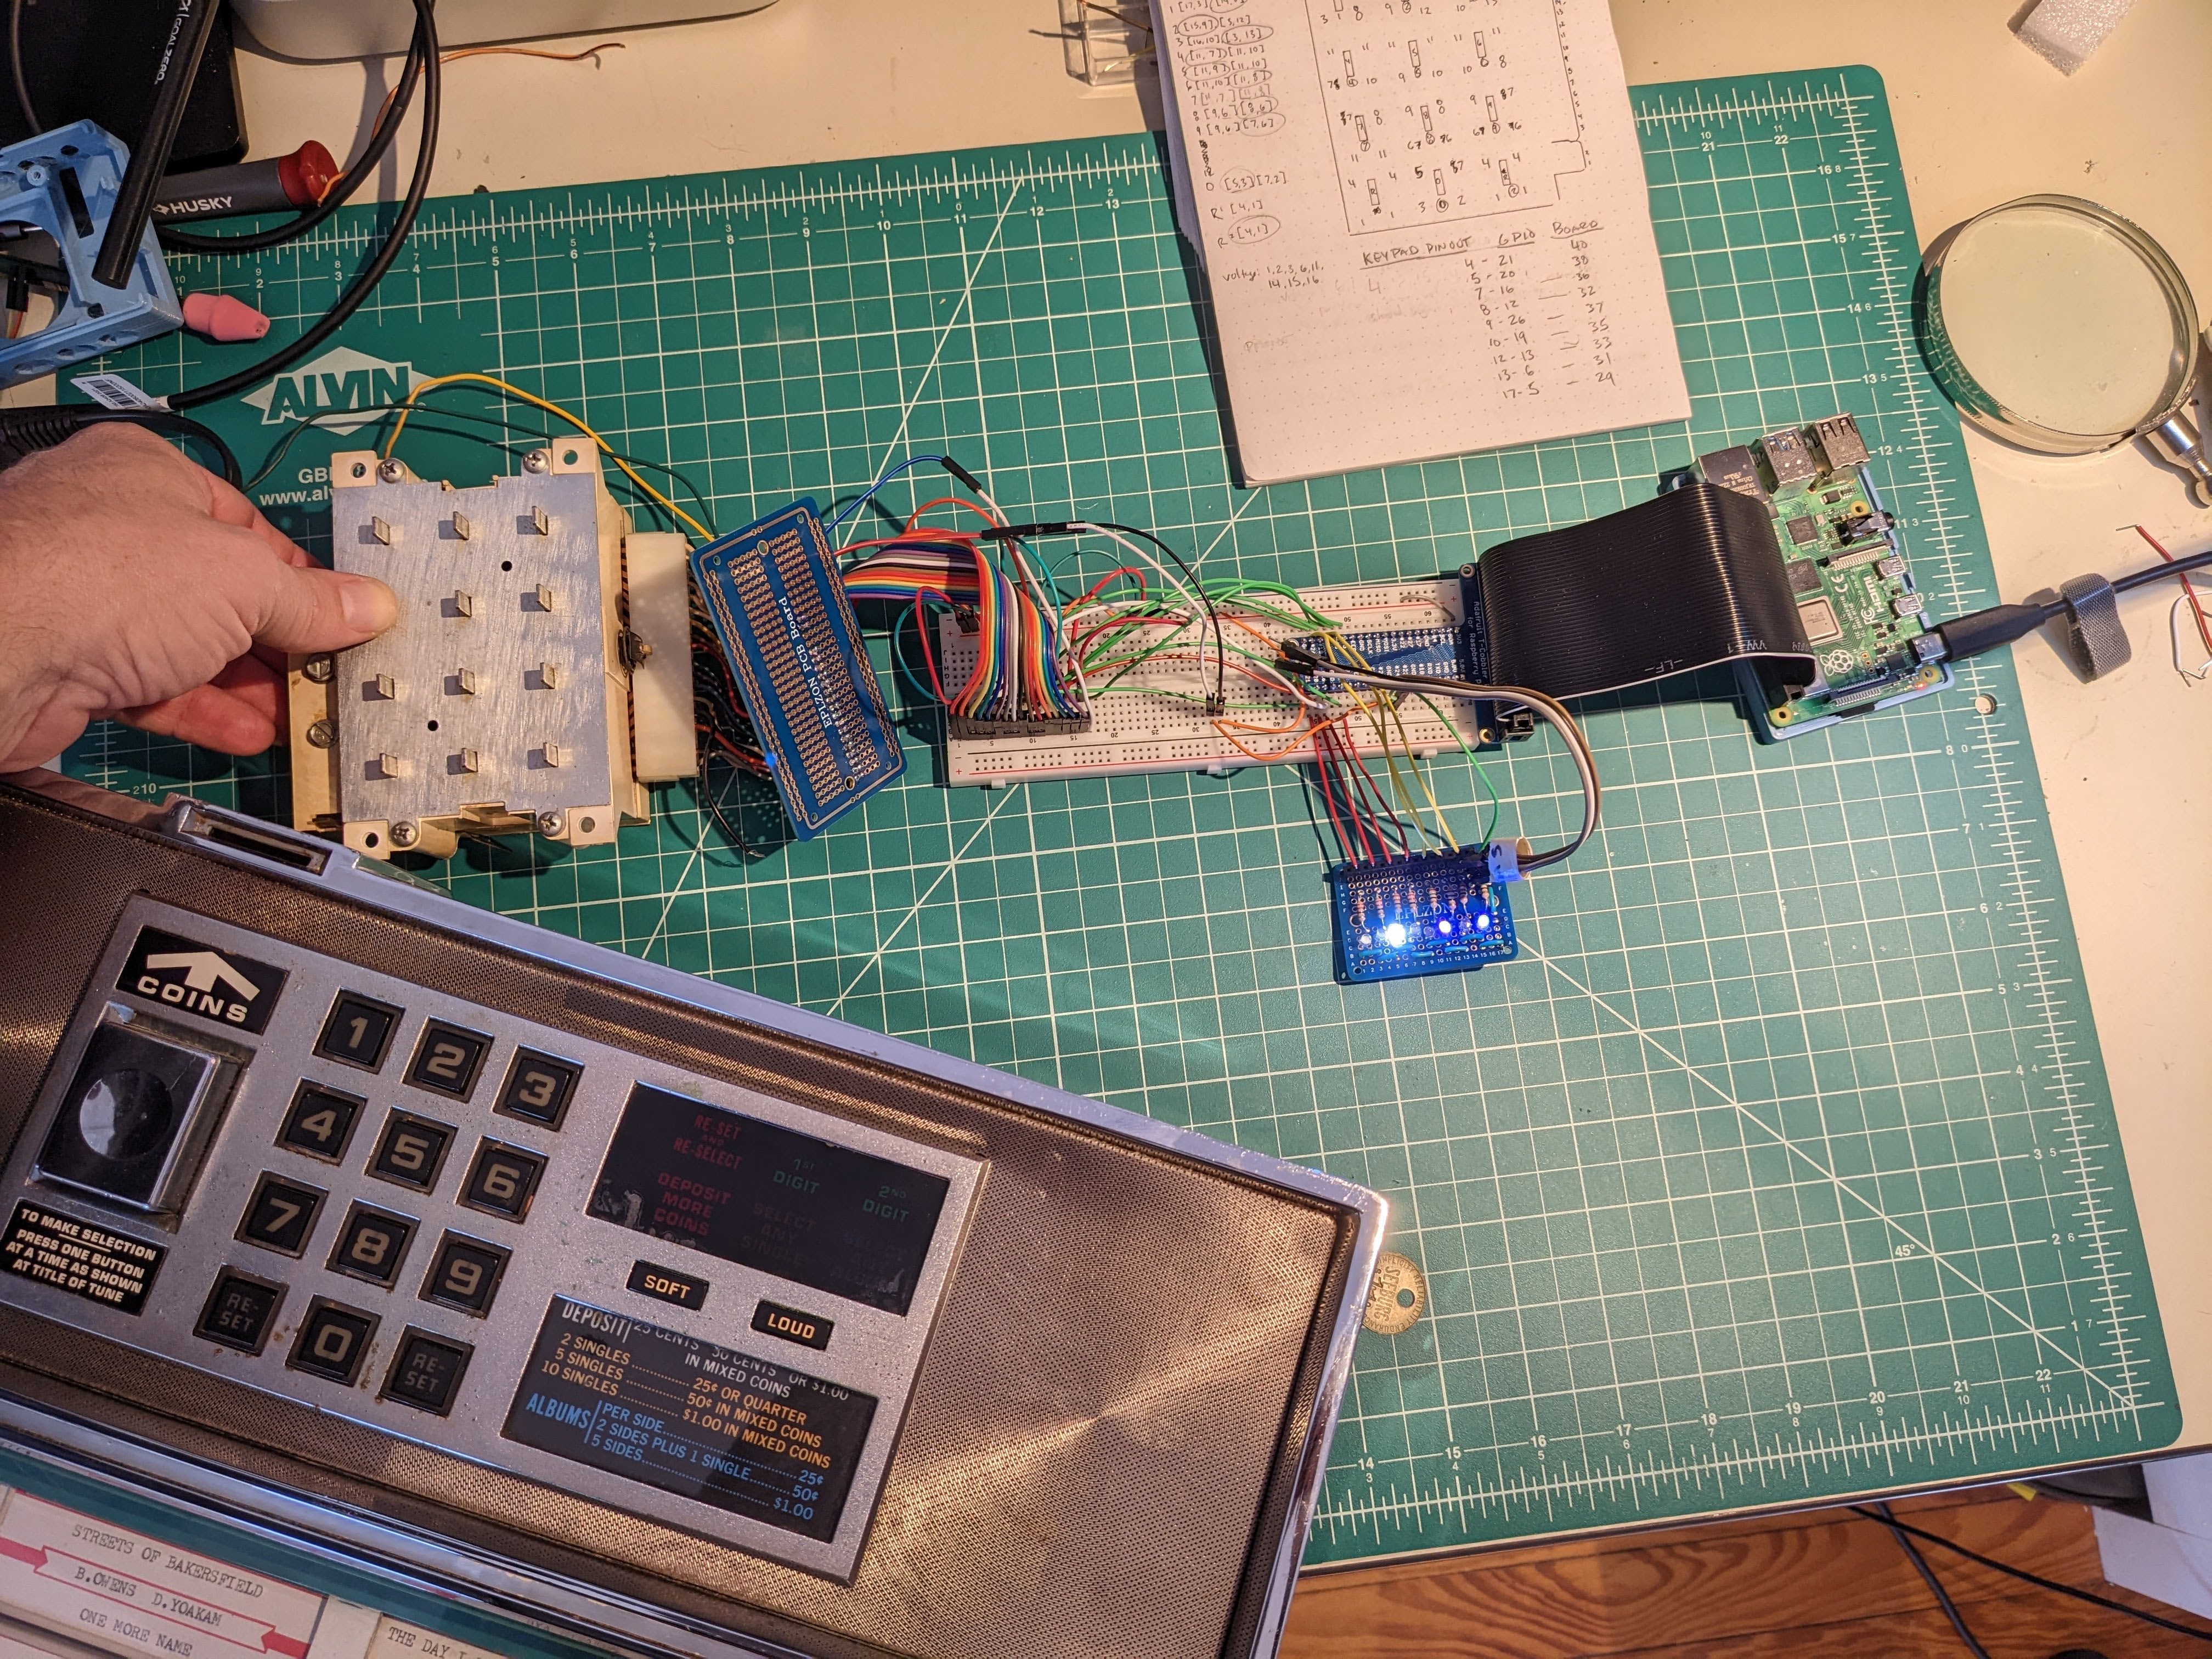
I needed to then figure out which pins on the keypad were going to get voltage (+), and which pins were going to be the pin triggered telling me that it’s been pressed. I was hoping that the two sets of numbers were used to trigger different circuits, but unfortunately, it seems like I’ll need to read both. (See, I was wrong).
From here, I made a nifty chart (see the left side of the above diagram), and then determined which pins were going to have voltage, based on which were the most shared across multiple keypads. The voltage coming in could be shared, but they would need unique identifiers coming out.
I then made a mapping of the voltage pins in the jukebox-cli testing code like so:
    voltageKeys = (
        (5, 7),  # 0
        (8, 17),  # 1
        (9, 12),  # 2
        (10, 13),  # 3
        (7, 10),  # 4
        (9, 10),  # 5
        (8, 10),  # 6
        (7, 8),  # 7
        (8, 9),  # 8
        (7, 9),  # 9
        (4, 4),  # Reset
Next is to write some logic that will iterate through all of these very quickly and see if the two pin inputs match (which will happen when a keypad is pressed), and put that number in a queue. To test out the code as I built it, I added a prompt for manual inputs. I then made it a function that accepts two pin numbers to be passed to it.
I then wrote another function which will take each keypad entry and add it to a sequence to get a 3 digit code. Once the 3 digit code is obtained … it’s time to call Spotify!!
Step 4-6. “Main App” Does a bunch of stuff.
 I think the best way to explain this next part is to just link to the code. I realized as I started coding this section in earnest that my brain could no longer write english about me writing python. It was way too meta. So when I point you to the code, almost think of it as me sending you to the original French version of something that was written.
Even though the code is still in progress and still being refined, I think I can comment on the journey. I love writing python. There is so much help out there, so many examples of code, so many people asking the same questions that you ask. You just have to take a step back and really understand what the question is, which is honestly half the work.
I also love writing code that controls something in the real world. That’s just so neat. How much fun is that, right?
At the point of writing, I have the code functioning, but still needs some help with logging into it. It doesn’t have great error handling (and errors still happen) and it doesn’t have a way to restart if something crashes (which also still happen). BUT, for now it’s super cool and I can easily run things from the command line.
Step 7. Spotify Main.app authenticates through Oath2 PKCE with Spotify
Uggh…. This stinks. But I get why Oath2 is necessary. The problem is that this authentication method works by sending you a URL in your browser. You then have to copy the URL that you got and send it back to Spotify. It’s easy enough to do when you’re looking at the browser, but to run this as an automated app … that’s a little trickier.
Authentication session also only lasts for about an hour, and it’s needed when addressing personal info, such as your device id. Again, makes sense and glad it’s there but ugggh. Have I said ugggh?
TODO: Capture URL sent from Spotipy/Spotify API to the browser. Paste it back in the text session. I know people have solved for automated Oath2 authentication, so I just need to read up on it.
Update: PKCE Fixes all of that. It’s use of a Proof Key for Code Exchange allows you to keep an authentication for longer since it is basically harder to crack. Once I switched my code to use this methode, the device was generally good about not having to re-authenticate. Still not 100% stand-alone headless so being able to remote ssh in with a laptop will be required for general maintenance.
Step 8 Raspberry Pi allows itself to be a device on Spotify by using Raspotify.
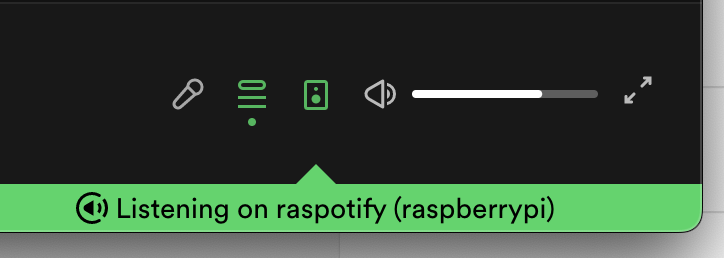 This part is going to be pretty quick because, you guessed it, Raspotify has already covered this use case completely. Very nice. I had some trouble in the beginning with the device disappearing from Spotify, but that could have also been my mixed authentication types early in development. I haven’t had any problems like that in a bit.
This is really the heart of so much of this app. I think there may be another option out there, but all roads seemed to point to Raspotify for my use case. I installed it. And … it just works.
Step 9 Raspberry Pi headphone jack broadcasts audio to an audio amp
I knew that I would need some way to amplify the audio signal that came out of the headphone jacks from the Pi. They would not be strong enough to push voltage through these high impedance speakers. They may be 24 Ohms(?). Luckily I had already made one from a kit, and 3d printed an enclosure. It’s actually too big for the space, so I’ll likely redesign and replace it with another, but it works for now.
Step 10 Audio Amp plays the music of the song selected out of the jukebox speakers.
And then we have sweet sweet music. Unless its Ray Stevens, Tanya Tucker or Hank Williams Jr. I’m sorry. I know some people like them but I just can’t. This new owner will be updating the playlist soon. I already snuck a few into the “invisible numbers”. I noticed there was a gap of 20 slots from 180 to 199, so I put my own jukebox songs in there from the same era. Here’s the playlist. Feel free to link to it as I change things out.
Thanks for reading. I hope that you’re either inspired to do something on your own, or feel like you’ve learned something that you didn’t know before. Take care and be good to each other.