Blog
How to Replace Battery on Dre Beats
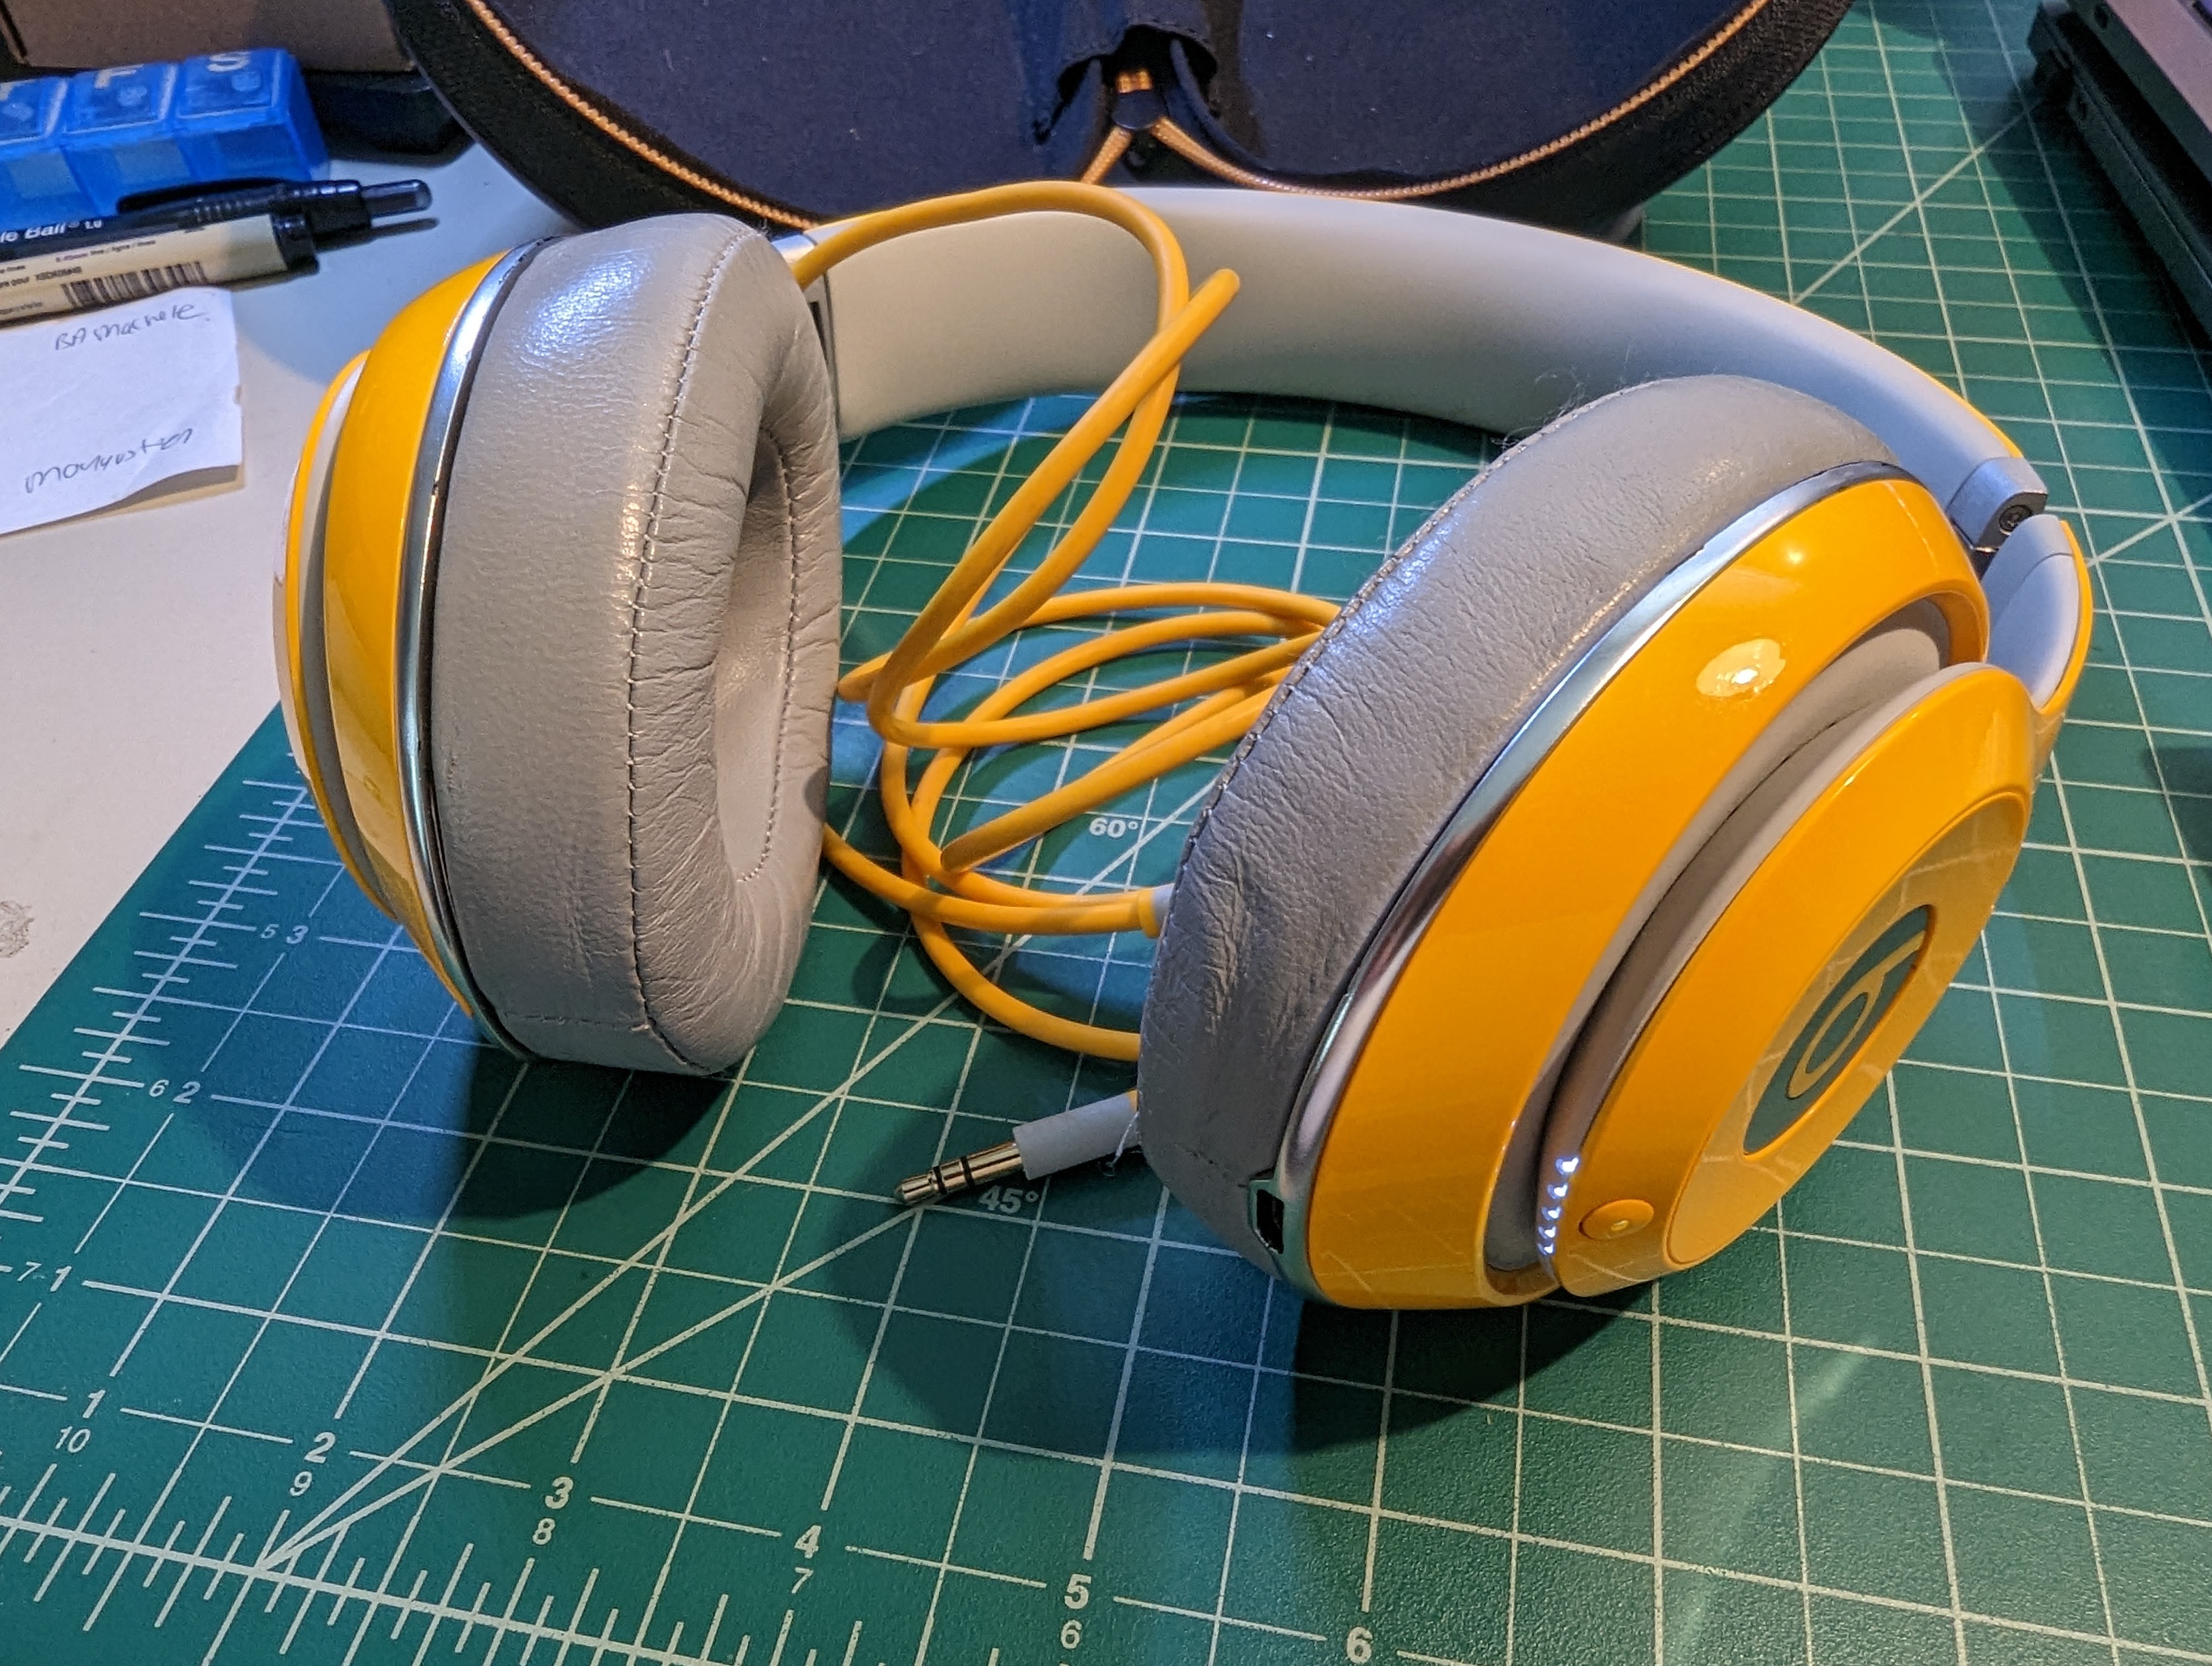
My original wired Dre Beats Studio 1 headphones still sounded great. They have noise canceling and can be really handy in places where you can only plug into headphone outlet (like some airplanes). A few years ago, I replace the outer ear pads that had become worn. The replacement earpads were easy to find on Amazon and pretty cheap too. This seller even has multiple color choices.
Eventually though, the battery wore out. You can tell it’s wearing out when the charge doesn’t hold for long and charging it doesn’t take long. Unfortunately, they didn’t design an easy way to replace the battery in these.
Lucky for us though, it has a fairly standard lithium ion 3.7v battery that can be found on Amazon for a reasonable price. (Note, the link says Studio 2.0 and 3.0 but the battery is the same)
Opening the headphones does requires careful prying so that you don’t break the plastic or the very thin wires.
Below are images of me taking the headphones apart, as well as the link for the battery that I purchased.
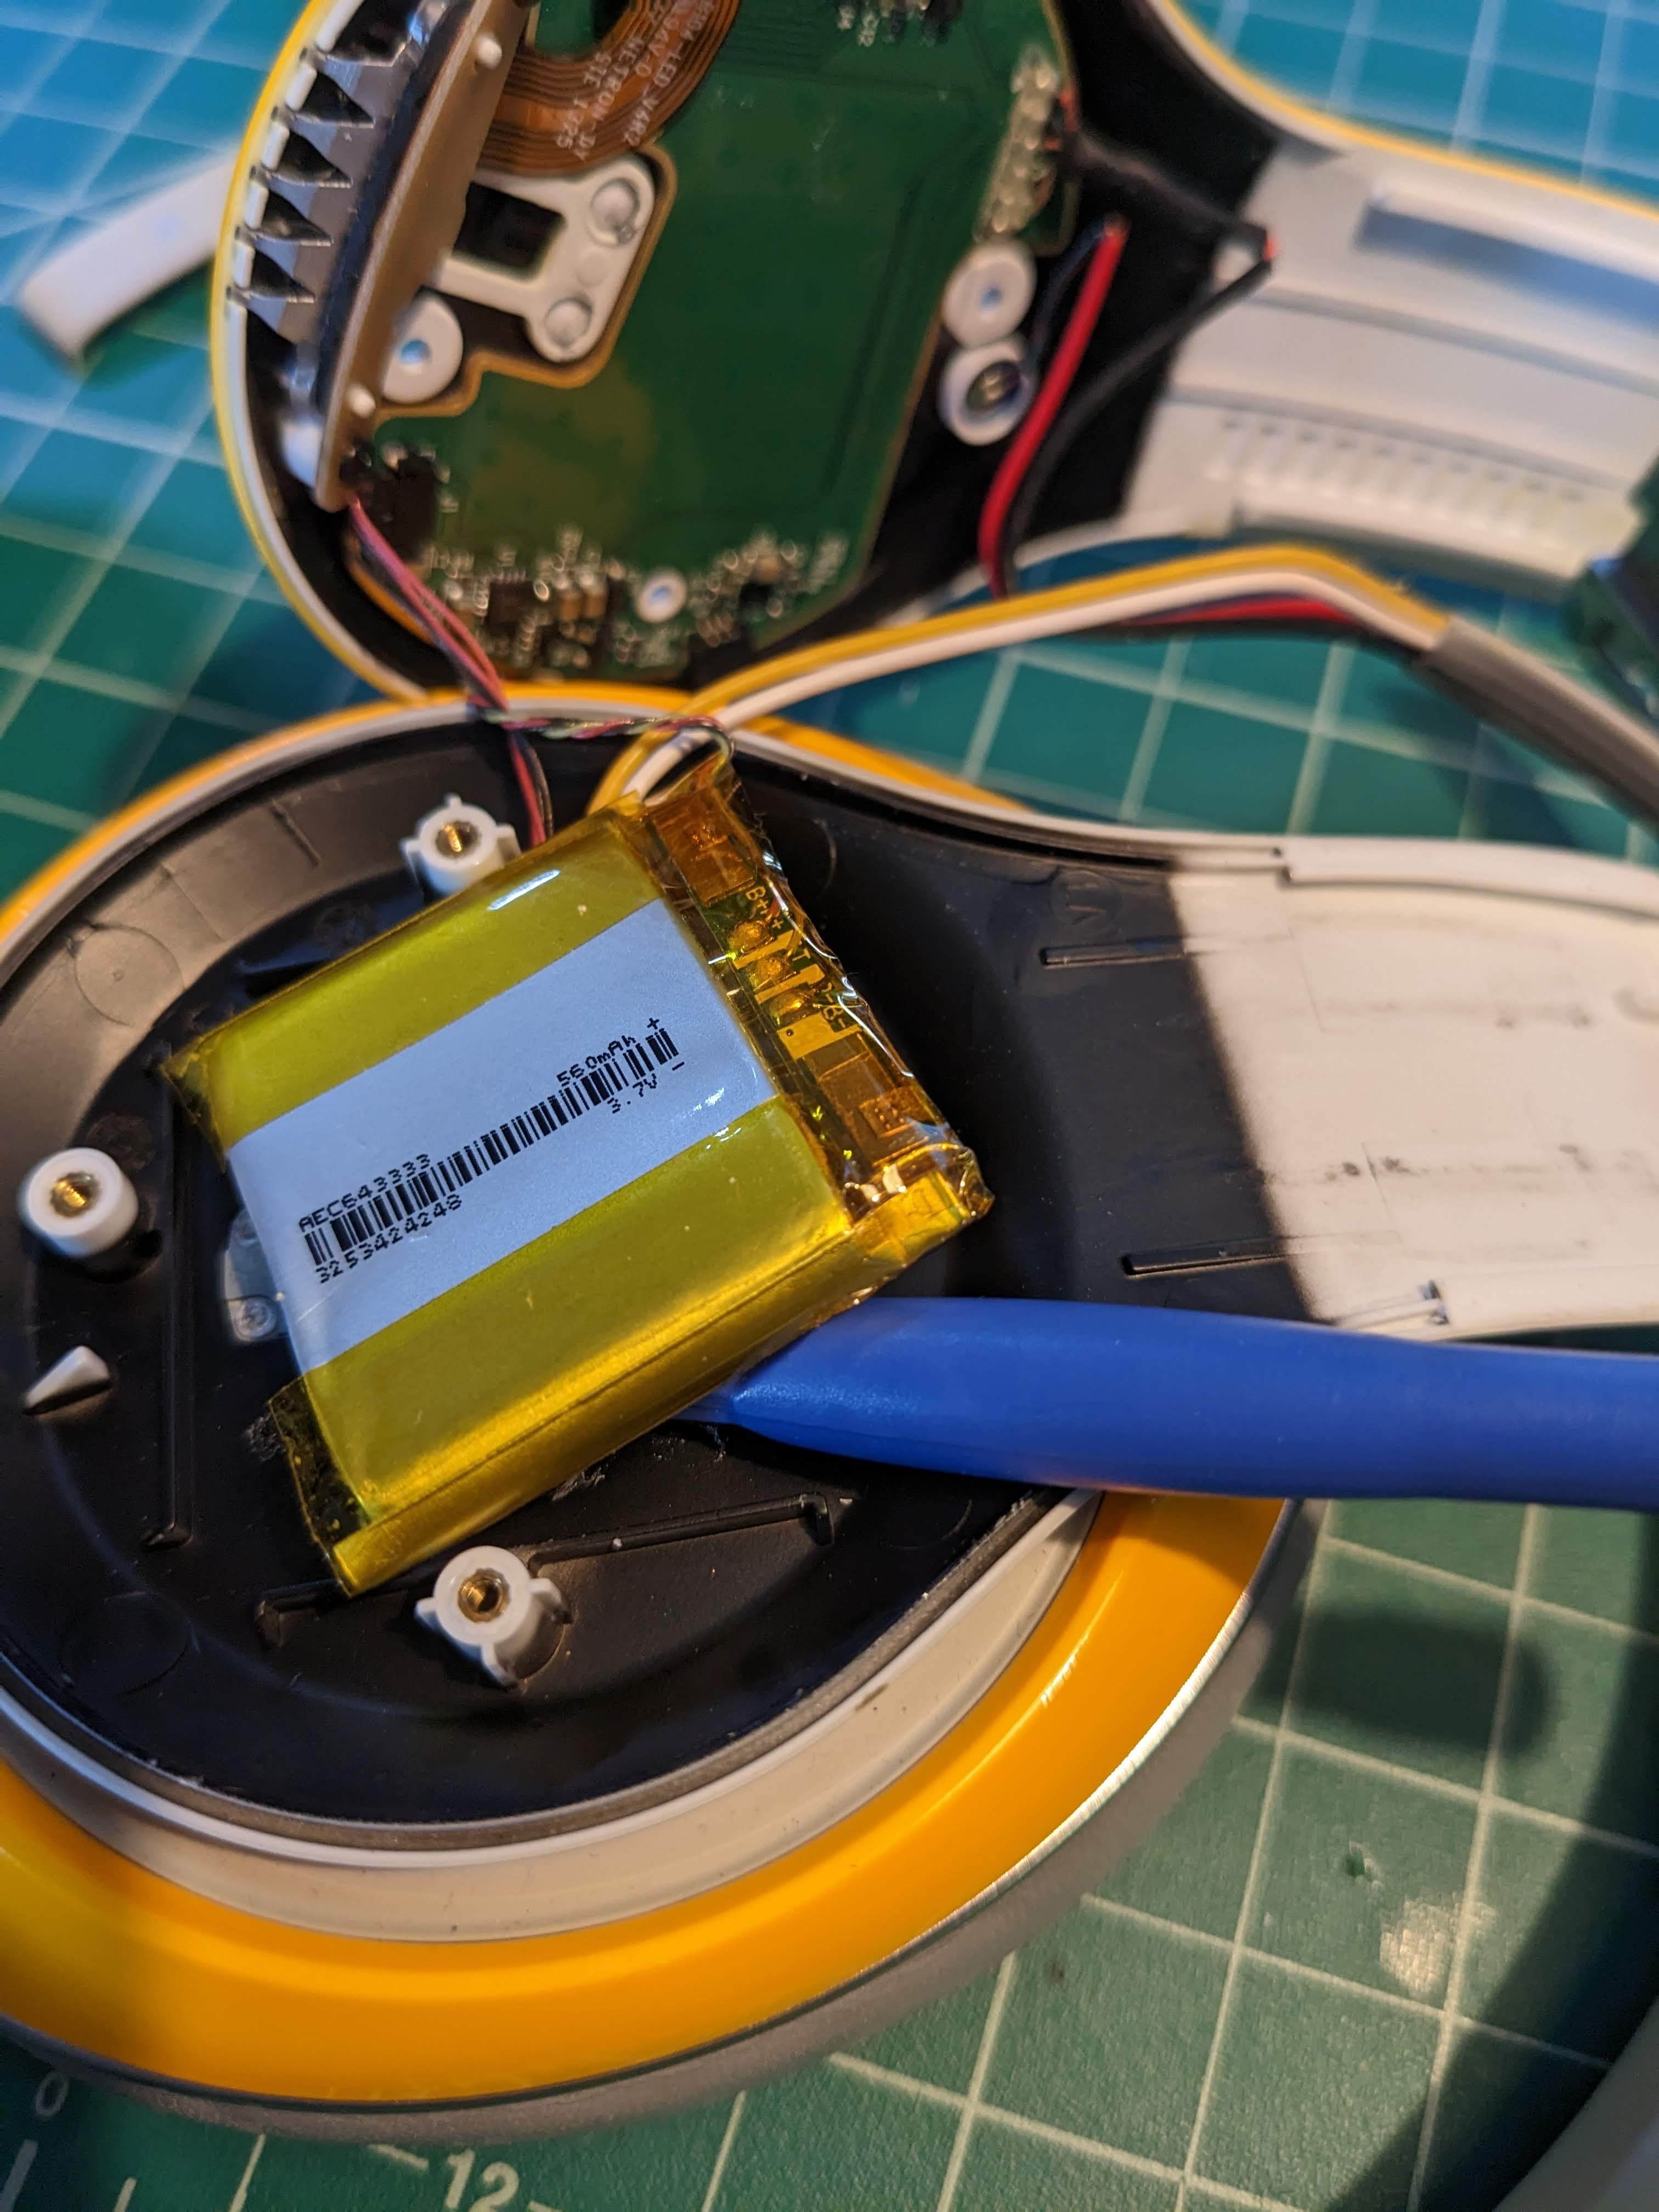
Once you get your battery out, check the label before ordering the battery from my link. You may be able to find a similar battery with similar measurements, but you want to make sure it has the super thin connector, otherwise you won’t be able to plug it back into the headphones.
My battery was:
AEC643333 560mAh 3.7v measuring 32mm wide x 30mm tall 6.3mm thick. The connector wire is about 50mm and a very small 3 wire connector on the end.
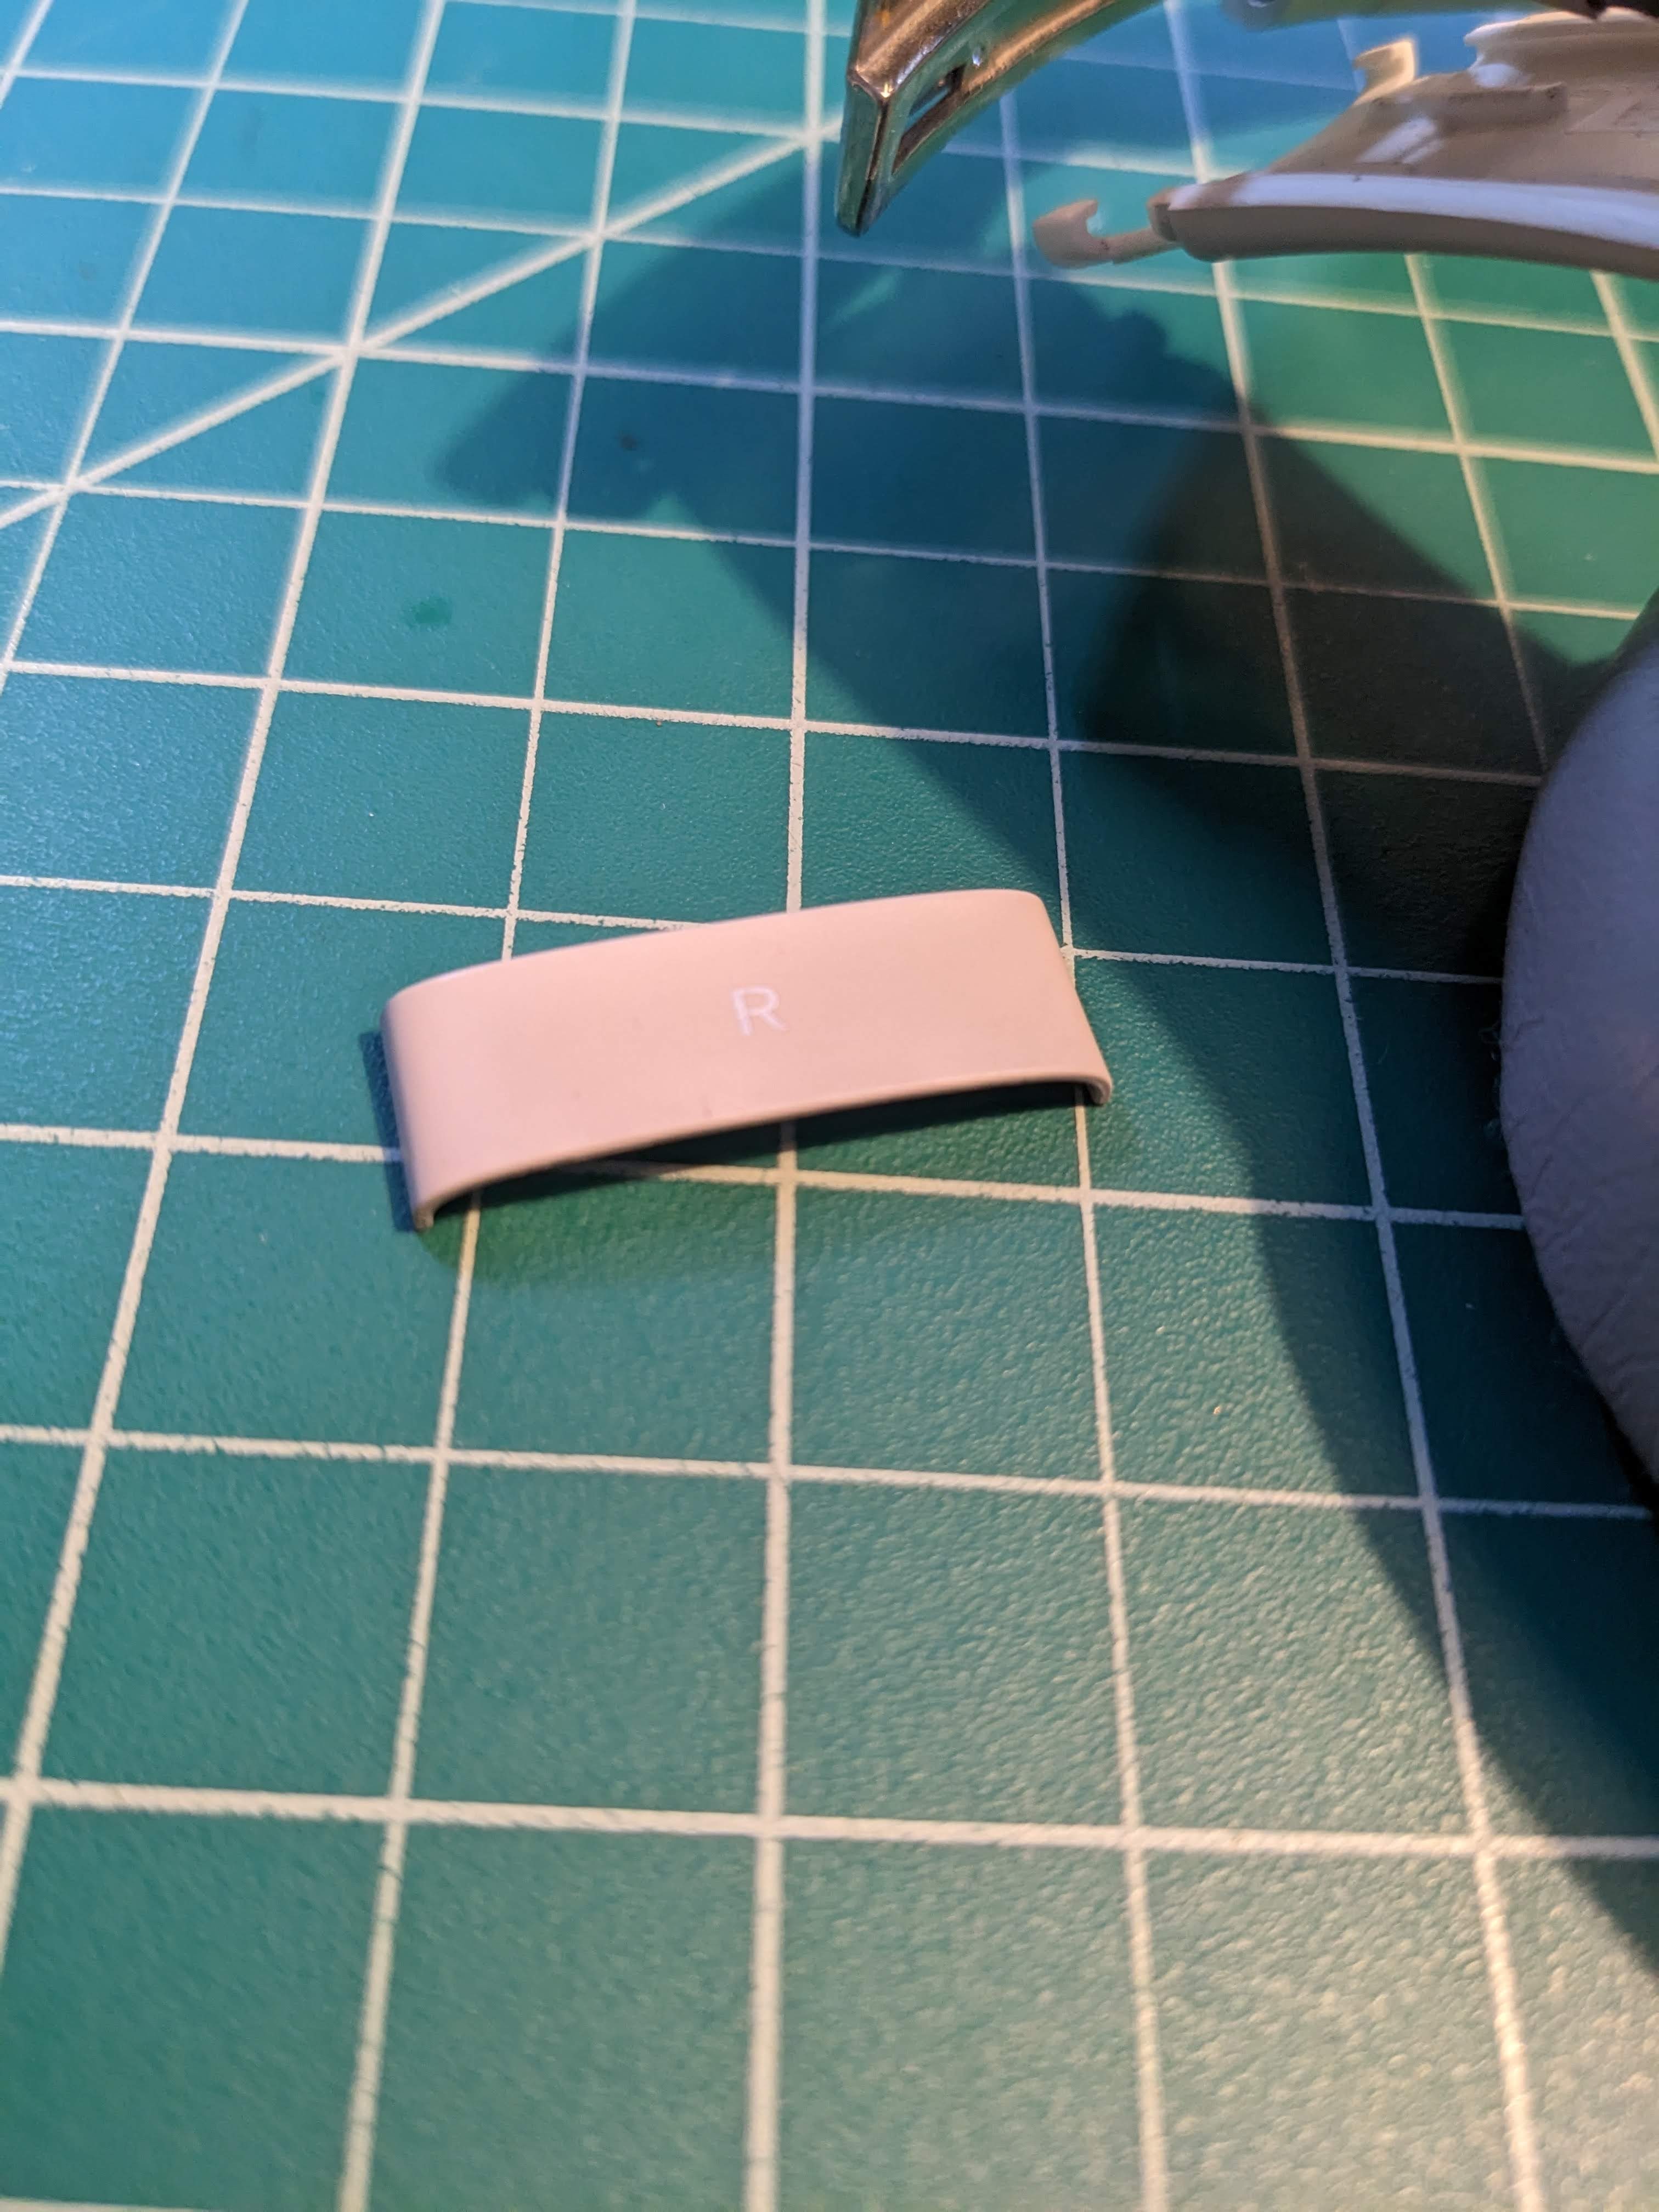 Pry off the ‘R’ side band from the side.
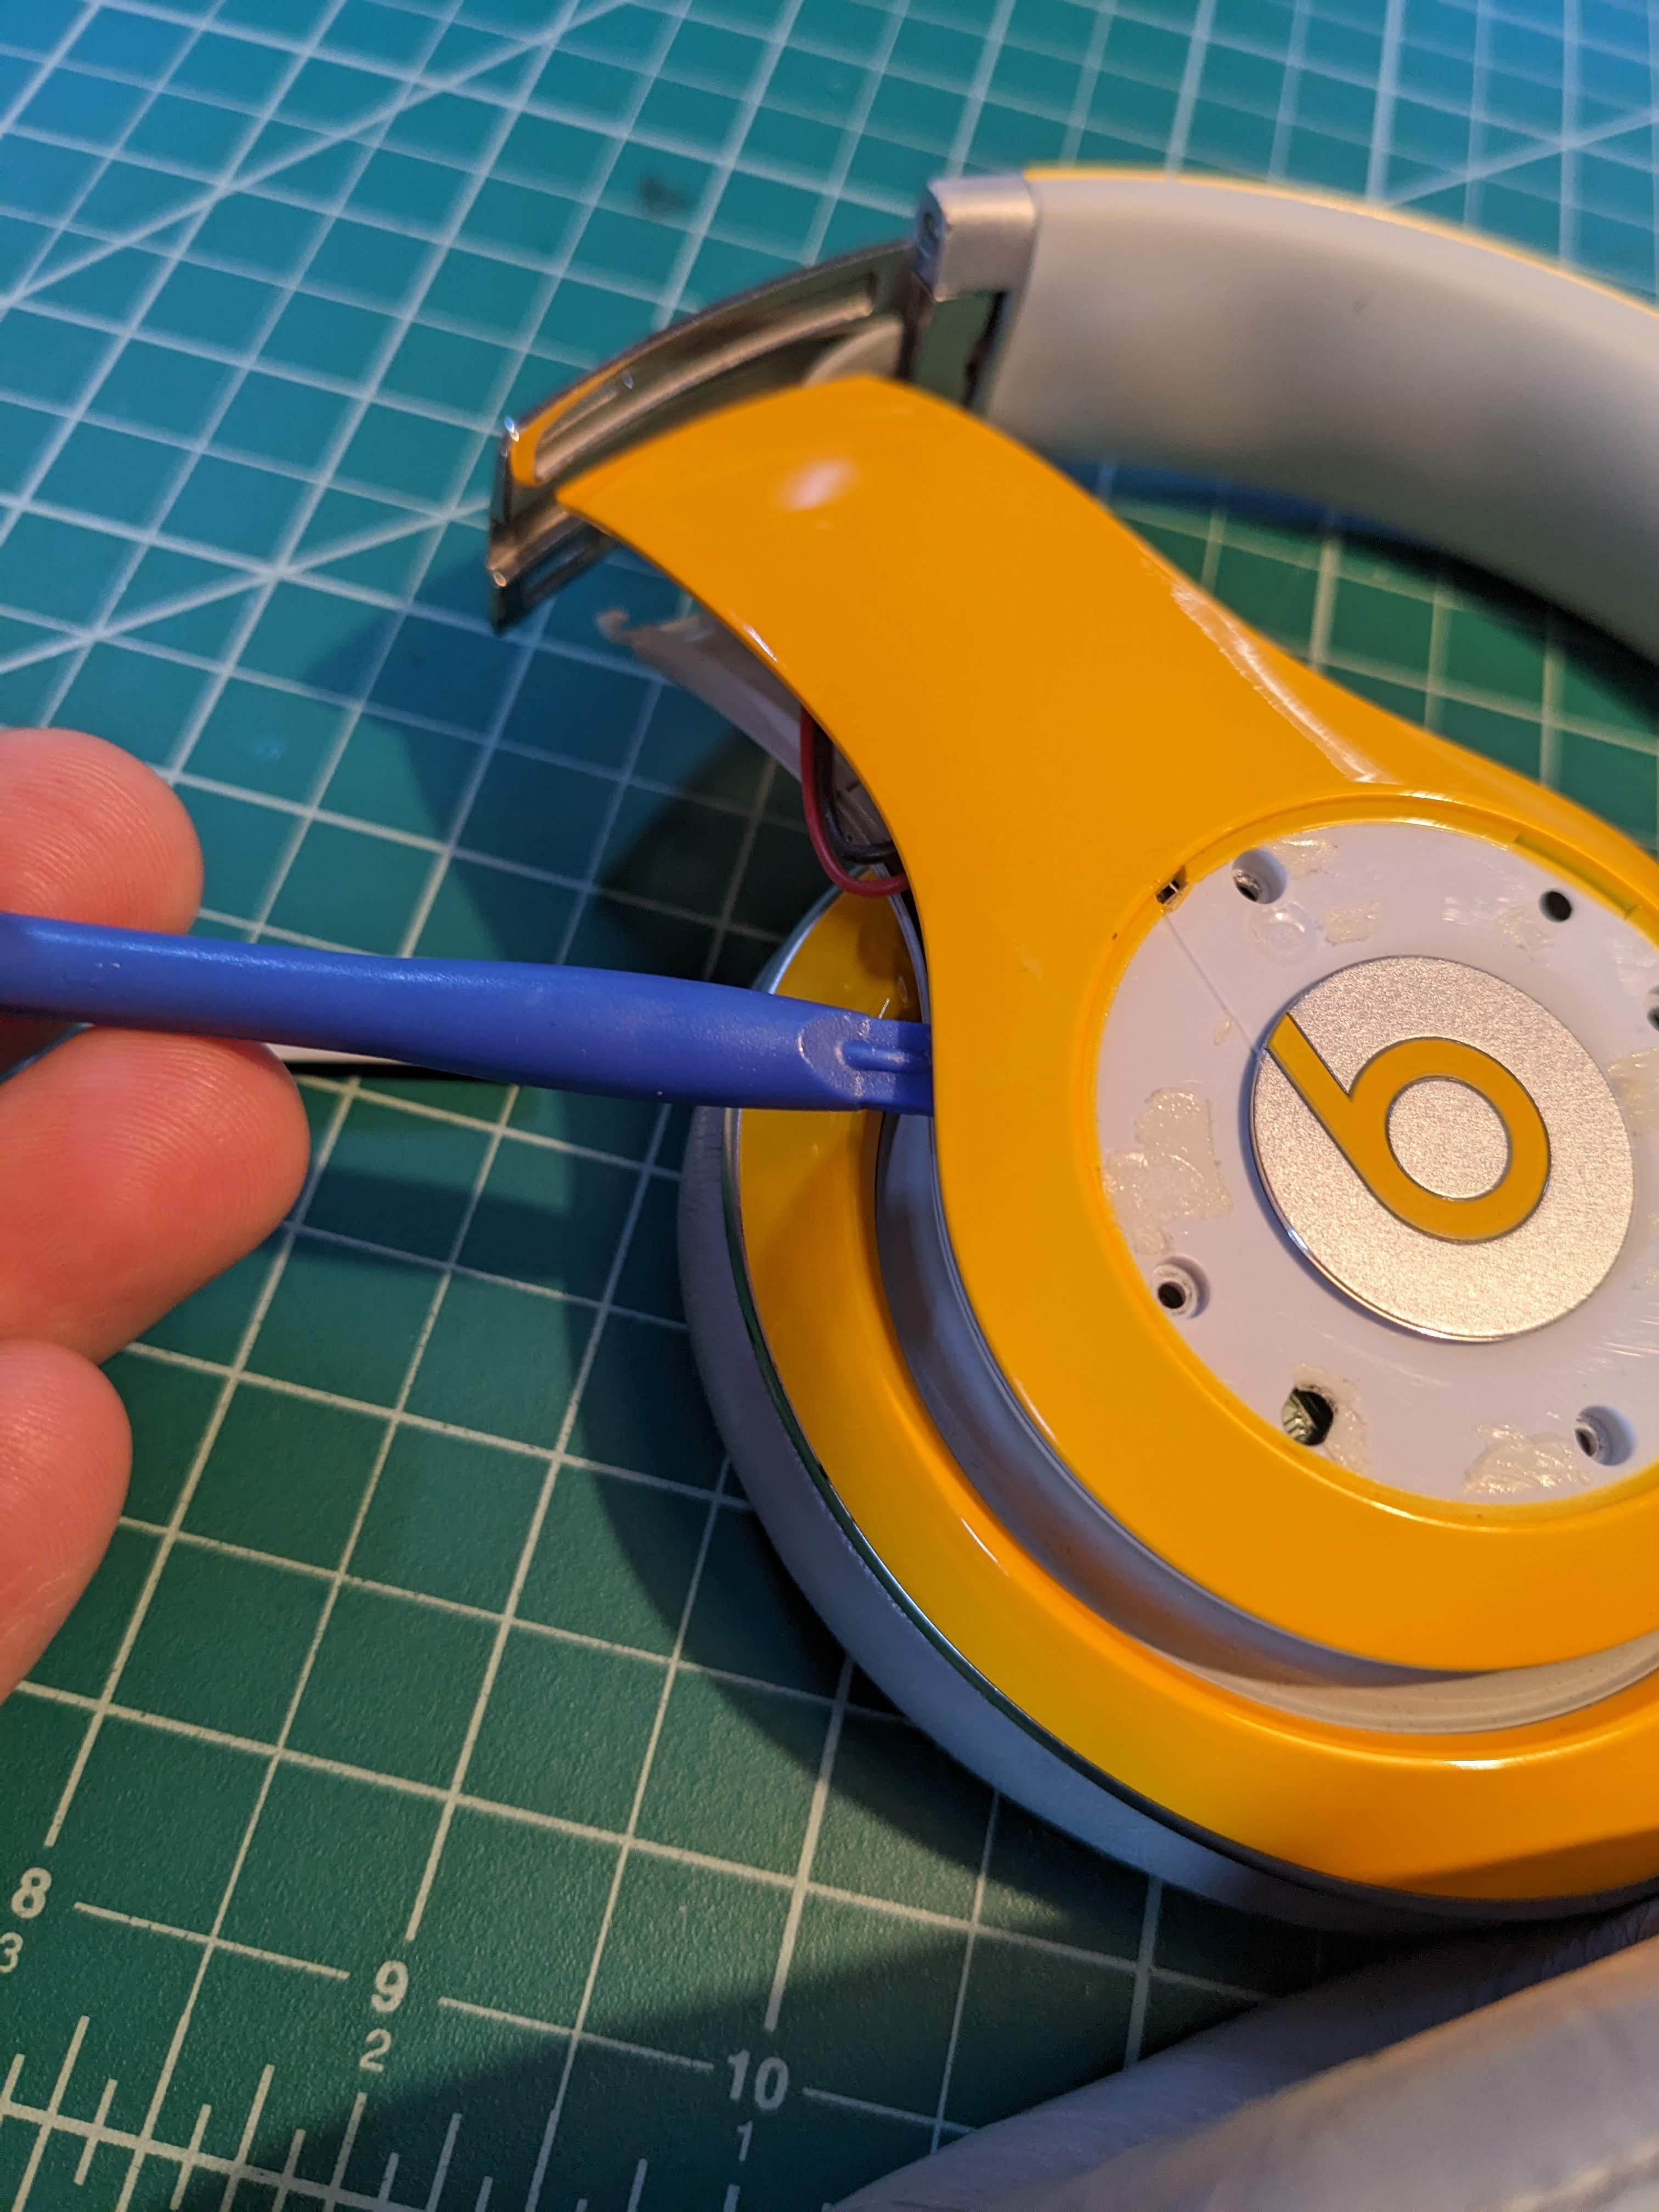 Pry off the circle around the “b” logo, and remove screws. (No picture)
Using a plastic tool, pry off the outside casing.
Pry off the circle around the “b” logo, and remove screws. (No picture)
Using a plastic tool, pry off the outside casing.
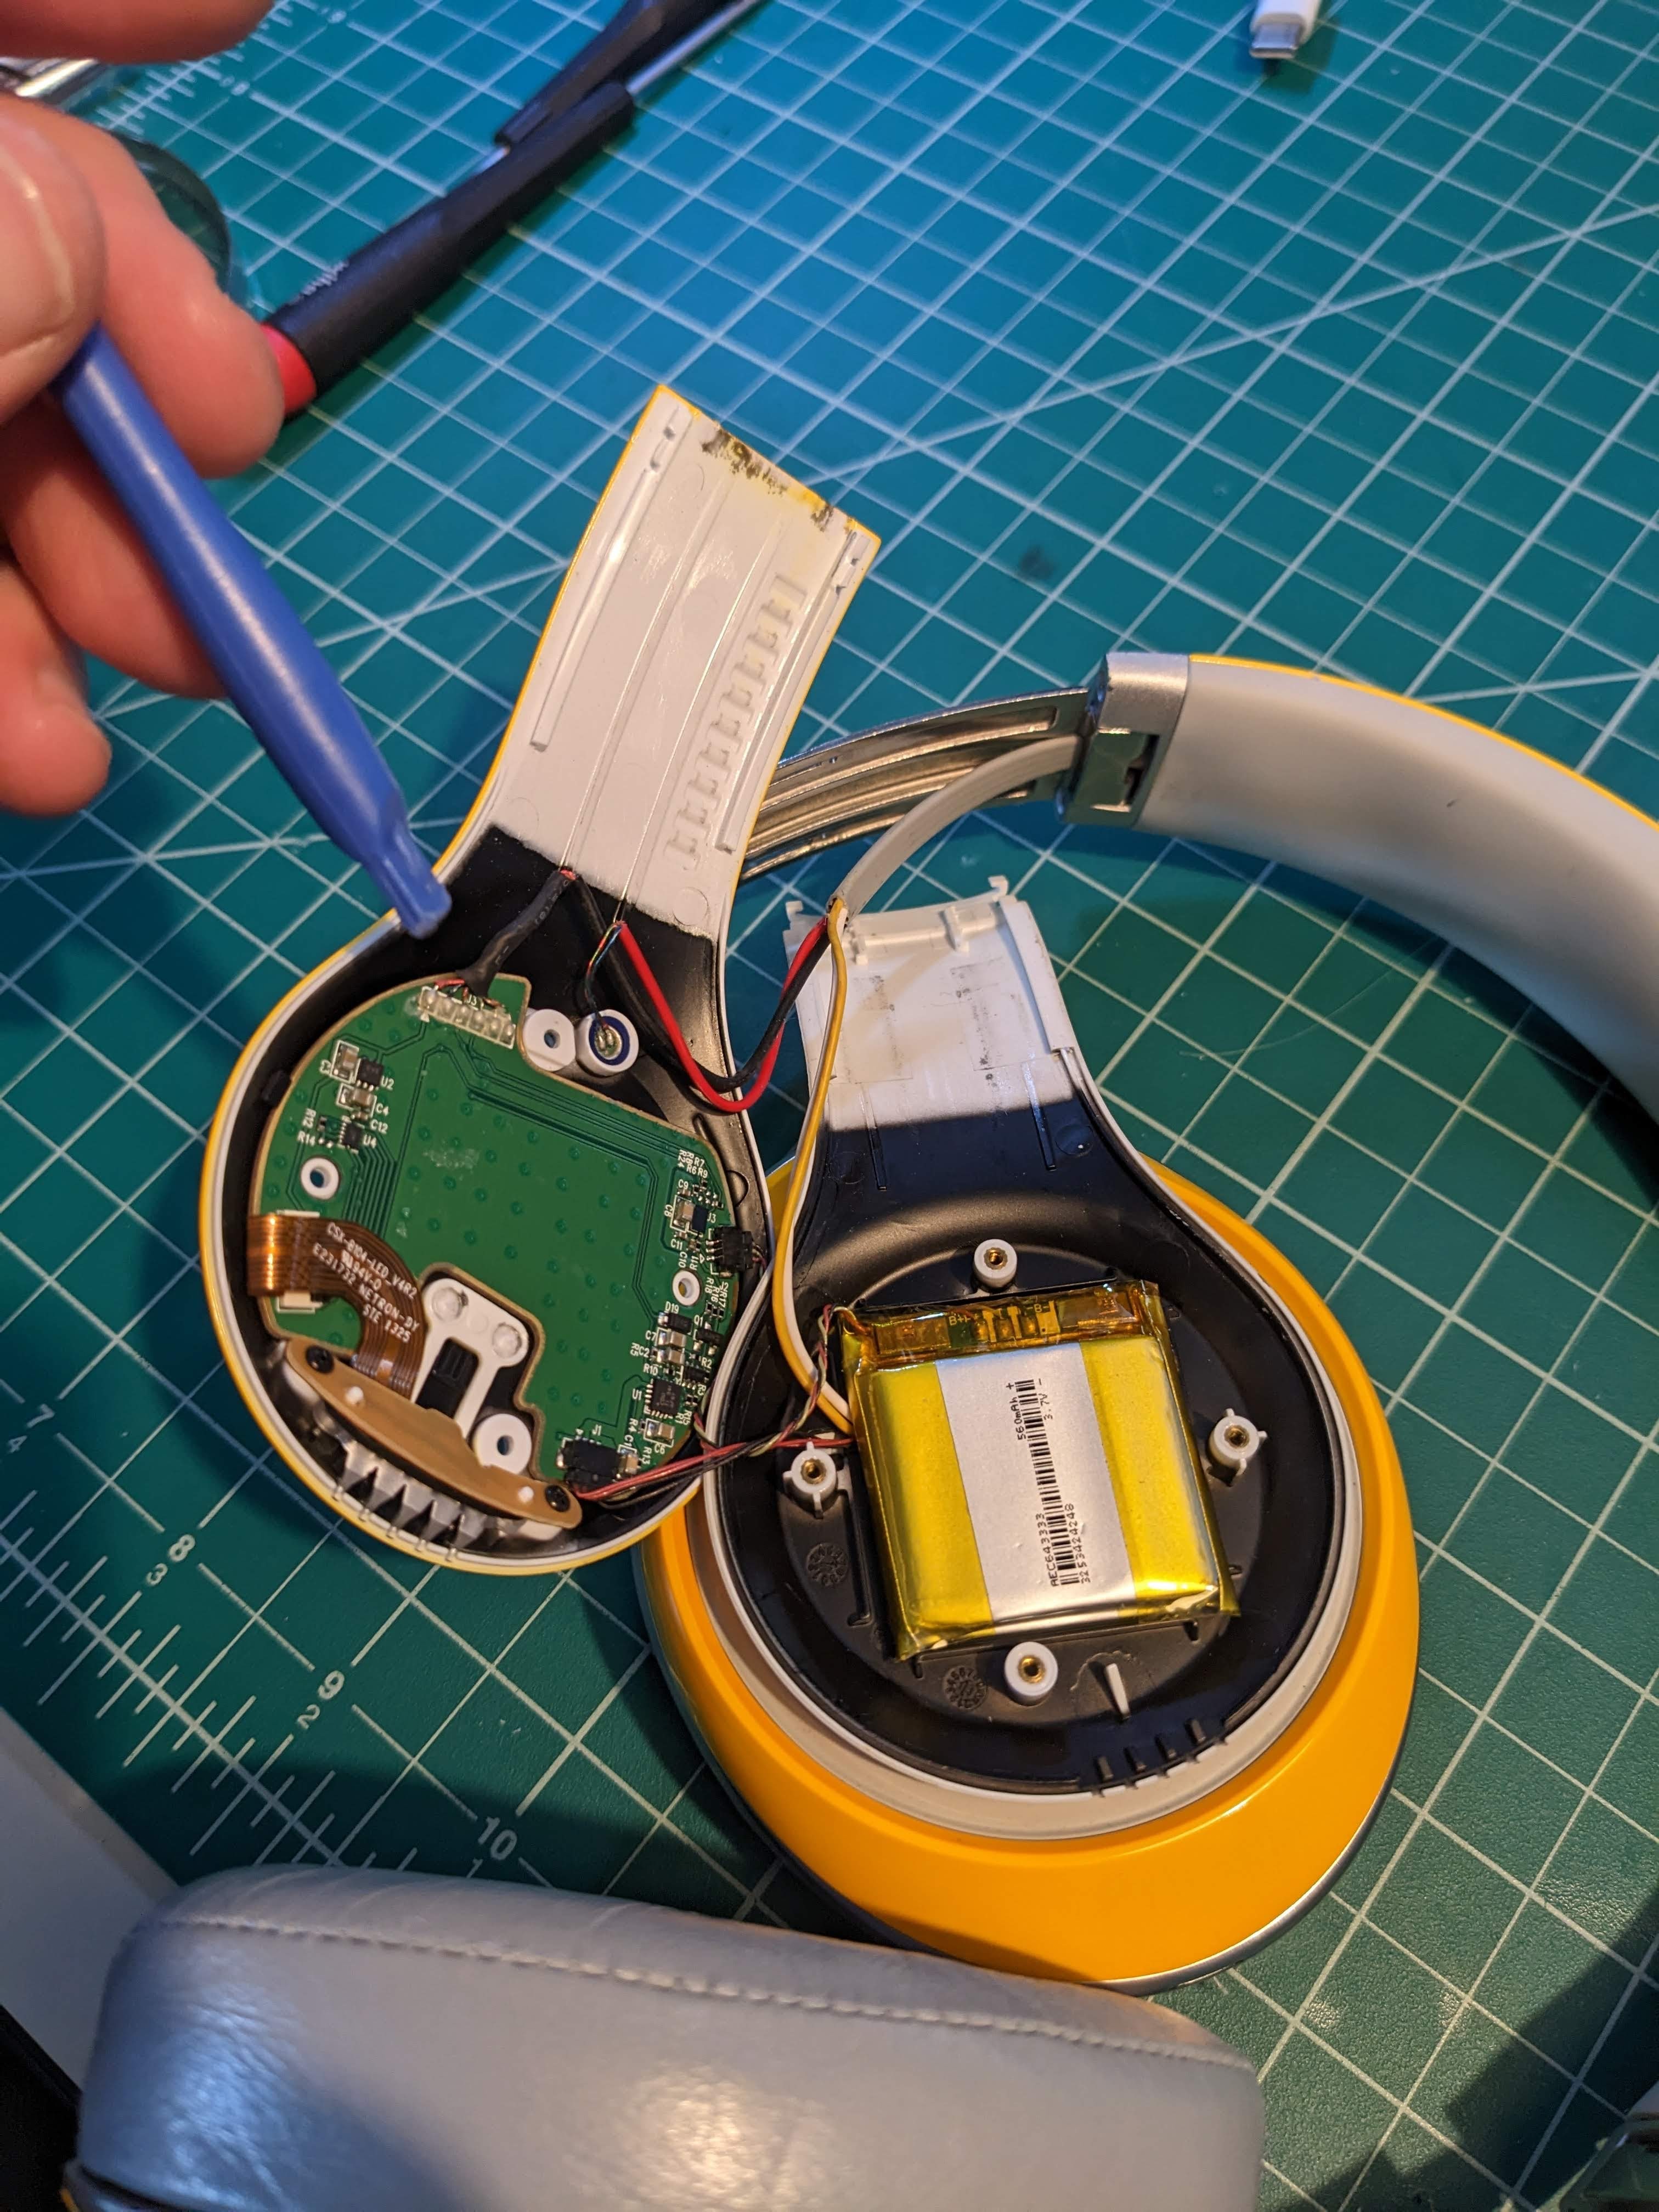 Carefully open up the headphones, taking note of how the wires fit into the casing. You will need to place them back in similar locations so the casing can fit back correctly.
 The battery is stuck to the headphone body with some sticky glue. Gently apply pressure to pry the battery away.
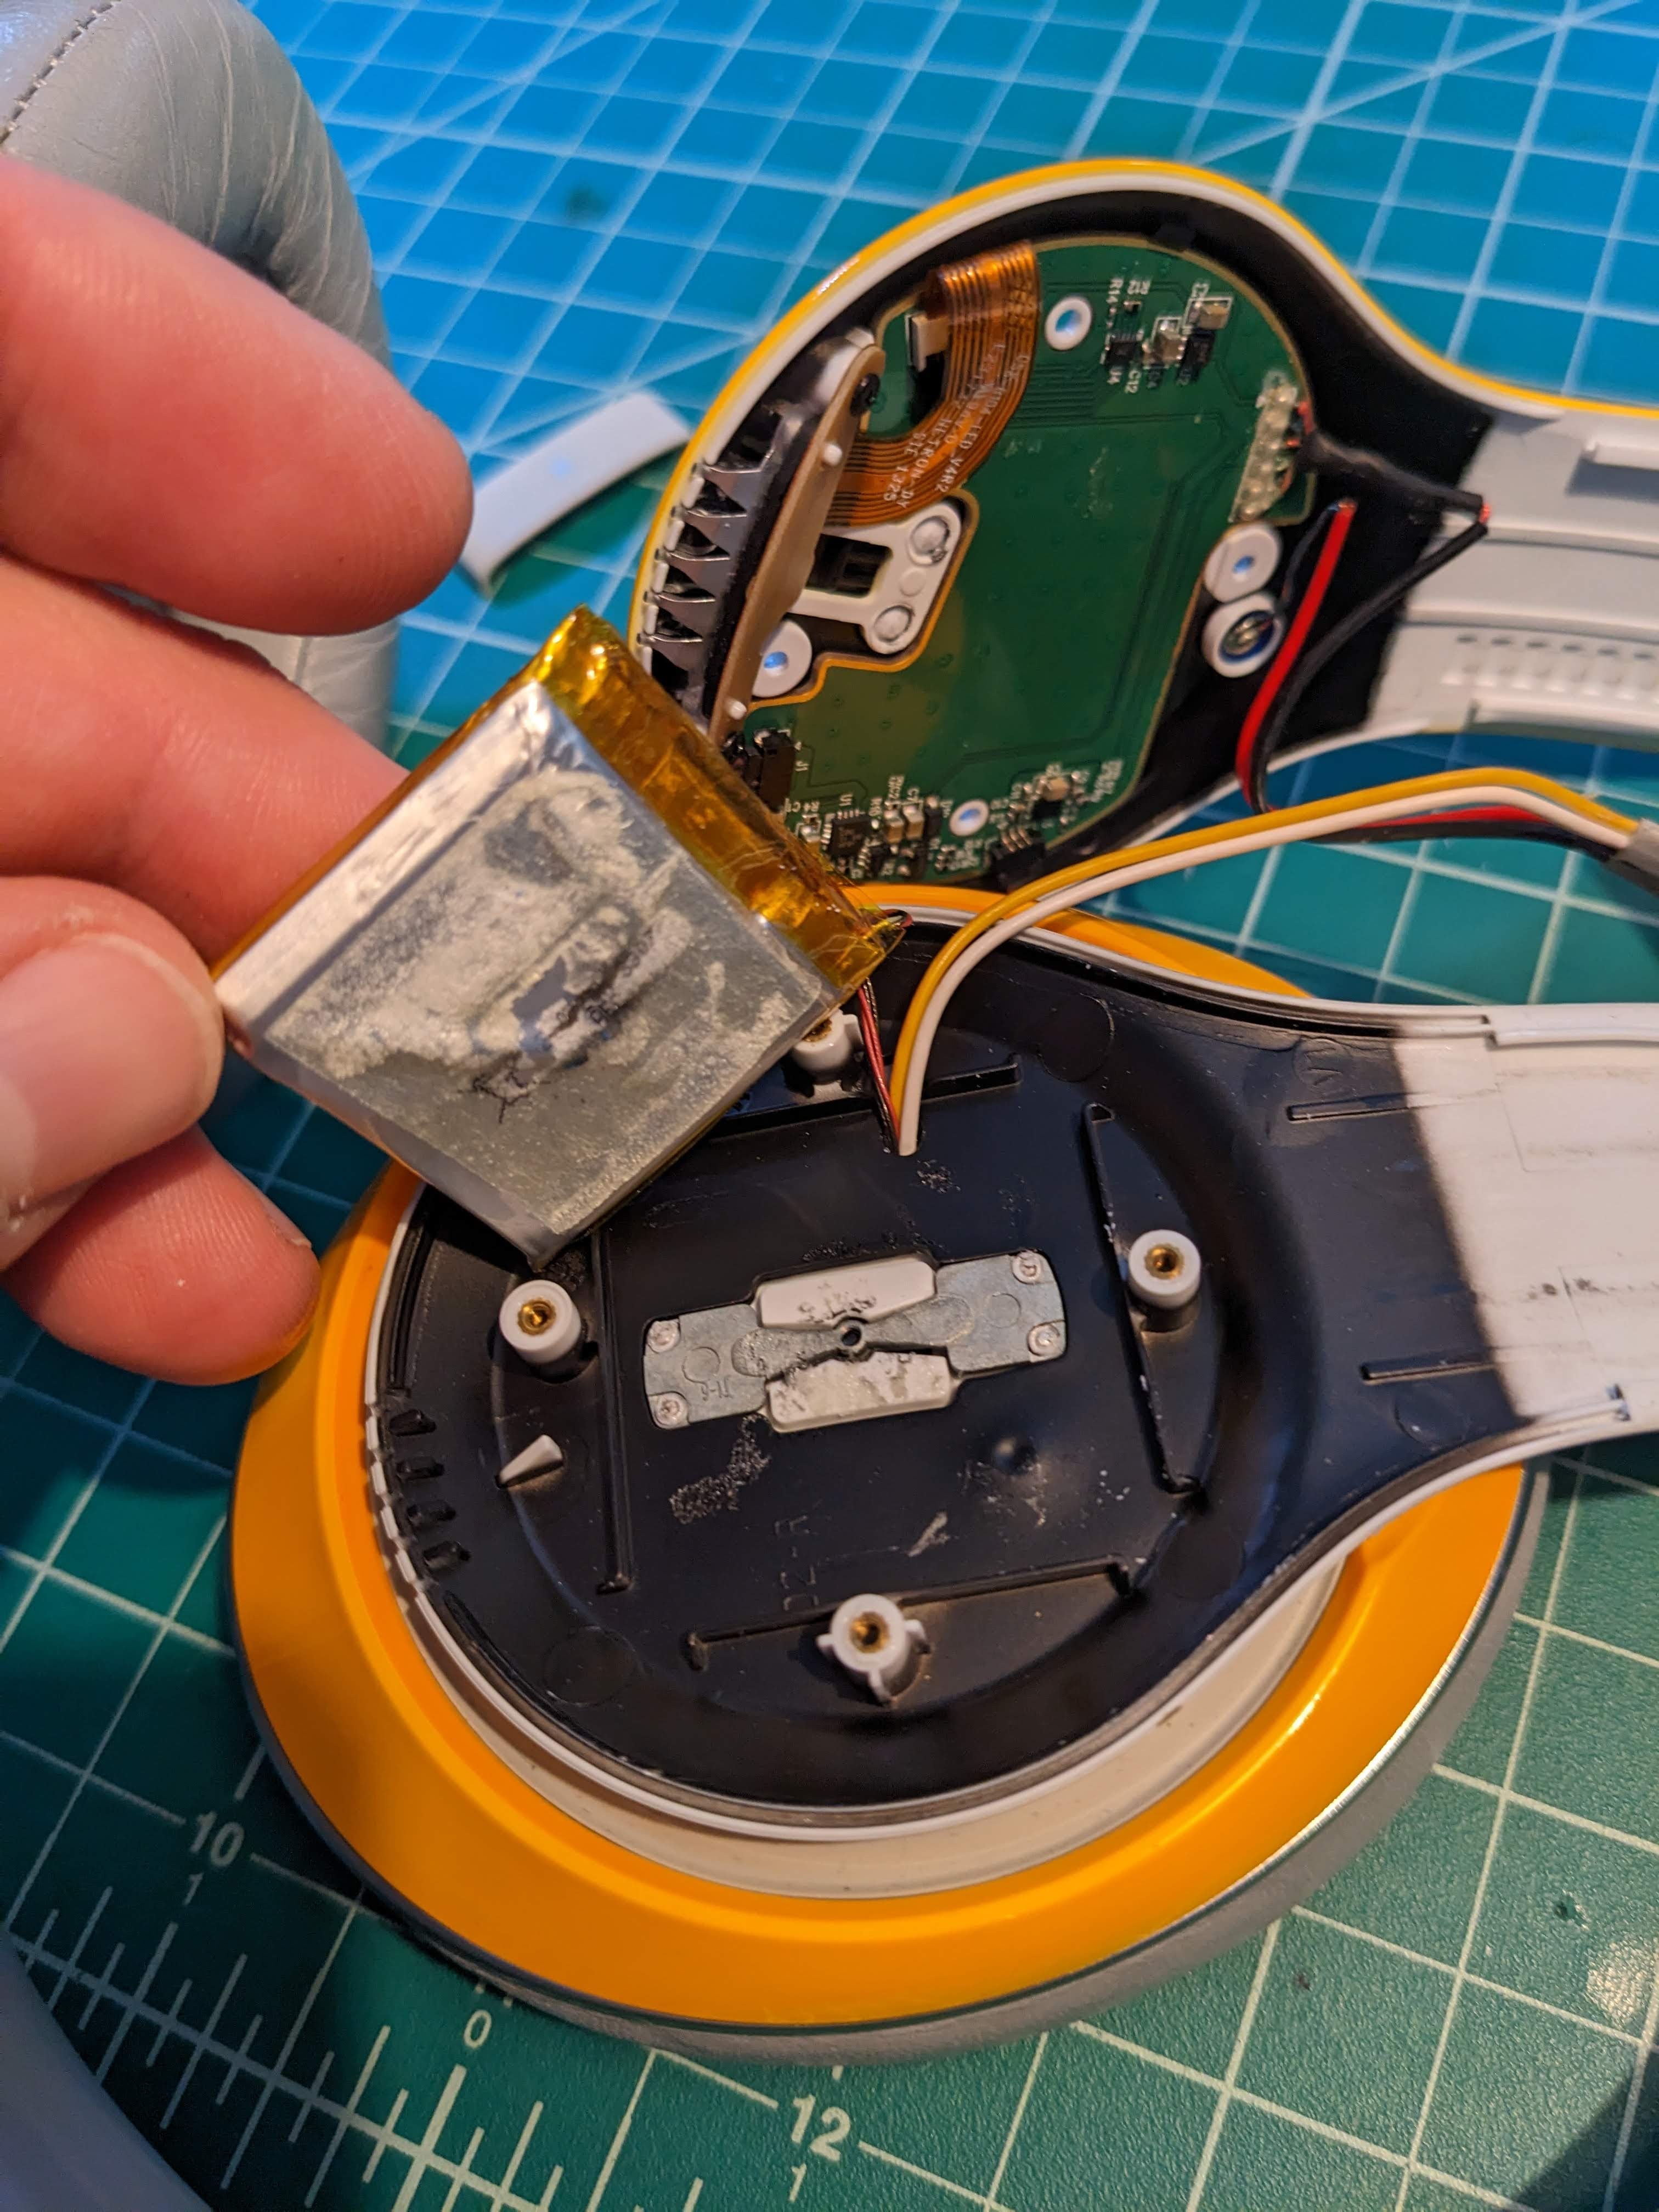 You may need to reuse the glue, so consider leaving it until you get the replacement battery. The battery that I ordered came with an extra strip of new glue.
I used a very thin flathead screwdriver to gently (GENTLY) pry the side of the battery connector.
Once you have the battery out, verify the numbers match mine (AEC643333 560mAh 3.7v) and then order a replacement battery!
The reassembly process is just the reverse. Put the battery back in oriented in the same direction as the old one was, with the wires coming out towards the top of the headphones, and carefully reconnect to the main circuit board.
Before you fully re-assemble, you should run a test to charge the battery and listen to sound coming out of the speakers. If something isn’t working right, check all wires to make sure the battery is completely connected and no wires have become dislodged.
Fit the wires back in and snap pieces back into place. Replace screws. Replace plastic circle. Replace band!
That’s it! Let me know how it goes for you!