Blog
How to Make a Foil Dispenser
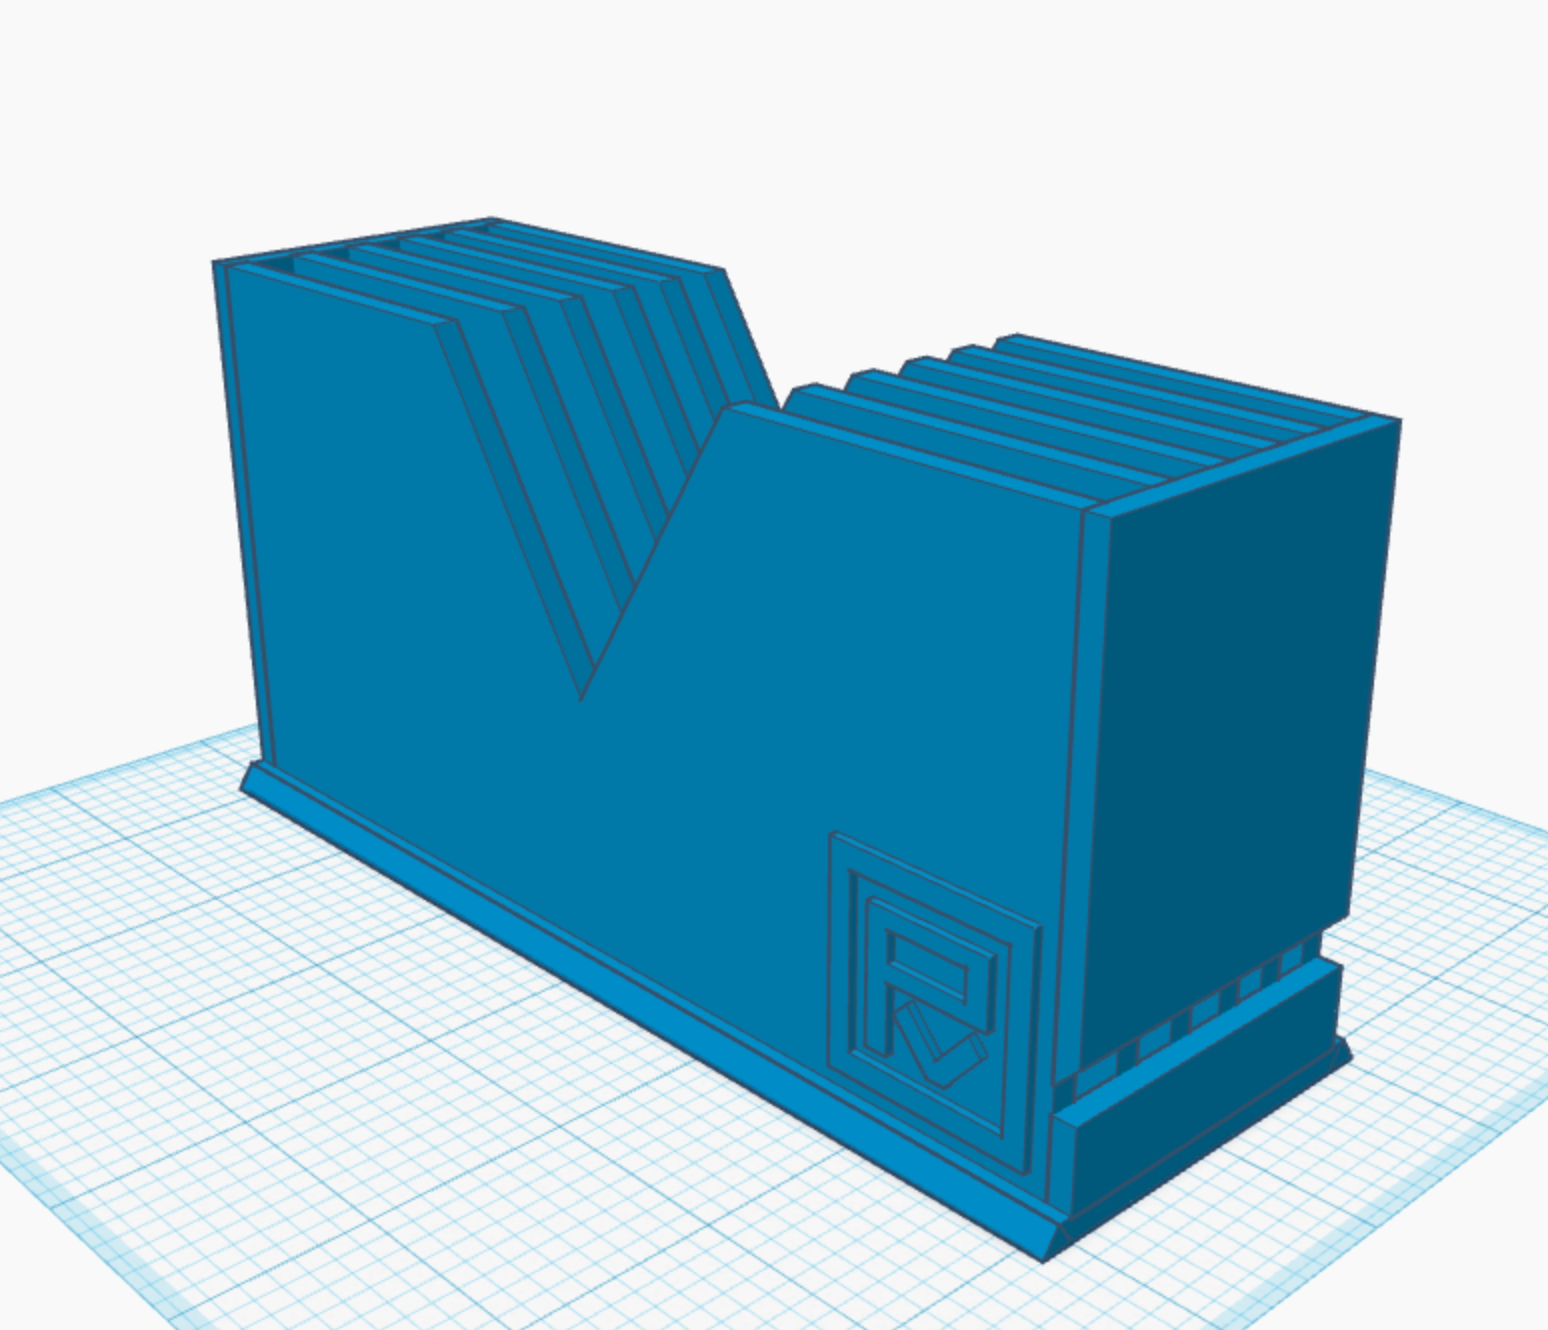
My youngest kid is a stained glass artist and needed a workshop tool to help them out with the tedious job of foiling the glass before soldering. They asked me to make a foil holder for various sizes of rolls. I felt like this was a good opportunity to level up in my 3D skills and see how precise I could get with Tinkercad. It turns out that it was also an opportunity to tune my 3D printer a bit. The results will be a prototype, where I’m expecting a few modifications after it is put into use.
Design 3d Model in Tinkercad
 I’m all about the free 3D apps. I don’t use them enough to pay for them, but I’ve made a few models in my life and know what kinds of features should be expected. You can do a lot with a few basic tools if they work well. I learned the basics of Fusion 360 a couple of years ago (AutoDesk) since they were offering free student licenses, but after a while my license stopped working. I wasn’t sure if it was me or them, but it became a pain to use it. I then learned about Blender, a very feature rich open-sourced 3D app (modeling, rendering, animation) but frankly, it was just too complicated. The stuff I’m working on isn’t going to be THAT detailed, so I just can’t invest the time to learn something that complicated.
Which is how I ended up back to Tinkercad. Tinkercad is also an Autodesk product, but its targeted to the students and entry level modeler. It’s in a browser and frankly, its plenty powerful enough. For any 3D programs, I recommend getting a 3 button mouse with a scroll wheel. It’s possible to do it without, but it makes the work go faster and helps alleviate frustration. The tasks that I do a LOT are 1) rotating your view (aka camera) and 2) sizing and moving objects. Having a left and right mouse button to alternate quickly between those (in combination with a few keyboard modifiers like holding the ‘shift’, and ‘ctrl-D’ for duplicating) makes the process of creating objects go faster.
Comment below if there’s an interest in hearing my top 5 “must learn” tips to building basic models.
And here are the results: Took about 5-6 hrs. to make, including the time to make a reusable logo that I can emboss on other projects.
Slice object for printer
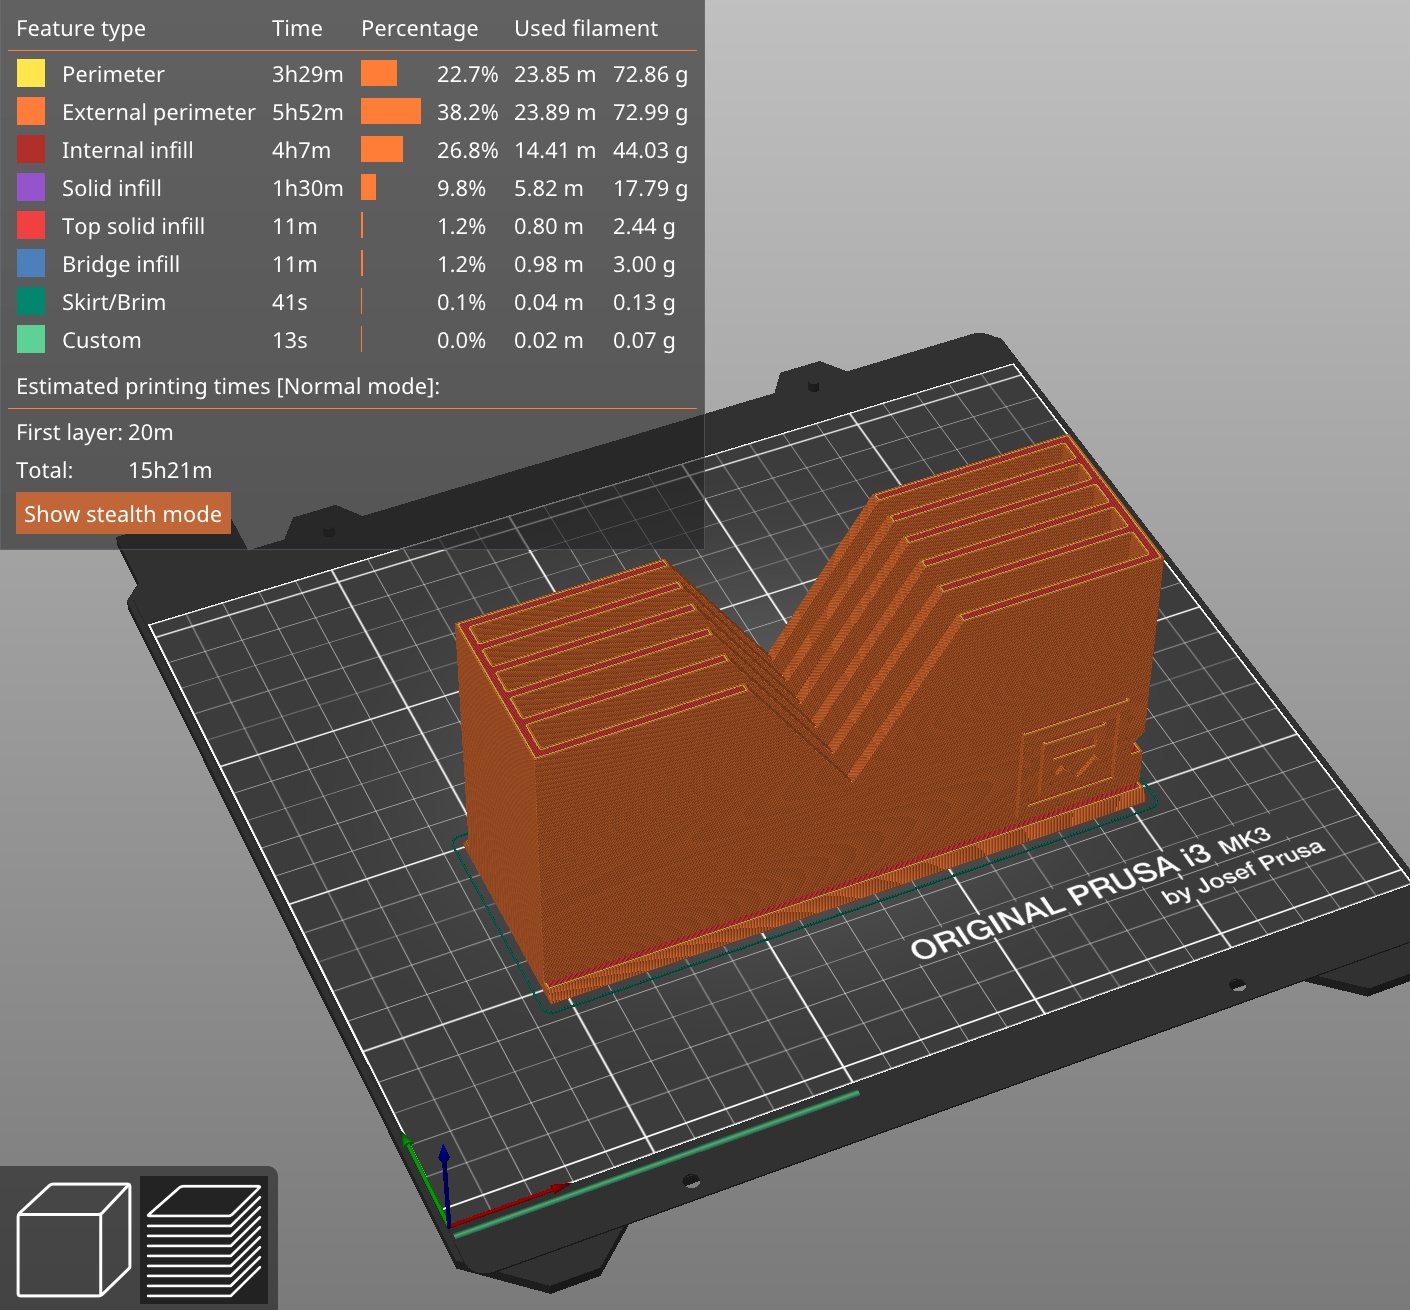 Once the object is created, Tinkercad let’s you export as an .stl file. This file will then need to be loaded into a “slicer” app which will divide the object into hundreds of horizontal slices, and export as instructions that the 3D printer will use. Think of it as a multi-hundred-layer layer cake. With really thin layers. I use PrusaSlicer since I have a Prusa printer. There are a few other variations, but I feel like this app is tuned to my printer. It’s also really easy to use and they keep adding features.
From here, you export as G-Code (the format of the instructions for the printer). At this point, you can get an estimate of how long your print is going to take. If you don’t like that, or want to fine tune it, you can make adjustments here, but in most cases the defaults are perfectly fine. You DO have to specify what type of filament you’re using as this determines the various temperature settings on the printer.
Print and iterate
This is a fairly large print for me. The larger the print, the more important it is for your printer to be working well. One small problem can be compounded and make for a junky print.
Here’s a version of someone’s else’s design that I started to print, and some of the problems that I was running into.
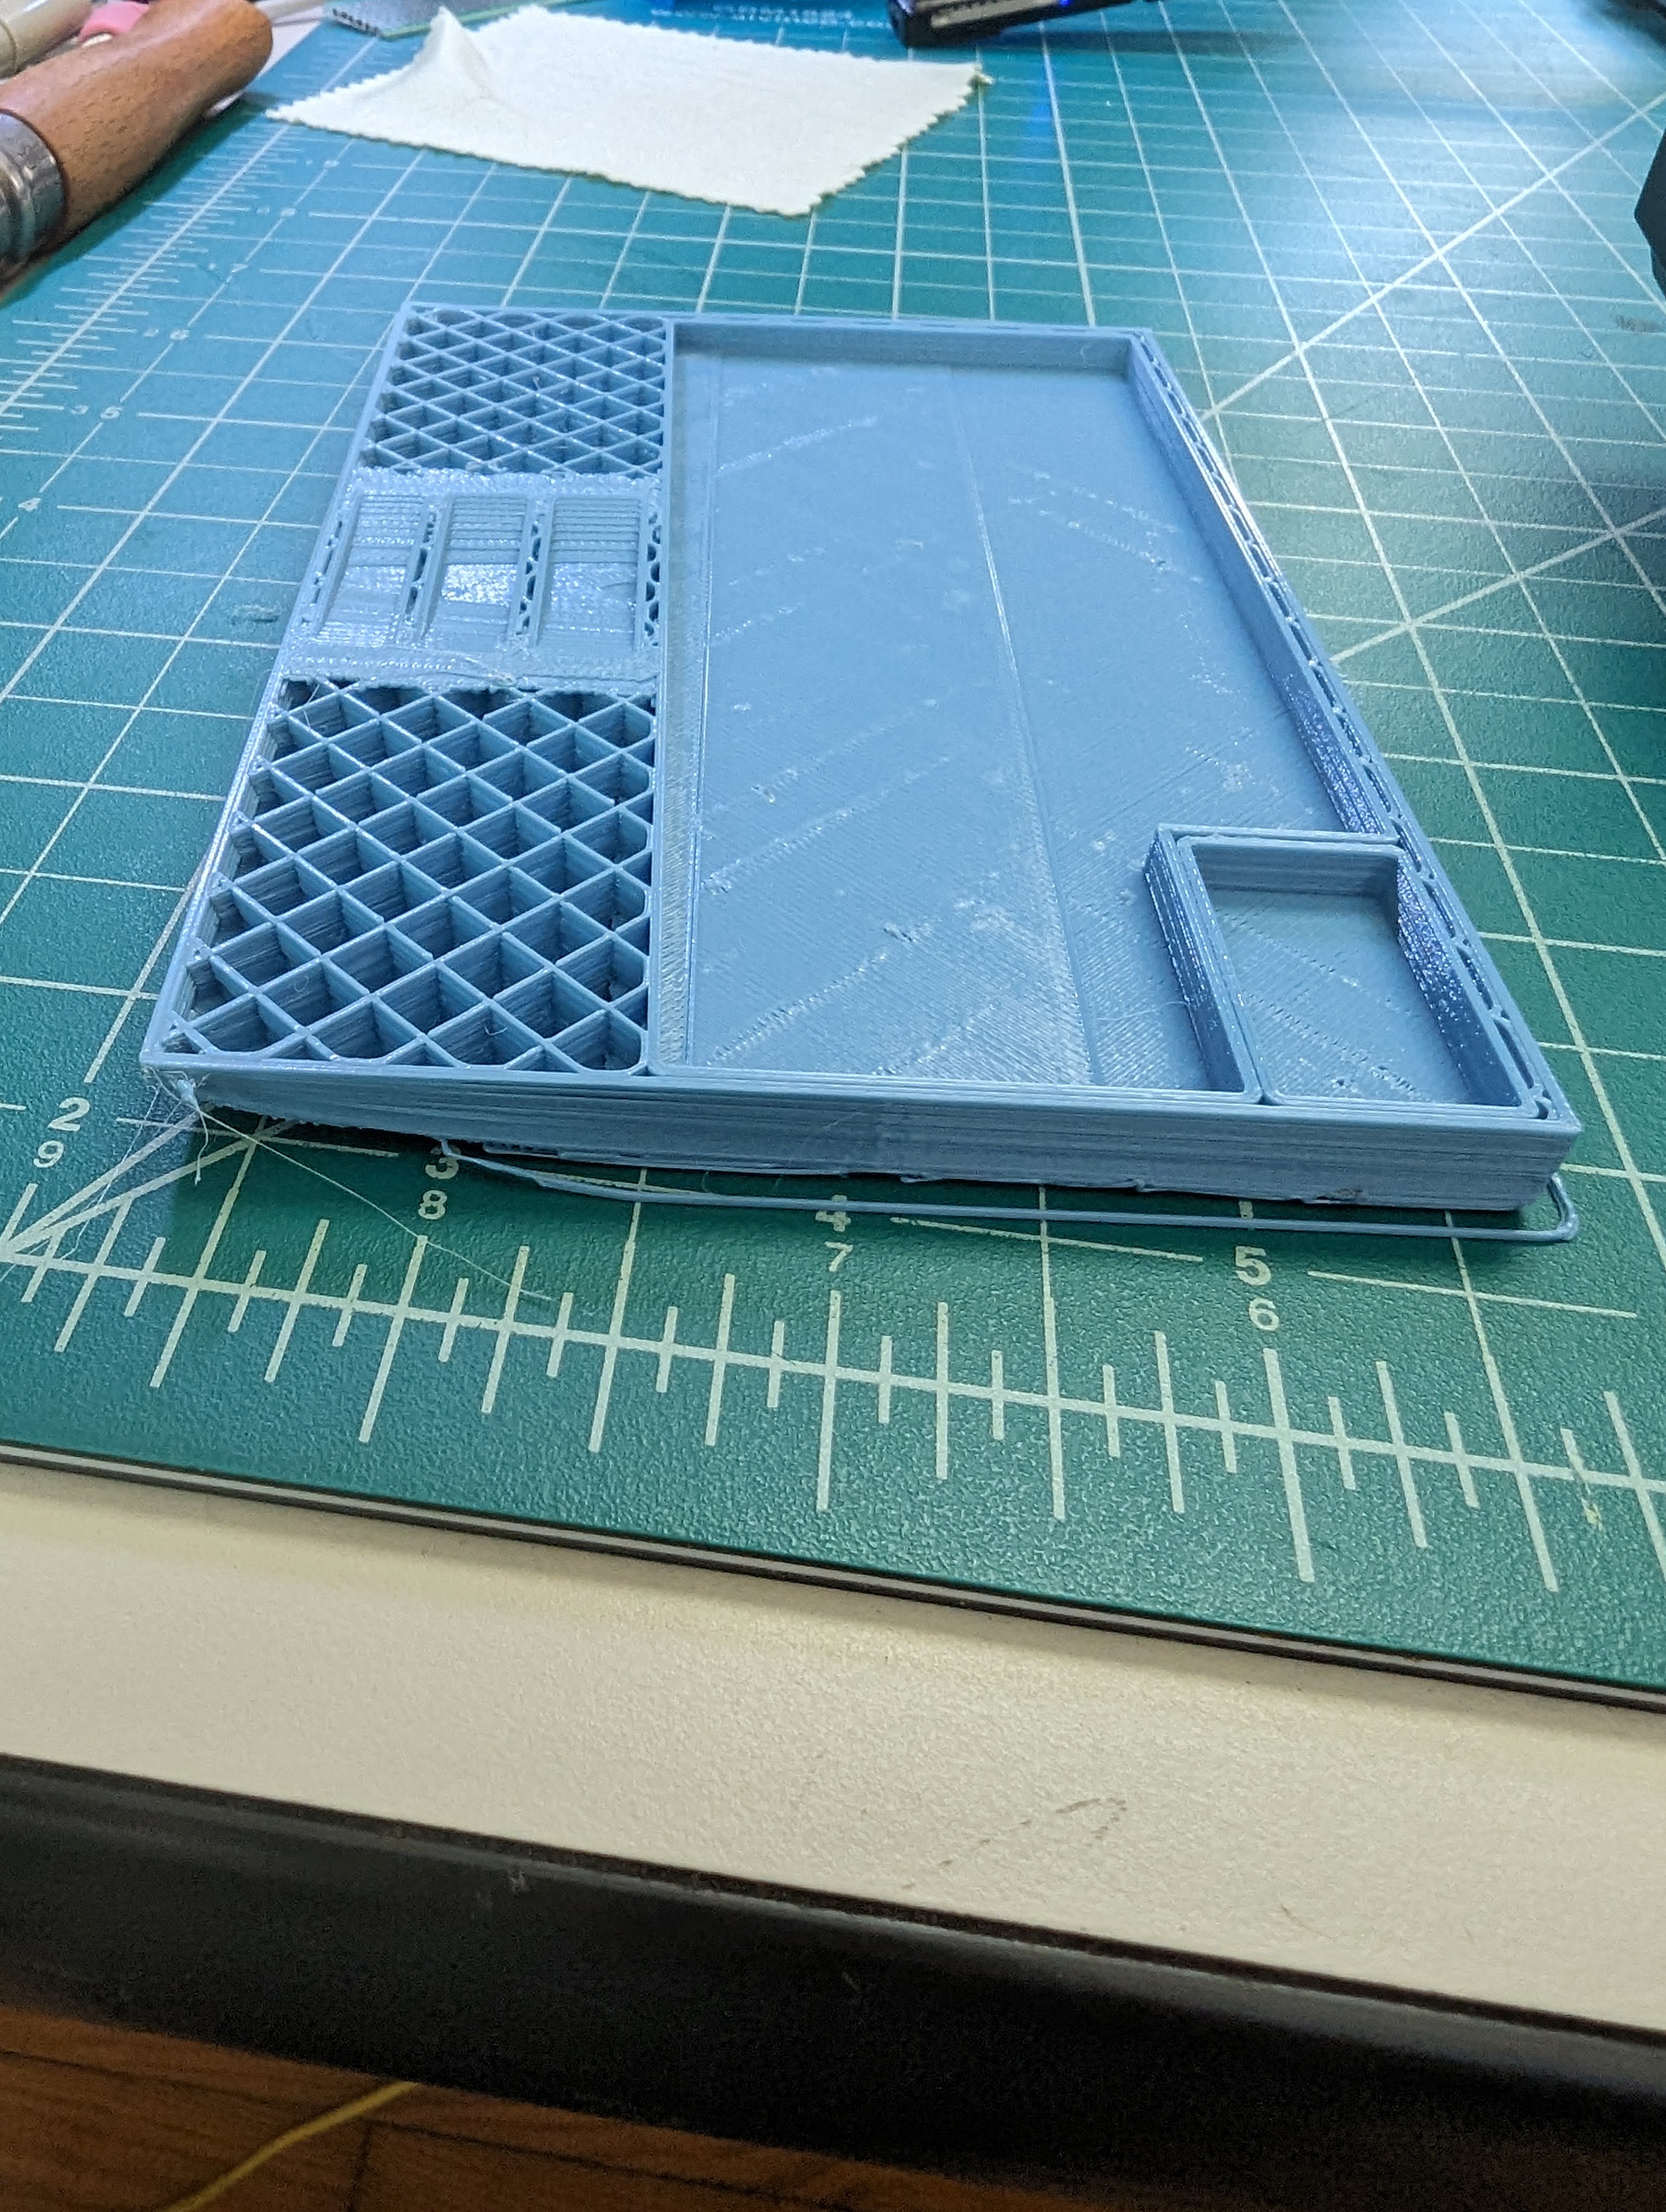
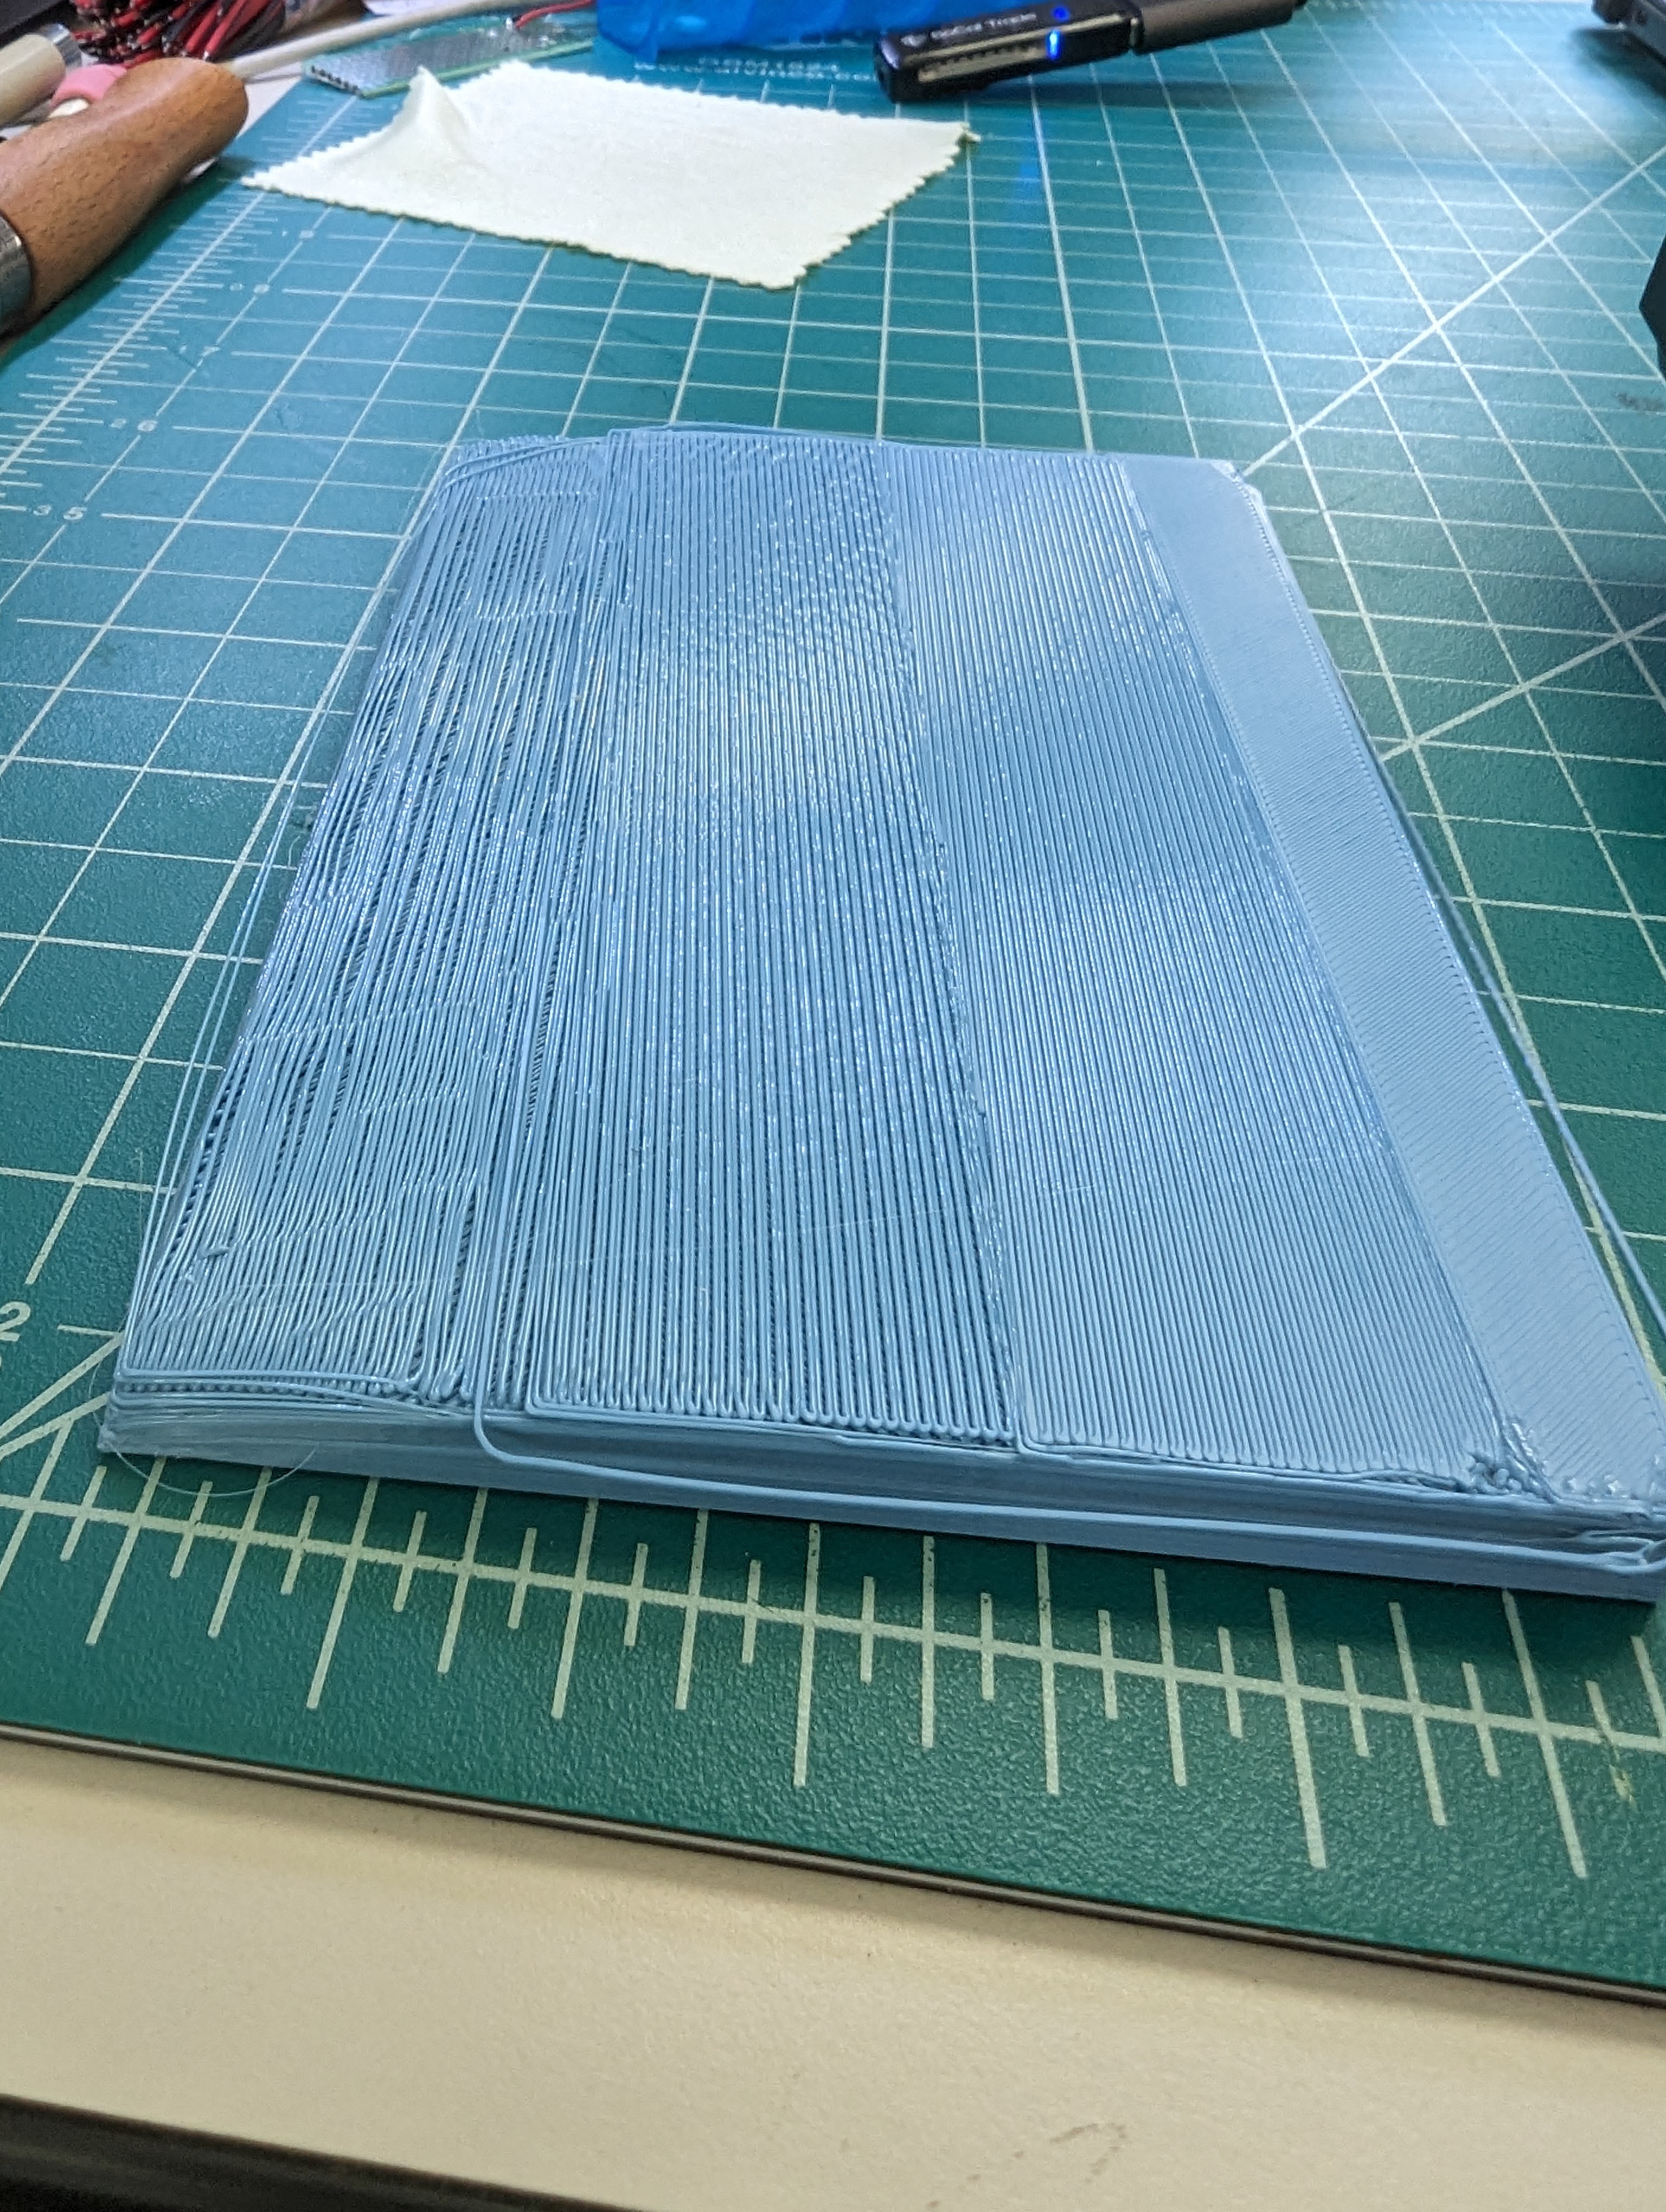
As you can see, the back edge was starting to curl up. I stopped the print, because I knew that this would eventually end up in a lop-sided print, which wouldn’t work very well something that needed to sit firmly in a single spot while dispensing foil from a roll.
After a little research (Google, baby), I learned that one of the main problems with “curling up” is lack of adhesion of the printer filament to the print surface. Well, okay. This can happen when your printer bed isn’t hot enough for the filament that you’re using. Mine needed to be 80-85˚C. The problem is that my printer saying the bed was at the right temperature … but was it?
Troubleshoot problem
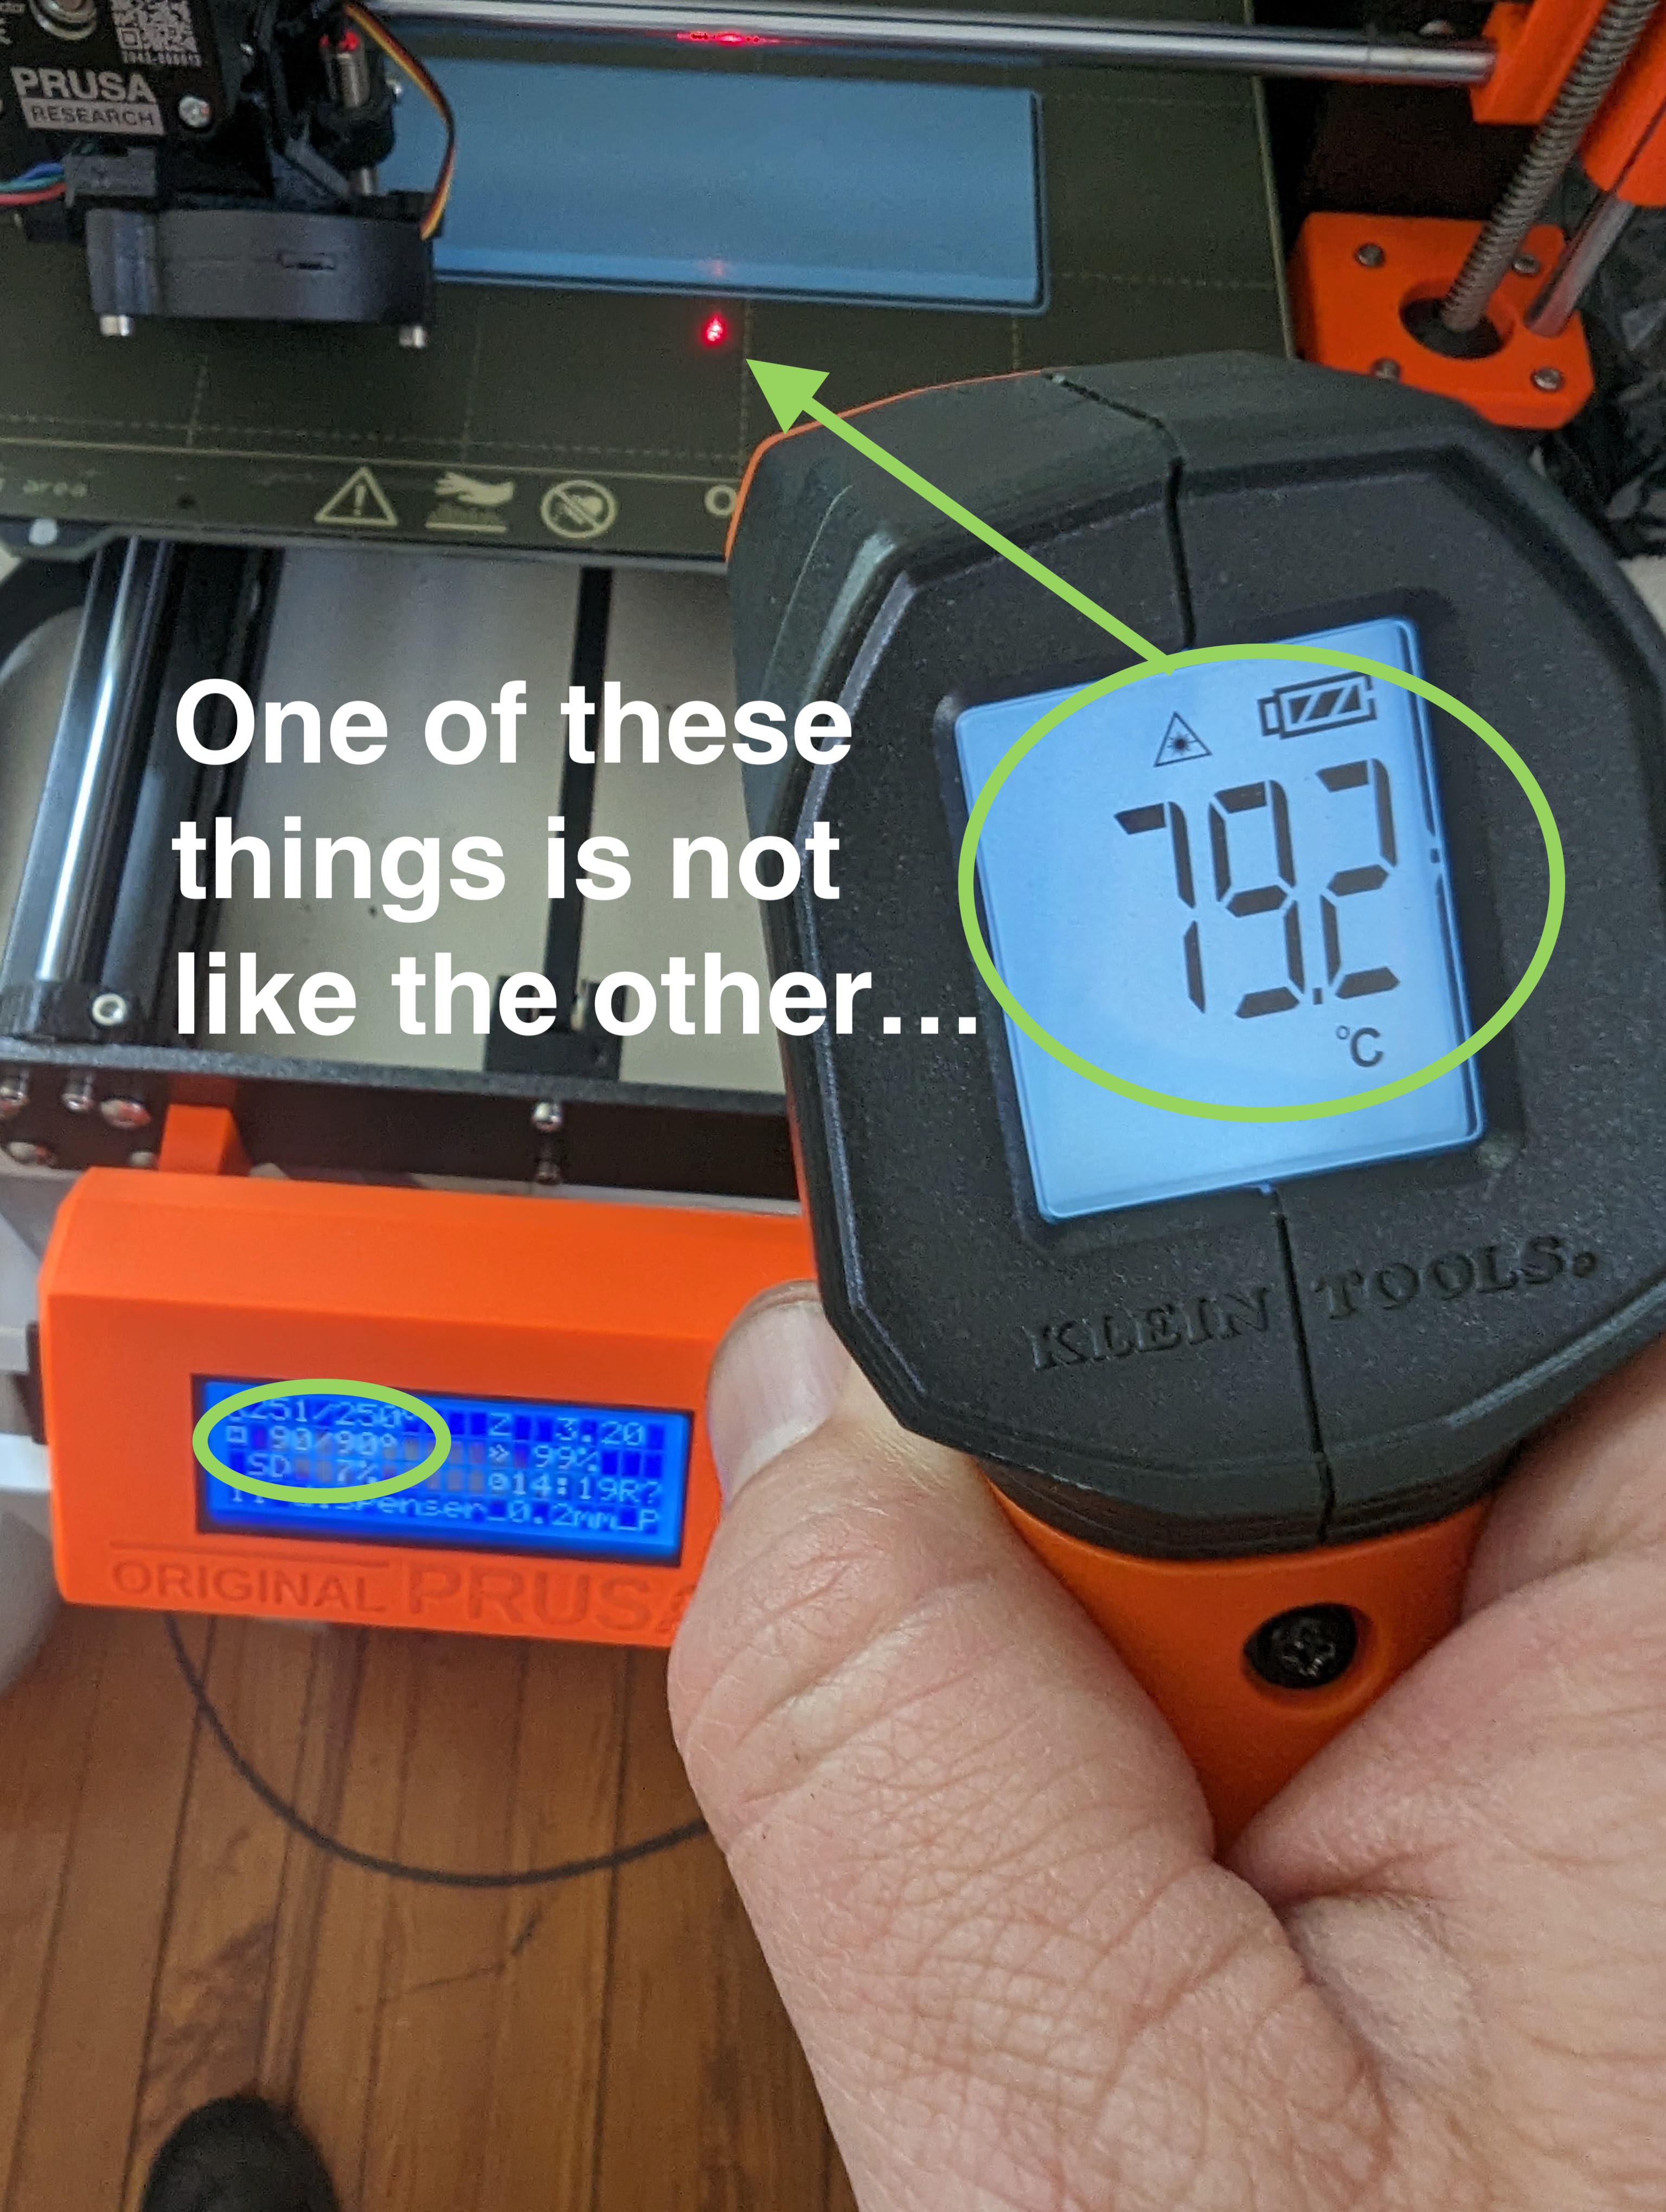
Luckily, I have this handy-dandy laser gun infrared thermometer from Klein Tools that runs about $32 on Amazon, which is perfect in this situation. I switched the thermometer to Celsius, since my printer is also in Celsius, paused the printer and checked the temp. Well, what do you know … it was off by about 10 whole degrees! I bumped up the bed temperature and checked with the thermometer, stopping until it reached the actual temperature that I was trying to go for.
This made all the difference in the world. My print looked much better now. I’ll probably have to recalibrate the temperature after this print is done, so that I don’t have to keep live-adjusting, but this was just so cool.
This problem solving fit nicely into a personal motto that I’ve decided to adopt: Having good sensors and measuring devices to give you accurate readings are indispensable and save time.
Final Product
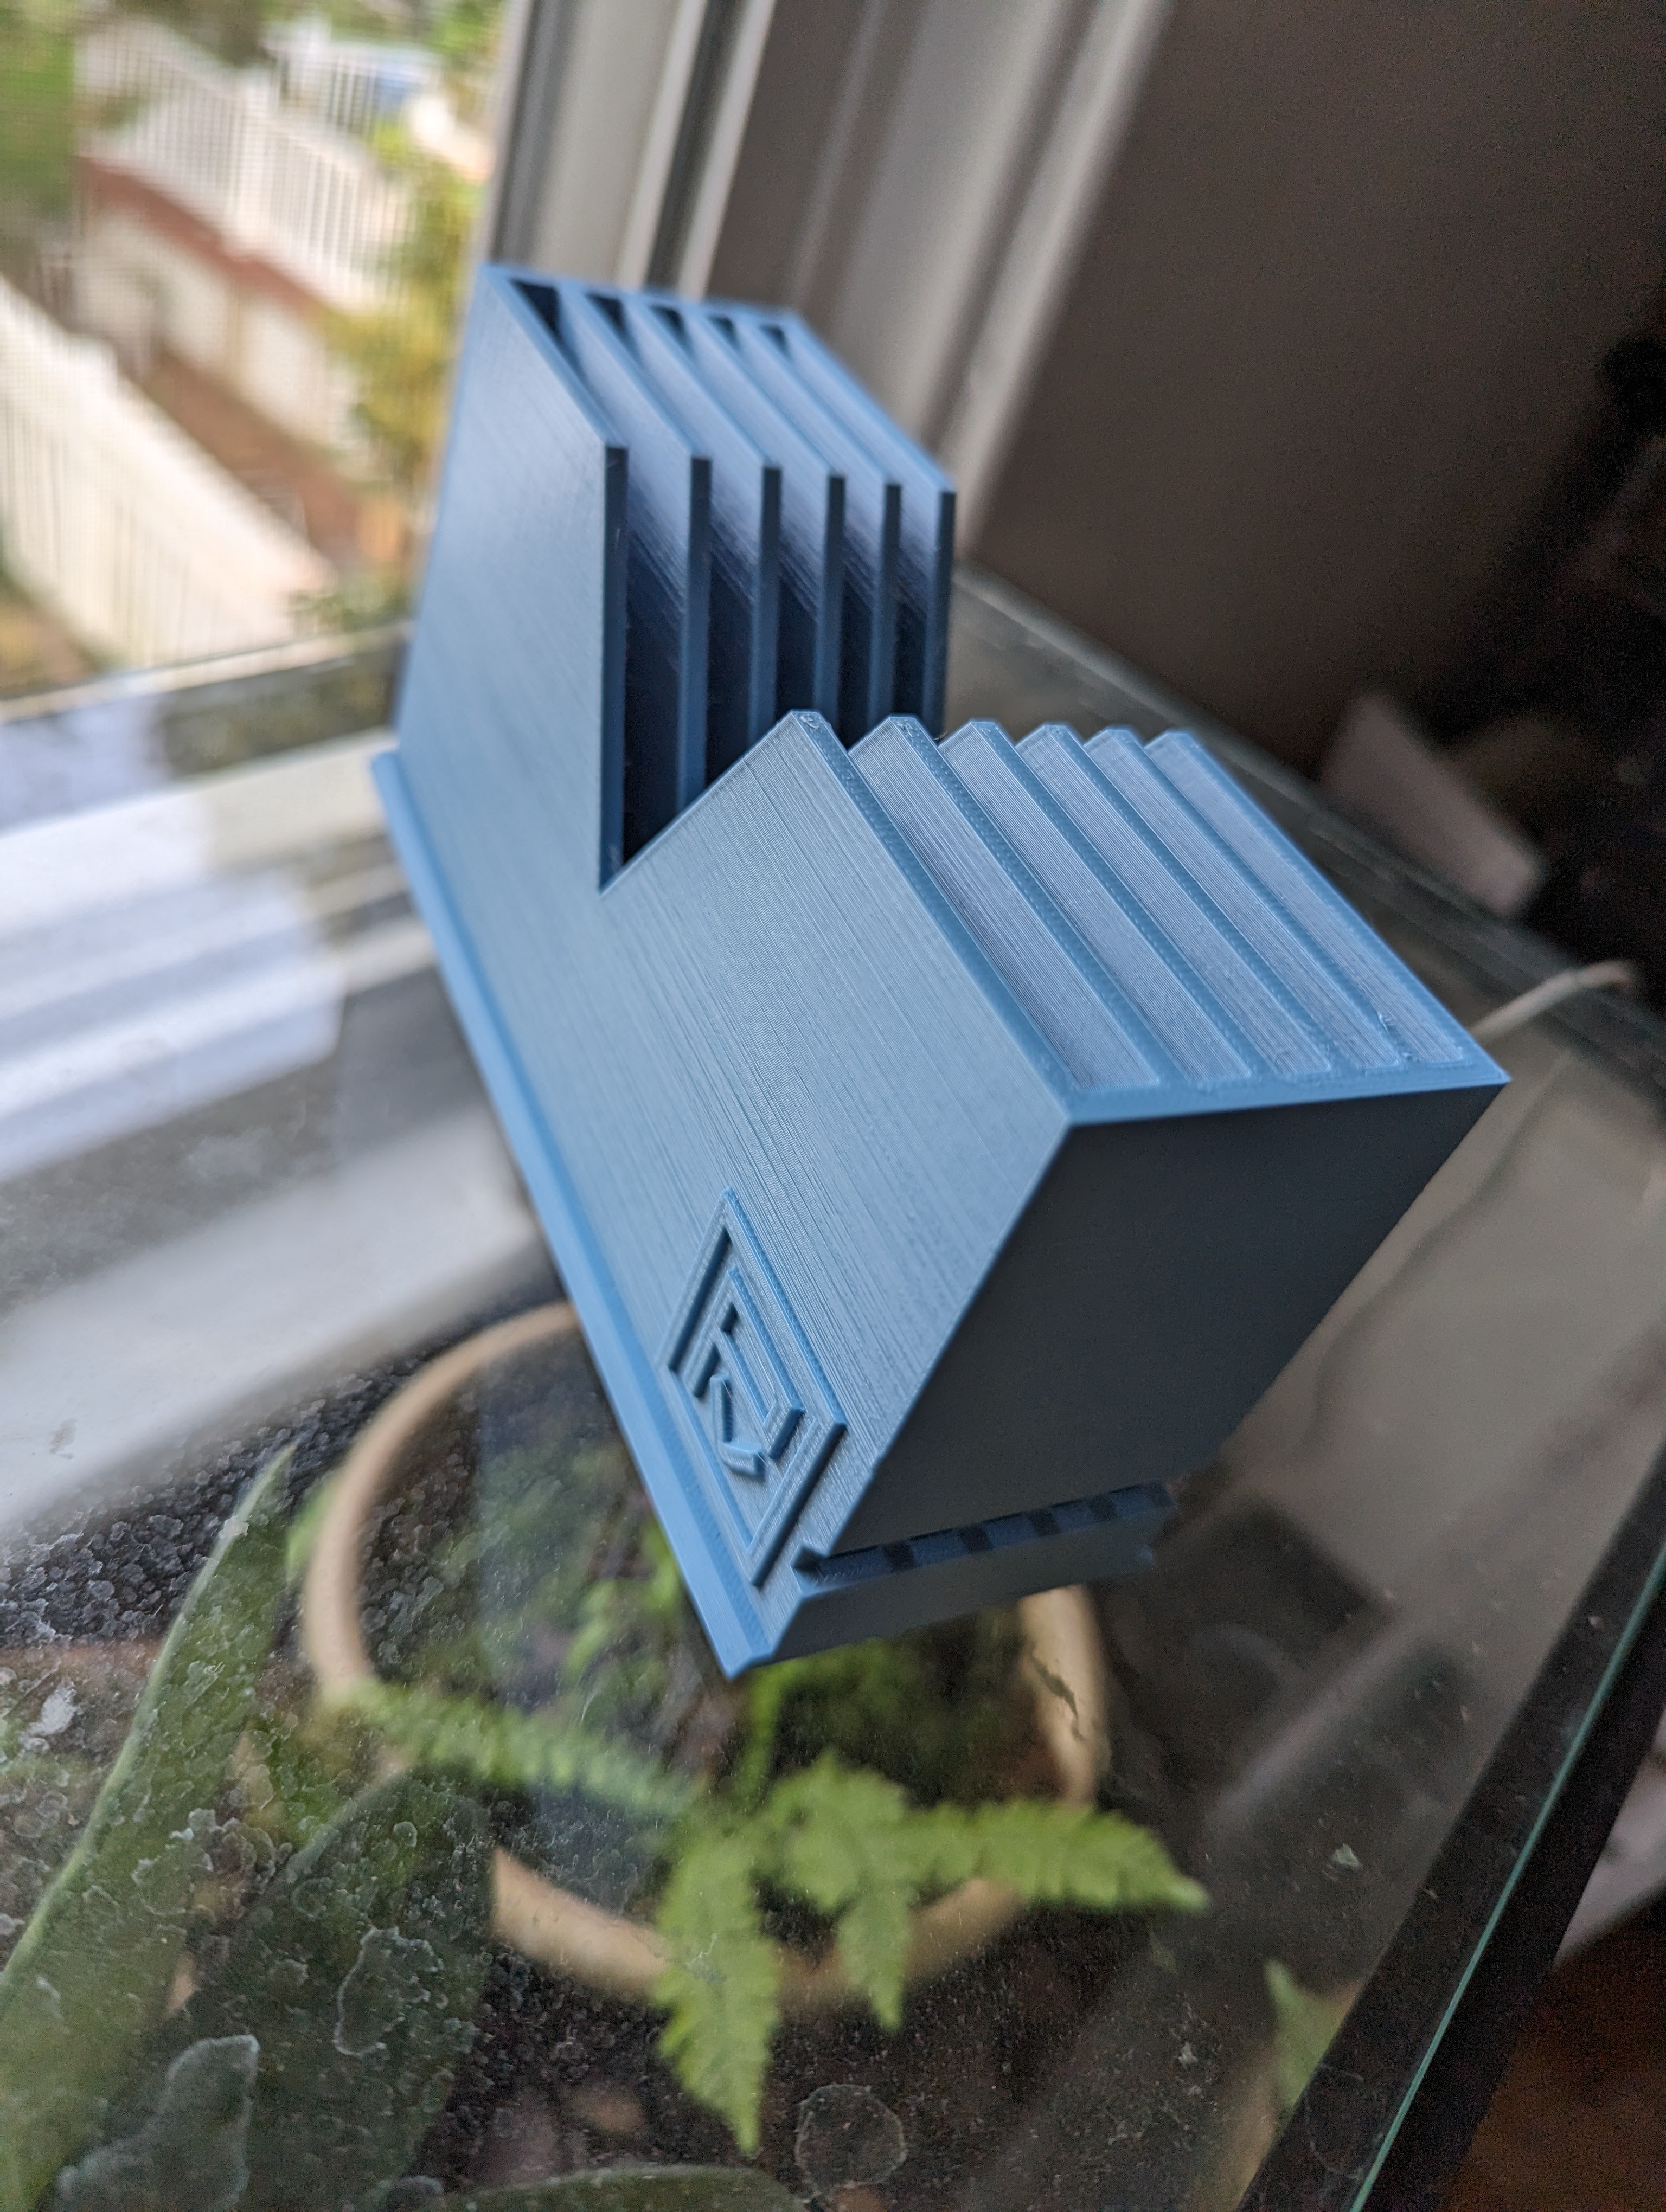
The final product took about 15 hrs to print. I didn’t really optimize the print for saving time but will probably make modifications if I print a second to make it go faster.
When I hand this off to my kid, I’m going to be asking for feedback on a couple of thing which could likely show up in future modifications to the design.
Follow up questions to ask about using the product
How stable is this? When pulling on the foil does it want to tip over easily?
Solution: Add weight to the bottom, or increase the “skirt”
How easily does the foil pull out of the holes?
- Solution: I’m thinking the slots may be too close to the actual size of the rolls. I wanted them to be tight so things fit nicely, but want there to still be freedom to roll. I may need to widen the slots.
- Solution: I’m also wondering if it helps to have a ‘ramp’ for the roll to on as it’s pulled. I just made the slots rectangular to save on material, but maybe a ramp would actually help. I’ll have to move the dispenser slots of a ramp is needed.
Should I add a “Hand foiler”?
The site above showed examples of a hand foiler where you can simply roll the glass along the tool. I don’t know if this is more efficient, or just different, but combining this with something to hold the hand tool may make this even cooler.
Well, that’s it. Let me know what you think, or even drop a comment for something that you think could be a useful tool for someone who works in crafts to use.