Blog

Materials
- Audio Amplifier circuit (The one I used is no longer available)
- [LM386 ]
- Mini TPA3118 board by Walfront
- Audio input and output jacks
- 3.5mm Stereo female 3-pole jack
- Optional - Same, but with bare wire cable
- Optional - Same, but two mono jacks Two speakers?
- Optional - 1/4 inch stereo jacks
- Optional - 1/4 inch mono jacks
Why did I want this?
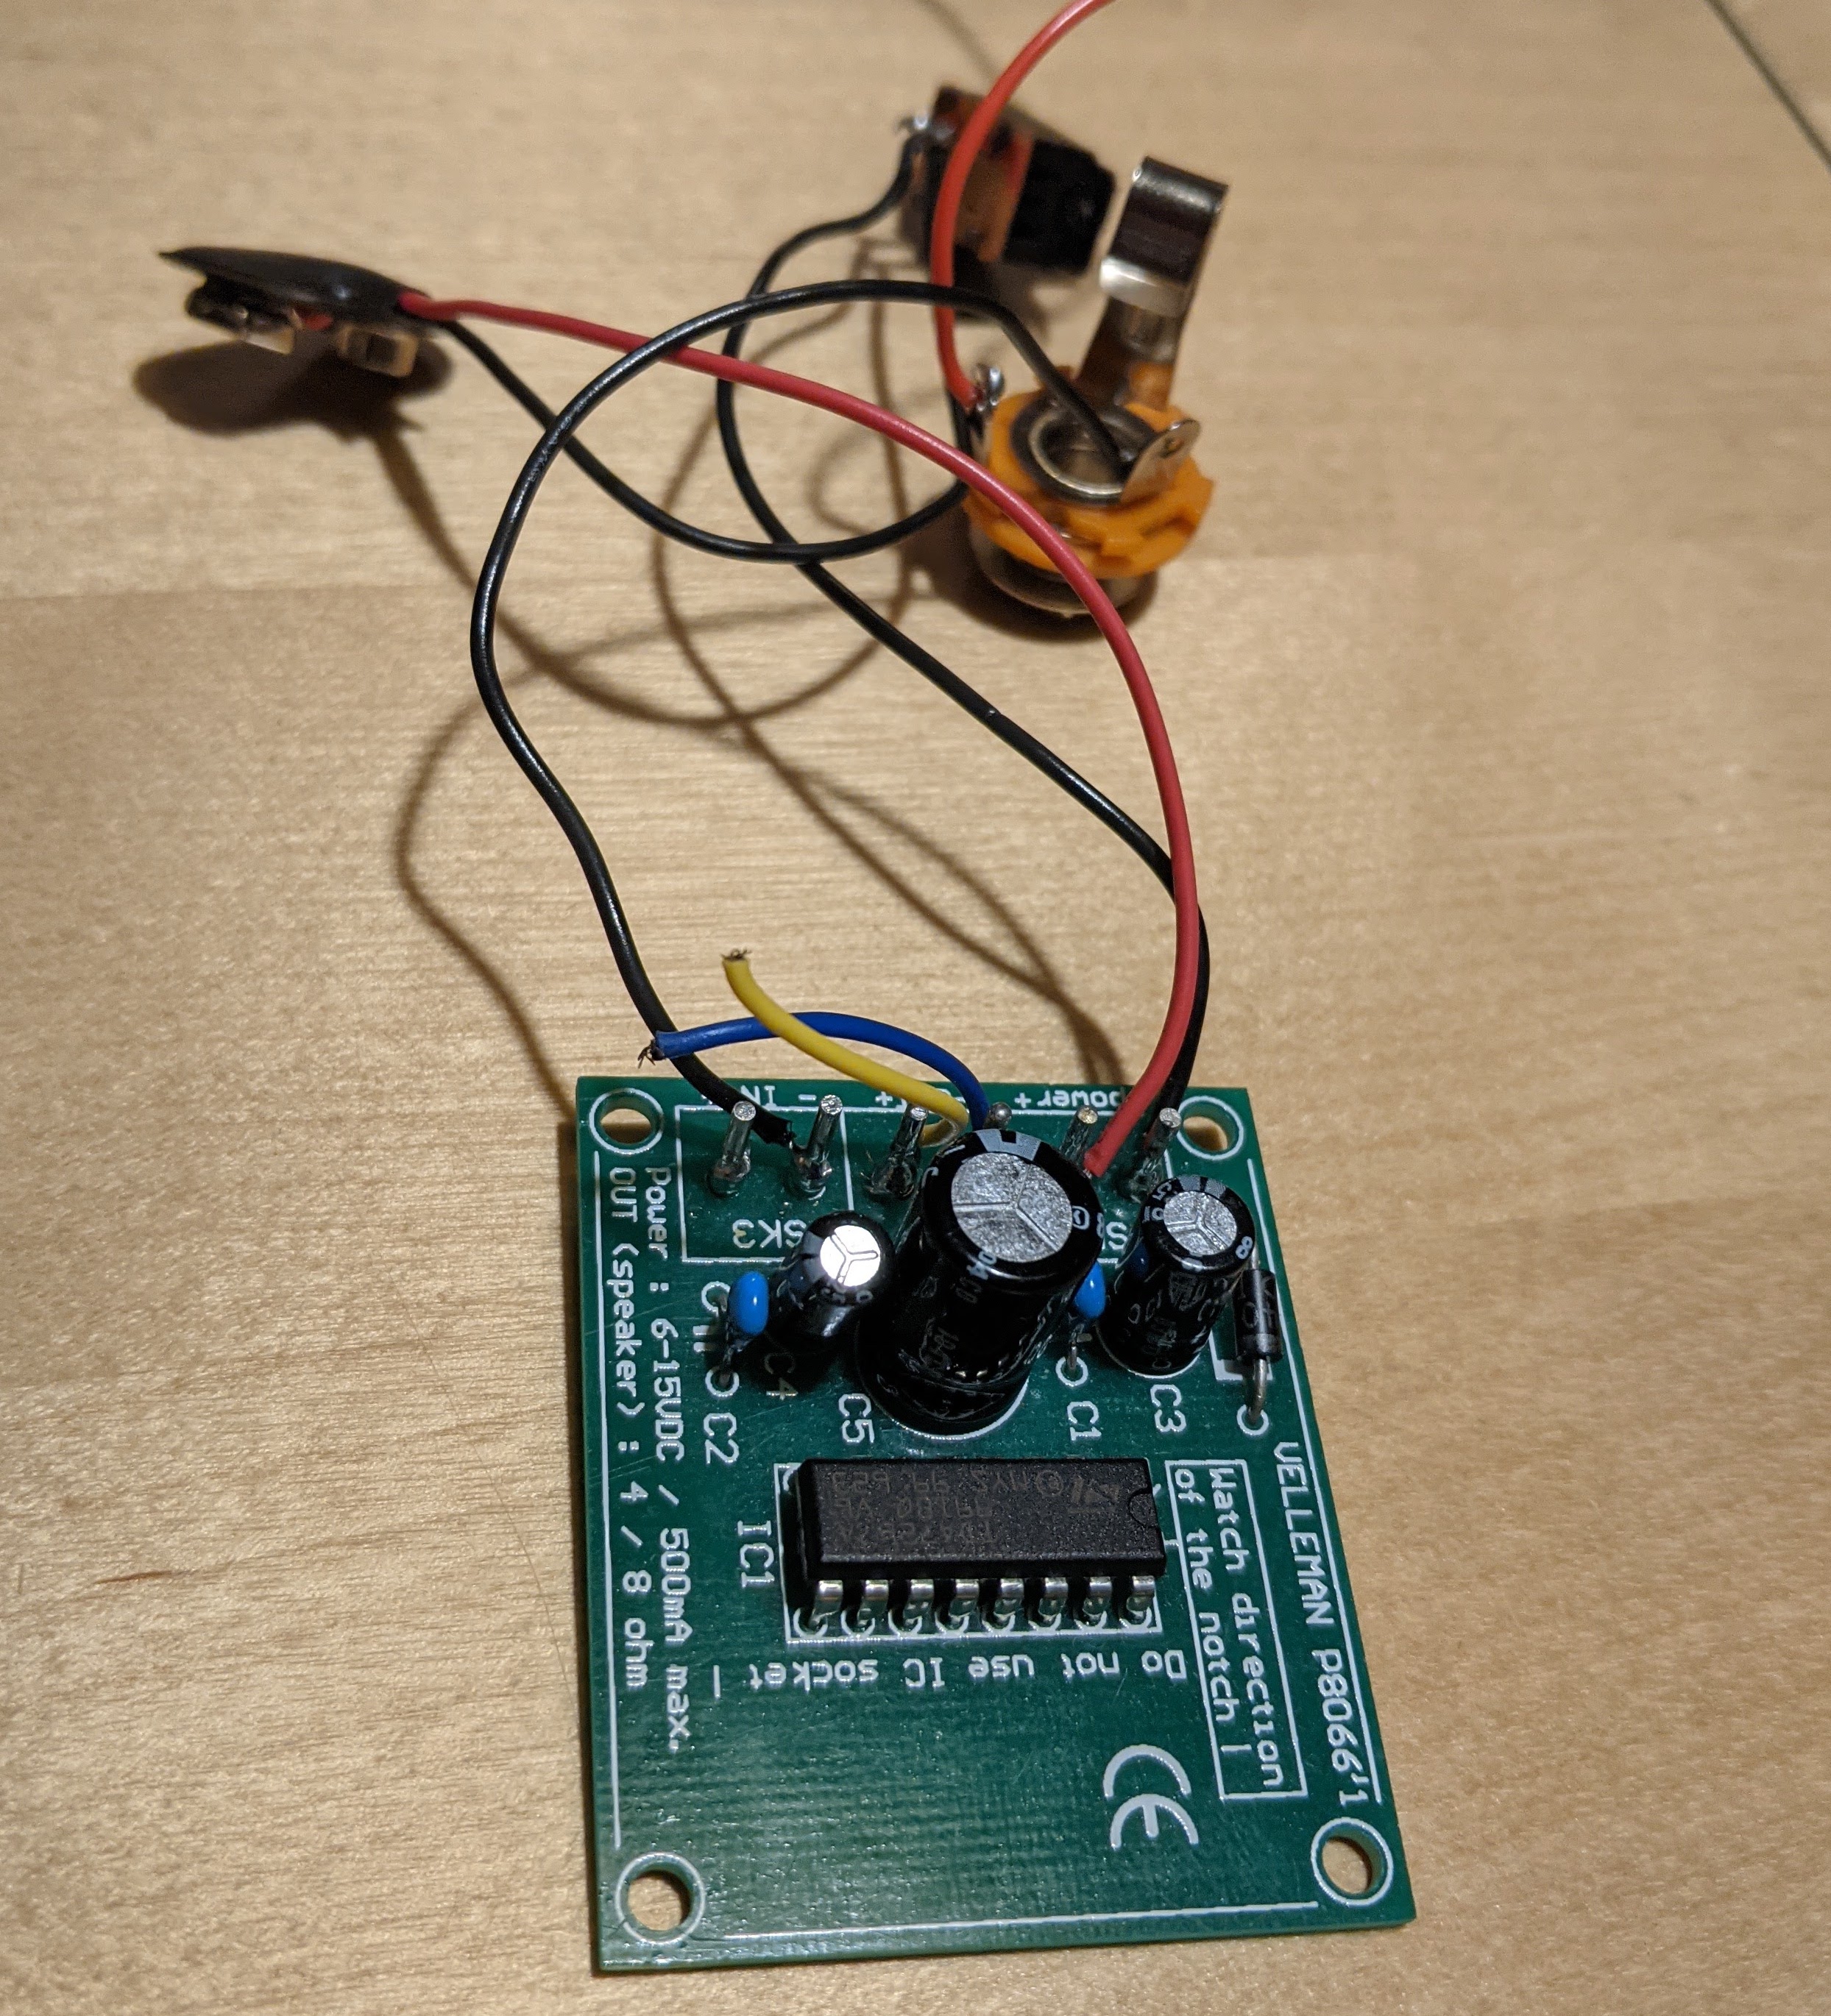
I picked up this kit about five or six years ago. It’s a Velleman P8066 3w mono audio amplifier. Kinda neat, really. The IC is doing all the work, and only 5 of the 16 pins on it are being used. That part makes me curious, but I’ll save the digging for another time.
The kit comes unsoldered. You decide how you want to power it, what kind of input connector you want to put on it and what speaker you want to connect to it. I had originally bought it because a friend of mine had pulled out a miniature cigarette-pack amplifier and plugged it into a cigar-box banjo that he made.
It was the coolest thing. I still have that banjo, Mike. Will never play it as good as you though.
Remember RadioShack
Anyway, at the time that I soldered this kit, I had nothing in the way of supplies or tools. I bought a cheap RadioShack soldering kit, and went at it. And it worked. And it was cool. And I needed a box for it. And I didn’t want it to be a cigarette box because I wanted to be able to use it around my kids. So I did nothing with it for. This functioning amplifier sat in a box for five or six years, moved houses, moved to other boxes, but never used.
Let’s use that 3D Printer!
Six years later, I have a 3D printer and a use for an amp! I was working on a project and needed a small audio amp to test it out. Unfortunately it’s been years since I’ve used any 3D editing software and learning the subtitles of a new program is not one of the more fun things to do in life. Luckily, I still know how to think in 3d software so some of the concepts (like drawing a vector image and then extruding it) are still core to most programs. It turns out that in Autodesk Fusion 360, it’s pretty darned easy. There were definitely a few problems, usually countered with an eventual “AhHah!” moment, but I’m proud to say that I’ve now designed and printed a nice little enclosure for the amp.

If I had to do this over again, I’d probably use TinkerCAD instead since my “student” copy of Fusion360 was not renewed.
Get a micrometer
Hands down, the main tool that is required for this job is a digital micrometer caliper. [If you don’t have one, just drop $10 and get one now.(https://amzn.to/3rdeSl1)]. Living without a micrometer caliper is basically like living without a way to measure things. You can get measurements with a ruler, but a micron makes it less painful and the precision is to the hundredths of a millimeter. With a digital micrometer you get a reliable exact measurement that is displayed right on the screen. The micrometer will read in inches and millimeters. I’ve decided that millimeters is just the most fantastic unit of measurement that there is. No more quarter-this, half-this, thirty-seconds-of-an-inch bullshit, then learning the digital equivalent of it. So confusing. Just 1 mm, 0.1 mm, 0.01mm from 1-10. Done.
This will allow you to make basic shapes that are exactly the size that you need.
With the tools in hand and the desire to work through it … well … I made a box. I made a box with some holes. Everything even fit the first time, which is kind of nice. I’ll still have to figure out how to mount the DC power connector. Ideally it would be mounted on the board, but the PCB didn’t have the holes for it. Oh well. I’ll work with what I have for now. I’m leaving the box open so that I can make connections directly with alligator clips to connect a speaker (or change the input source).
I’ll be on the lookout for a way to set those into the box eventually, and then redesign and reprint another enclosure! So cool.
Feedback
Let me know if this is helpful or inspiring, or if you’d be interested in seeing things like “how to get from a micrometer to CAD” or “How to construct this in TinkerCAD”.